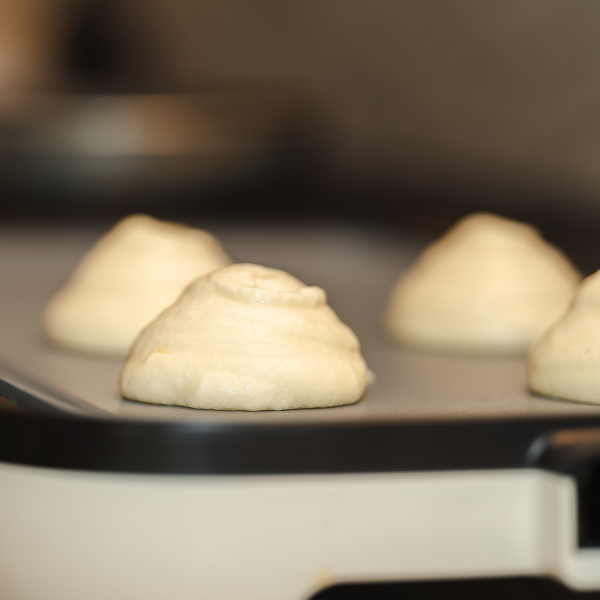
While out in Austin for House Beautiful’s 2025 Whole Home Showcase, we hosted a chicken keeping workshop for a group of chicken novices. As part of the workshop, we covered all the joys that come with chicken keeping, including the daily fresh eggs. Chef Colter Peck taught the group how to make Japanese style fluffy egg pancakes using fresh eggs from the coop.
Here’s the recipe in case you fancy giving it a go (trust us, you do.)
Japanese Pancake Recipe
For the pancake batter:
30g all-purpose flour
2g baking powder
4g cornstarch
60 grams whole milk
80 grams egg yolks
4g vanilla paste
2g (Pinch) salt
For the meringue
4 large (120 grams) egg whites
40g caster white sugar
INSTRUCTIONS
Grease a non-stick pan or electric flat top lightly with melted butter or neutral oil.
Combine all the pancake batter ingredients together in a mixing bowl, then whisk until combined and smooth.
Make the meringue in a medium separate bowl or utilise a stand mixer with the whisk attachment. Whip the egg whites on medium/high until frothy. Then add in the sugar and continue to whip until stiff peaks form, at least 10 minutes by hand, and about 6 to 8 minutes using a stand mixer.
Add a third of the meringue to the pancake batter and gently fold, using a rubber spatula, until combined. Be careful not to beat the meringue and do not use a whisk for this stage of the process.
Fold in the rest of the meringue into the batter. The final batter should be fluffy, airy, and smooth, but very soft.
Heat the pan to low to medium-low heat. Transfer the batter into a piping bag fitted with a large round tip. If a piping bag isn’t available, you can use a cookie scoop or large spoon to scoop the batter onto the pan.
Pipe three even pancakes, about 3-inches each in diameter and pipe the batter high but lower than your pan lid. Space them apart as they’ll spread when cooking. Drizzle 1 tablespoon of water onto the pan, surrounding the pancakes to steam. Cover the pan with a high top lid and cook for five to seven minutes. The pancakes are ready to flip when the bottom edges are less glossy and bottoms are slightly browned.
Remove the lid slowly and carefully but quickly flip the pancakes. Using a thin spatula is key! Drizzle the rest of the water around the pancakes and cook for another five to seven minutes until both sides are golden brown.
Remove pancakes from the pan. Plate and drizzle with fresh, local honey, or any toppings you fancy!
Let us know if you give it a go by tagging us in your pictures!
Does your cat get in the way when you’re wrapping presents at Christmas? Are you tired of hunching over badly wrapped socks with sellotape stuck to your fingers? Is your dog snoring in the corner with one eye on the food gift sets?
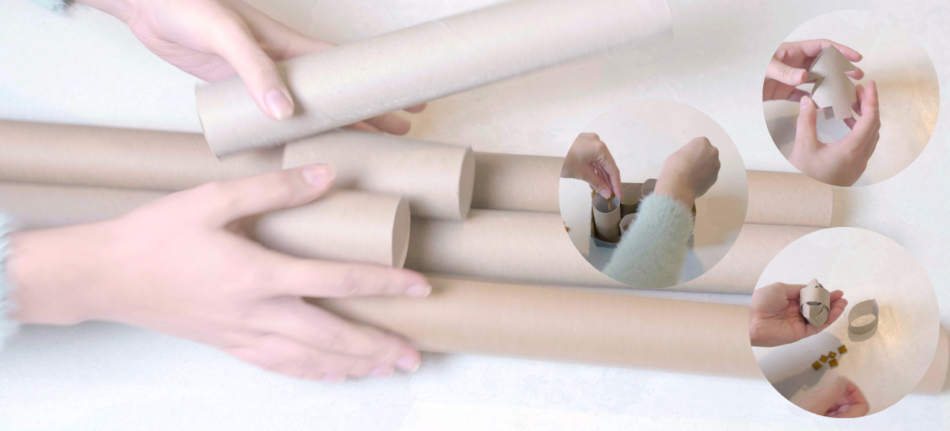
It’s time to take a break and make some fun DIY pet toys! These four simple toys can easily be made with used wrapping paper cardboard tubes, so you can make great use of the tubes, and keep your pets entertained.
Opting out of wrapping this year? Don’t worry, you can make all these toys with toilet roll or kitchen towel tubes.
Safety note: Always supervise children with scissors, and supervise your pets with these new toys. Give treats in moderation.
Treat dispenser
You will need:
Toilet roll cardboard tubes or a longer wrapping paper tube cut shorter
Your dog or cat’s favourite treats/kibbles
A pencil
Scissors
How to:
Cut into one end of the cardboard tubes, and repeat around the edge of the end of the tube, about 1cm between each cut, and up the tube by about 2cm
Fold the cut pieces into each other and hook together so they hold their position, push your thumb through so the ends point inwards into the tube
Repeat with the other end, but before closing up the tube and pushing inside, fill with your pets favourite treats or kibble
Use the pencil to puncture holes into the tube, just about big enough for the kibble to fall out of
Give to your pet and encourage them to kick the tube around to release the treats!
Slow release feeder
You will need:
Toilet roll cardboard tubes or a longer wrapping paper tube cut shorter
A small cardboard box
Your dog’s favourite kibble
How to:
If using a cardboard box, cut down the top flaps so it’s a completely open box
Stand up toilet roll cardboard tubes in the box. You can cut them into different heights to make it more interesting
Fill the box with your dog’s food
Place the box on the floor and watch as your dog sniffs out their kibble and nudges and removes the tubes to eat
Christmas tree chewer
You will need:
Toilet roll cardboard tubes or a longer wrapping paper tube cut shorter
Scissors
How to:
Fold a toilet roll tube in half by length (end to end)
Draw a Christmas tree shape on the toilet roll
It’s very important to leave a folded edge uncut by about half a centimetre either side – this will hold the tree together
Once the tree shape is cut, push in the sides so isn’t folded flat, and the tree should stand up
Place in your hamster’s cage or playpen and enjoy!
Treat ball
You will need:
Toilet roll cardboard tubes or cut up a longer wrapping paper tube
Scissors
Treats or kibble
How to:
Cut a toilet roll tube into 5 rings
Place one ring through the other, and a third ring through these 2
Place another ring through a gap, then pop some kibble into the centre
Place the final ring through the tiny gap left so it holds its shape
Roll the treat ball on the floor for your cat or dog to kick around to release the treats!
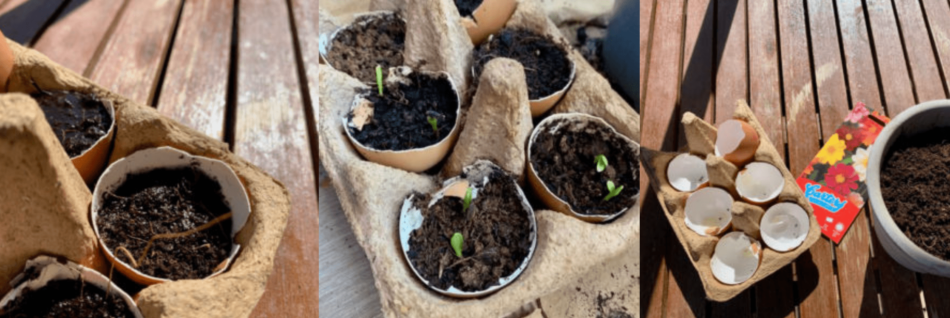
Next time you’re about to throw away your empty egg shells, spare the food waste bin and keep hold of them. Many people use crushed up egg shells in gardening to add calcium to the soil, however we have another great way you can use egg shells to add to your garden. Many propagators or seed starter tubs are made out of plastic, which isn’t great for the environment. Why not use your empty egg shells to start your next batch of seeds?! It’s so quick and easy to do!
1. Firstly rinse out the shells, and then let them dry.
2. Once dry, fill the egg shells halfway with compost and sit them in the egg carton.
3. Sprinkle a little water on the compost and then add your chosen seeds to the compost.
4. Spread a thin layer of compost on top and drizzle a little bit more water.
5. Then place in a sunny spot indoors – a window ledge is a great place to start seeds.
6. Keep watering your eggshell seeds each night, and after a few days you should start to see them sprout!
Once they’re too big for the shell then transfer to a bigger spot to continue growing indoors or outdoors depending on the chosen seeds (see packet for details).
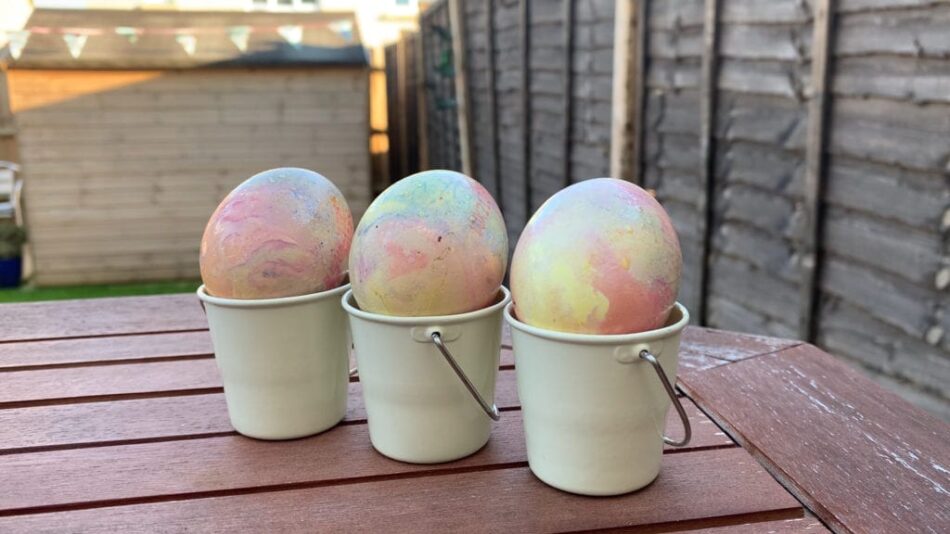
Make Easter more colourful with this super fun craft for the whole family – marbled eggs! Watch the video or follow the instructions below.
You will need:
Eggs
Food Colouring
Vinegar
Vegetable Oil
Instructions:
Take an egg and gently poke a hole at one end. Poke a hole at the other end of the egg which is slightly larger than the first.
Empty the egg by carefully blowing through the smaller of the holes, pushing the inside of the egg out into a bowl.
Set aside the egg mixture.
Add a tablespoon of food colouring to a bowl and mix with a splash of hot water and a tablespoon of vinegar.
Put the empty eggs in the bowls and let them sit there for a while, regularly turning them to get an even coating.
When the eggs has got some colour to them, drain and put on the side to dry.
Add a few drops of a different food colouring to a plate and mix with some water and a drop of vegetable oil. Roll the eggs on the plate to cover them in the second colour. They don’t need to be fully covered.
Repeat with a few different colours, adding more layers.
Let the eggs dry on a piece of kitchen roll.
You will now have some beautiful and truly unique marbled Easter eggs! Wash your hands thoroughly and scramble the eggs you put aside earlier for a delicious lunch!
By clicking "Accept All", you agree to the storing of cookies on your device to enhance site navigation, analyze site usage, and assist in our marketing efforts.
Privacy Preference Centre
When you visit any website, it may store or retrieve information on your browser, mostly in the form of cookies. This information might be about you, your preferences or your device and is mostly used to make the site work as you expect it to. The information does not usually directly identify you, but it can give you a more personalized web experience. Because we respect your right to privacy, you can choose not to allow some types of cookies. Click on the different category headings to find out more and change our default settings. However, blocking some types of cookies may impact your experience of the site and the services we are able to offer.
Manage Consent Preferences
Always Active
These cookies are necessary for the website to function and cannot be switched off in our systems. They are usually only set in response to actions made by you which amount to a request for services, such as setting your privacy preferences, logging in or filling in forms. You can set your browser to block or alert you about these cookies, but some parts of the site will not then work. These cookies do not store any personally identifiable information.
These cookies allow us to count visits and traffic sources so we can measure and improve the performance of our site. They help us to know which pages are the most and least popular and see how visitors move around the site. All information these cookies collect is aggregated and therefore anonymous. If you do not allow these cookies we will not know when you have visited our site, and will not be able to monitor its performance.
These cookies enable the website to provide enhanced functionality and personalisation. They may be set by us or by third party providers whose services we have added to our pages. If you do not allow these cookies then some or all of these services may not function properly.
These cookies may be set through our site by our advertising partners. They may be used by those companies to build a profile of your interests and show you relevant adverts on other sites. They do not store directly personal information, but are based on uniquely identifying your browser and internet device. If you do not allow these cookies, you will experience less targeted advertising.