Chickens sometimes lay eggs that look nothing like a standard supermarket egg. Some are huge, some are tiny, some are ball-shaped, some are pointy, and some are soft-shelled. There are various reasons for these oddities.
Each hen will have her own ‘quirks’ in terms of egg size and colour. Although most chicken breeds lay light brown eggs, some have eggs with pigmented shells. A hen will produce eggs of the same colour throughout her laying years. The palette ranges from deep browns to light blues and pastel greens, with speckling adding another dimension of prettiness.
Odd shapes and sizes are something quite different, though. They are quirks rather than breed-specific traits.
Why are chicken eggs sometimes bigger or smaller than usual?
A huge egg sometimes contains two yolks. In these cases, the hen has doubled up on her usual daily production and has had to produce a giant egg to accommodate the extra mass. These eggs usually have smaller-than-usual yolks, but they look very eye-catching in the poaching or frying pan!
Young birds often produce small eggs, and they will begin laying regular eggs very quickly. Some smaller bantam breeds produce small eggs all the time, of course.
Why are chicken eggs sometimes misshapen?
An oddly-shaped egg can be produced for various reasons. It often takes young hens an egg or two before they settle into their regular pattern. Stress in the chicken coop can lead to misshapen eggs too. This is usually due to a hen having the urge to lay but finding her space in the laying box occupied by another bird.
Misshapen eggs can be elongated, or they may have a thin, pointy end. Sometimes they are rough-looking, with craggy rather than smooth surfaces, or with thicker bands of shell running across their middles. In all these cases, the egg inside is unaffected and is perfectly safe to eat.
A ball-shaped egg is usually a sign of slight calcium deficiency. The round shape requires less calcium than a normal oval egg.
Are oddly-shaped chicken eggs a sign of illness?
Infectious bronchitis can lead to misshapen eggs. An infected hen will stop producing eggs for a few days or will only lay intermittently. The eggs she lays will have thin, wrinkled or rough-shelled eggs, and the white of the egg will be watery. It is also common for the affected eggs to have lighter-coloured shells than usual. The condition is rare, and chickens can be vaccinated against it.
Laryngotracheitis is another illness linked to egg abnormalities, and this, too, can be prevented through vaccination. Any ailment can cause a hen to become stressed, so, in theory, any illness can result in misshapen eggs.
Why do chickens lay freckled eggs?
Some breeds always lay speckled eggs. However, if a hen that typically produces plain eggs lays speckled ones, there are various possible causes. She may have been shocked or stressed in some way while the egg was forming, or she may have developed a quirk in the pigment-producing part of her egg-laying system.
Freckling is often the result of excess calcium production, sometimes associated with the ‘end of season’ laying at the beginning of winter. On some eggs, there is a marbled pattern rather than an area of freckles.
The speckling is usually smooth, but it sometimes manifests as raised blotches of excess calcium. These can be spots or wormlike strands, and they often occur as single spots on an otherwise standard egg. This may be linked to dehydration, so make sure your hens have enough water, and that a timid hen isn’t being bullied away from it all the time.
Why do chicken eggshells sometimes have a white ring?
Viewed from the side, an eggshell with this peculiar oddity has a thick white ring, looking uncannily like an x-ray of the egg that lies beneath. It is usually caused by an interruption in the formation of the eggshell, caused by stress or by a second egg entering the internal production line.
The second egg produced in this process will usually have a flattened side, as it has bumped into the first egg during the early stages of shell formation and has been ‘squashed’ into an odd, flattened shape.
Why are chicken eggs sometimes wrinkled?
A wrinkly eggshell can be a sign of stress or illness, but is usually a hereditary condition. Some older hens begin to lay wrinkly eggs too. The wrinkles are often deep grooves, giving a very misshapen egg and making this perhaps the weirdest of all the egg oddities.
The wrinkles sometimes look like a series of cracks in the shell. This results from an egg cracking during calcium formation, and the cracks are the chicken’s repairs, laying calcium over the cracks. Once again, the underlying cause is usually stress or illness, although sometimes it is simply the result of a second egg ‘crashing into’ the first due to an over-productive system.
Why do some chicken eggs have soft shells?
A soft shell is a sign of calcium deficiency or a lack of vitamin D. Low calcium can be prevented by making sure the hens have a high quality feed and don’t gorge on kitchen scraps (which may fill them up so much that they don’t bother eating the layers pellets). Low vitamin D can be prevented by sunlight – not always easy in the cloudier months of the year!
Other possible causes include heat stress, too much salt or too much spinach. When feeding chickens kitchen scraps, avoid giving them anything that is salted.
The extreme version of the soft-shelled egg is the egg with no shell at all. If a hen lays a shell-less egg, it should be cleaned up at once, as it will soon become rotten in the warm coop.
Weird eggs are usually one-offs, and they are nothing to worry about. If a hen lays an odd egg two days in a row, it is worth looking at possible underlying causes. Diet and stress are the chief culprits.
In terms of culinary uses, don’t worry. With the exception of soft-shelled and shell-less eggs, all these egg oddities are safe to eat.
Choosing the right dog bed for your puppy can be tricky – or at least it used to be…Omlet’s Topology dog beds tick all boxes for your new best friend’s nap time needs, meaning you no longer need to compromise on what your puppy truly wants. Say goodbye to flimsy mattresses, chewed-up toppers and bad bed odours and discover why Topology is the perfect solution.
Comes in three different sizes
Depending on your dog’s breed, your puppy might be super small at the moment, but they’ll quickly grow up to be a full-sized dog before you know it. And since the Topology dog bed is the last you’ll buy, we recommend buying a bed based on their predicted measurements as a fully-grown adult dog. You want to make sure that your dog will be able to fit on the bed in all possible sleeping positions. The bed might look comfy when they’re curled up into a furry little ball, but would they be able to stretch out their legs if they wanted to? As they grow older you’ll find which positions they tend to sleep in, but for now, it’s best to go slightly bigger to be on the safe side.
The Topology dog beds come in three sizes to accommodate all breeds and are designed to fit snugly into standard-sized crates, avoiding any gaps along the sides. Just be sure that if you’re planning on dog crate training and want to put your bed in the crate, check your dog’s crate dimensions to ensure it fits. Take a look at our dog size guide so that you can match your breed to the right bed.
Choose from a range of removable toppers
The genius of the Topology design means that you can choose a range of versatiledog bed toppers which can all easily be removed to put in the wash, reducing odours and improving home hygiene.
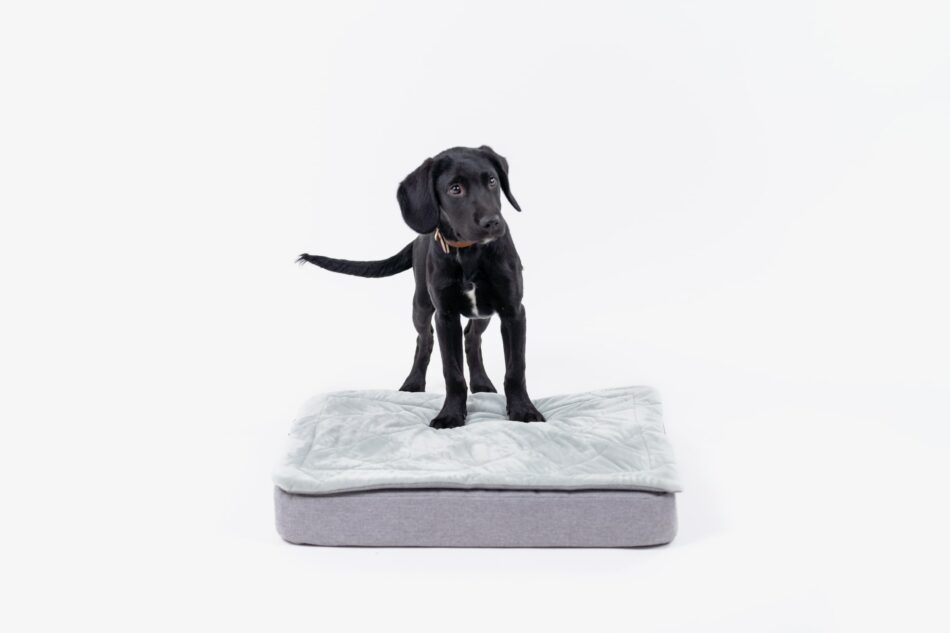
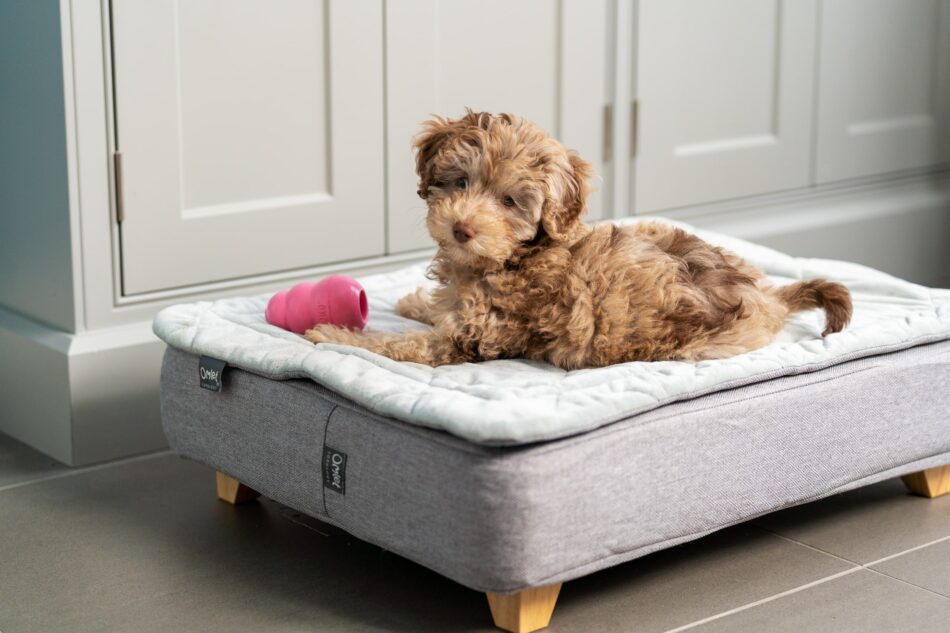
For puppies, we recommend the Quilted topper, designed by Omlet with razor-sharp puppy teeth in mind. This super soft topper means optimum comfort for dogs of all ages and the durable fabric with the option to zip a puppy pad underneath, makes this style perfect for growing dogs. We’ll even replace your Quilted topper or mattress cover for free should your puppy chew through it within the first 6 months under our 180 Day Puppy Guarantee*.
Whilst your Quilted topper is being washed clean, you can choose an extra topper to zip onto your Topology dog bed. The Sheepskin topper is ideal for smaller puppies that might need a bit of extra warmth, transforming their bed into a cloud of tranquillity. Plus, you can pick from five different colours of this luxurious topper to match your home decor.
Minimise chewing damage
All puppies will chew – there’s no way around it. Dog breeds such as Golden Retrievers that are bred to use their mouths to fetch and carry are more likely to destroy anything that comes in their way, as well as breeds with a high prey drive.
You can of course train your puppy from an early age to only chew appropriate dog toys or other accessories, but if they do manage to get those sharp teeth into their bed, the design of the Topology Puppy Bed means they’ll likely be unsuccessful in getting through the topper or mattress.
No need to worry about dirt and accidents
Puppies get into all sorts of mess, so being able to zip off the topper and put it in the washing machine will make your life a lot easier, and your dog will appreciate having a fresh bed to return to.
This goes for puppy toilet accidents as well. If there’s a leak, the mattress under the topper has a waterproof cover that you can easily remove and wash with the topper. If this becomes a recurring problem, you can even put a puppy training pad on the mattress before your zip on the topper to soak up any accidents.
Provide premium comfort
Puppies sleep up to 20 hours a day, and it’s super important to give their growing bodies extreme comfort and support. Keeping your dog off the ground on a sufficiently padded surface can prevent severe arthritic pain in the future, so make sure you choose a good-quality bed.
Topology dog beds have a memory foam mattress that moulds around the body as the dog lays down on it, and provides amazing support for tired legs after vigorous play. The toppers all add extra comfort, either by super softness against the body, like the Quilted or the Sheepskin, or by extra padding like in the Beanbag or Bolster toppers.
Pick the perfect extras
If you decide not to place your puppy’s bed in a crate, you can elevate your Topology off the ground with a range of stylish feet. Raising your dog’s mattress reduces drafts and improves the airflow under the bed, which helps minimise a build-up of mould, mildew, dust and debris.
It’s also a good idea to add a blanket to the bed to make your puppy’s Topology dog bed for an even better night’s sleep. Simply place your Omlet Luxury Faux Sheepskin dog blanket on your puppy’s bed and they’ll soon learn to associate it with a safe and calm environment. This means that if you go away on holiday or have to take your puppy to the vet for their jabs, you can bring the blanket and give him or her an extra sense of safety.
Omlet and your puppy
We’re confident that your new puppy will love theirTopology Dog Bed, and you can be confident knowing you’ll have a dog bed to last a lifetime with our 180 Day Puppy Guarantee. Plus, with accessories such as designer dog bed feet and super snug dog blankets, your furry friend will be sure to have their own puppy paradise for years to come.
Behind the twitching noses and soft expressions of rabbits lies a surprisingly structured social system. Because they’re social animals, bunnies thrive best when living in pairs or groups. But with more than one rabbit in the mix, you’ll quickly see a hierarchy take form. Understanding how rabbits decide who’s boss will help you interpret their behaviour, support healthy bonds, and step in when needed.
Why rabbits have a hierarchy
In the wild, rabbits live in large warrens with many individuals. To keep the peace in such close quarters, they rely on a clear hierarchy. This order establishes dominant rabbits as the first in line for resources like food and shelter, and helps submissive rabbits understand their place, which reduces the risk of constant conflict. When a healthy hierarchy is in place, the whole group can coexist peacefully.
Domesticated rabbits are no different. Even in your backyard rabbit setup or indoor enclosure, bunnies will establish a pecking order among themselves. Knowing how to tell who the dominant and submissive members are and making sure there’s plenty of rabbit enrichment will help you maintain the peace.
Signs of dominance
A dominant rabbit will usually make its position clear through a mix of bunny body language and behaviours like:
Mounting — Not always a mating gesture; it’s a way to show dominance over another rabbit. Both males and females will mount other rabbits of either gender until the hierarchy is established.
Nudging or chasing — Used to move submissive rabbits out of the way. Sometimes chasing manifests as circling, and shouldn’t result in stress or injury.
Resource guarding — Blocking access to food bowls, hay feeders, or favourite hideouts. This shouldn’t be persistent, just a dominant rabbit staking their claim as first in the desired activity.
Demanding grooming — Lowering their head expectantly for attention from others. This “bowing” may be met with another bow from the other rabbit until the hierarchy is firmly established.
These are normal parts of establishing hierarchy, but they should settle into routine rather than remain constant.
Signs of submission
The flip side of dominance is submission, and it’s just as important for keeping the peace. A submissive rabbit may:
Groom the dominant rabbit as a show of respect. The rabbit doing the grooming is acknowledging the elevated position of the other rabbit, and is accepting their place lower in the hierarchy.
Lay low with ears back to avoid confrontation. This “flattening” is in response to a rabbit feeling threatened by another, and it will usually diffuse tension right away.
Move away when challenged instead of fighting. Passive behaviours are a sure way to tell which of your rabbits are more submissive.
Recognising these behaviours reassures you that your rabbits are negotiating boundaries rather than escalating into real conflict.
How the hierarchy is established
When rabbits first meet, or when an established pair goes through changes, the hierarchy must be worked out. During periods of change, or when introducing new rabbits, you can expect to see mild scuffles like quick “boxing” matches or brief chases. You may also see nose-to-nose standoffs until one rabbit backs down. And, most commonly, you’ll notice mounting and chasing until the roles are accepted.
This process can look dramatic, but it’s usually short-lived. The important thing to remember is that dominance isn’t always permanent. It can shift later due to age, health, or personality changes. Keep an eye on your rabbits to make sure all transitions and shifts remain safe.
Healthy vs. problematic behaviour
While it’s normal to see chasing, nudging, and mounting during normal bonding and hierarchy restructuring, there’s a line between healthy dominance and problematic aggression. Here are some warning signs to watch out for:
Persistent bullying of the same rabbit.
Fur pulling or biting that draws blood.
One rabbit being isolated or excluded from resources.
In these cases, separating the aggressive rabbit and reintroducing them over a longer period of time may be necessary to prevent further injury and stress.
Top tips for rabbit owners
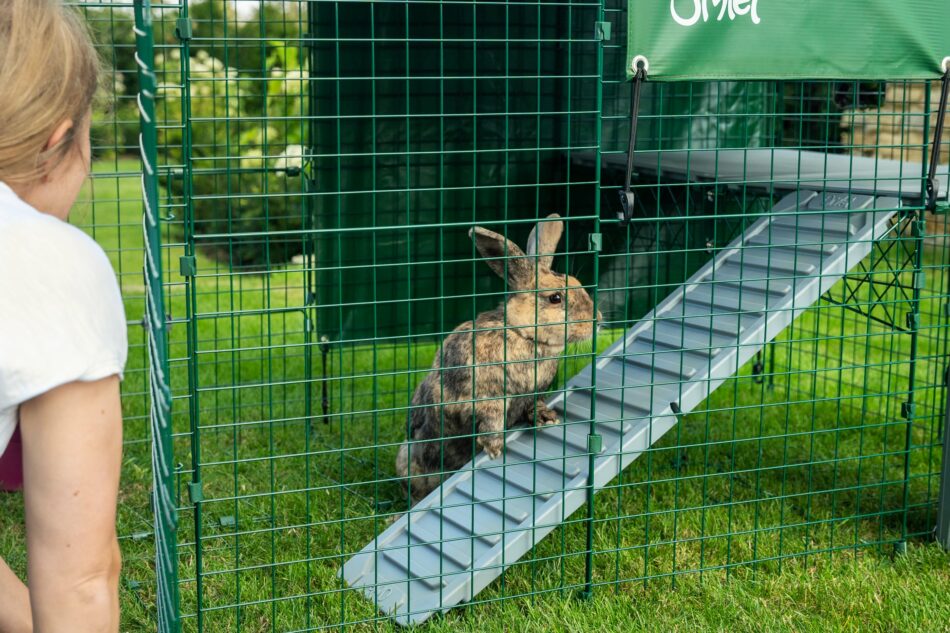
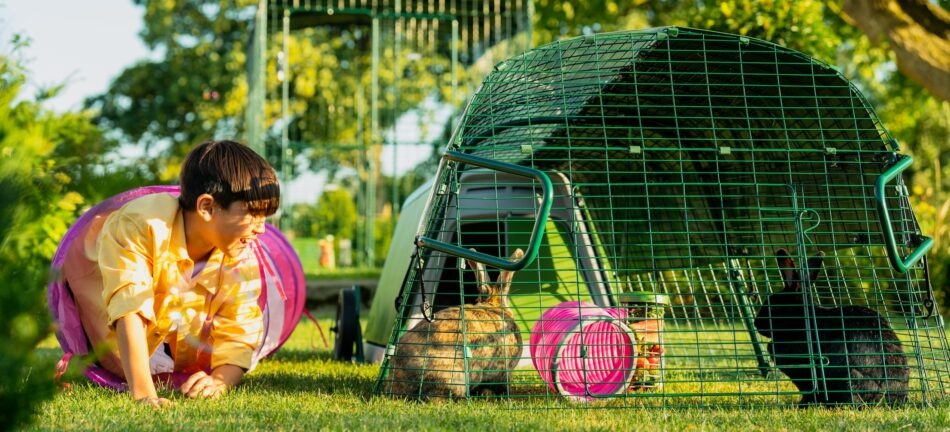
As their owner, you can make hierarchy establishment smoother and safer. Providing a neutral bonding space like a rabbit playpen gives bunnies a fresh environment to help reduce territorial disputes. Offer more than one feeding and watering station, and provide plenty of rabbit hideouts to prevent competition for resources, and create escape routes with Zippi tunnels and platforms to allow submissive rabbits a way to retreat. And most importantly, remember to be patient. Bunny bonding and hierarchy take time, over the course of several days or even weeks. But once it’s established, your rabbits will have created an environment where everyone belongs and enjoys each other’s company.
Omlet and your rabbits
The right setup makes it easier to manage your rabbits’ social needs. Omlet’s Zippi Rabbit Runs and Zippi Rabbit Tunnels offer plenty of customizable space and entry points, giving rabbits the room they need to retreat or explore during the bonding process. Paired with an Eglu Go Rabbit Hutch, and both dominant and submissive bunnies will be able to call this secure and engaging setup their home.
Choosing the right litter for your cat is an important decision but with so many different types of cat litter out there, it can sometimes be overwhelming to know which to go for! Cats can be very fussy animals, even when it comes to their litter boxes, so when choosing which litter to invest in, you’ll need to take both you and your furry friend into consideration. Clay and pine cat litters are popular choices – but which is best for you and your pet cat?
What is Clay Cat Litter?
Clay cat litter was one of the earliest cat litters to be used. Traditional clay litter is formed when clay is crushed, dried in a kiln, and then crushed again to form the litter as we know it to look. To make a clumping clay cat litter, bentonite clay is added to the mix, which absorbs liquid, or your cat’s urine, once it has been detected.
What is Pine Cat Litter?
Pine cat litter on the other hand is made from either wood pulp, or recycled pine shavings, that are then shaped into pellets. This type of litter has a natural wood aroma and can either come as a clumping litter or in non clumping form.
Now that we have established what the main difference is between these two types of litter, we can start to consider what other factors need to come into play when you decide on either clay or pine.
Scent and Odour Control
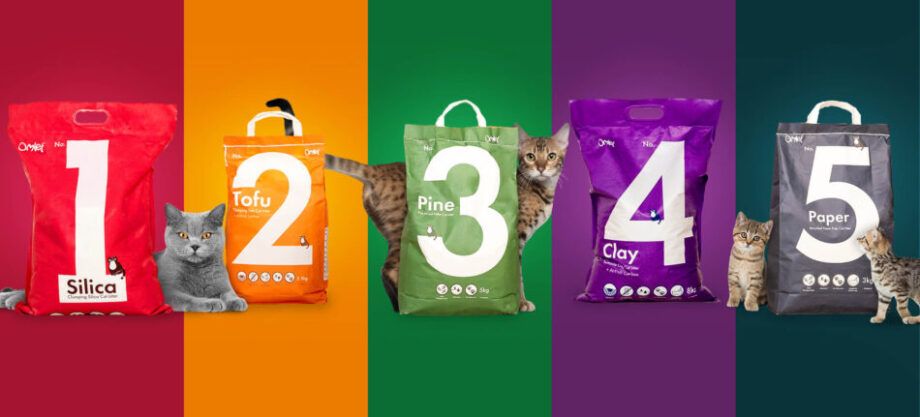
A lot of clay litters are artificially scented, so if you want more of a natural smell, a pine litter is probably best for you. Furthermore, some cats can be easily irritated by the artificial scents that a lot of clay cat litters have, which can sometimes simply be masking odours, making it near impossible to get rid of litter box odours entirely. If you and your cat prefer a more freshly chopped wood scent, then you’ll love the Omlet Cat Litter No. 3 – Pine, that naturally helps to reduce litter box odours such as ammonia thanks to its absorbent properties. However, if a clay litter is more to your taste but your cat is prone to irritation, unscented clay cat litter is also available. This might be a better option for your cat if you notice a scented clay litter resulting in allergies or your cat refusing to use their box.
Texture
Of course every cat is different, but particularly fussy cats will likely prefer a fine-grained litter texture. Clay has this advantage over pine, which some cats do not get along with, as the granules are slightly larger than the sand-like texture that clay offers. In the outdoors, cats like to bury their waste in sand so the closer their litter can replicate this, the better.
Clumping
Many clay litters are clumping, which means that they form clumps when coming into contact with liquid. This is because of the type of clay that is added to the formula (bentonite). Clumping clay litter, as opposed to a clay non-clumping litter, is what you’re most likely to find on the market as it makes for a much easier cleaning process of the litter box. Although pine is highly absorbent, it simply does not clump quite as well as clay does.
Dust
Dust can become a real issue with some cat litters. When litters are handled or in transit, it almost becomes inevitable that the pellets will rub together which then forms a dust. Many cat owners notice this dust when pouring the litter into their cat’s litter box. Although it may seem harmless, litter dust can in fact become harmful for both humans and cats, causing respiratory problems in the long run. Pine litters are generally better than clay when it comes to producing the least dust. They are a low dust cat litter option, which also means a better choice for cats with allergies or sensitivities.
Environmental Impact
If a more environmentally friendly option is what you’re on the lookout for, then a pine litter will be a much better choice for you. Being a natural litter made up of wood pulp, pine is a renewable and biodegradable material. Alternatively, Omlet’s Cat Litter No. 4 – Clay offers a low waste clay litter solution that is less taxing on the planet than traditional non clumping clay cat litter, which can often create more waste, as cat owners can unknowingly end up frequently disposing of fresh litter. Omlet’s clumping clay cat litter means less waste for you, as clumps appear once the litter box has been used by your cat, making it super easy to scoop.
Other Litters to Consider
Pine and clay cat litters are just two of the many litter options out there. Omlet stock arange of different types of cat litter that might be a better fit for you and your cats.
If dust is becoming a problem with your current litter, how about switching toOmlet’s Cat Litter No. 5 – Paper. As previously mentioned, many types of cat litter produce at least some amount of dust. However, the Omlet paper cat litter is virtually dust free, with the biodegradable pellets being made from recycled newspaper.
Natural litters such as grass are growing in popularity. Grass cat litters are a newer product on the market and are made using grass seeds. This litter is extremely lightweight, offers good odour control, and is also scent free.
Omlet’s Cat Litter No. 2 – Tofu may be one that you’ve not heard of just yet, but with highly absorbent properties and being more of an eco-friendly candidate, it might just be the right litter for you and your furry friend. Made from 100% crushed tofu, tofu cat litter stays fresher for longer with its active carbon composition.
Silica gel litter, also known as crystal litter, is a silica based cat litter. Made from silica crystals, it has the amazing ability to absorb a large amount of liquid. Another newer cat litter that has become available, dust from silica gel litter is also practically non-existent. Take a look at Omlet’s Cat Litter No. 1 – Silica.
After reading how clay and pine cat litters differ and learning a bit more about what else is available, hopefully you’ll now be one step closer to making your final decision on which one is the perfect match for your pet!
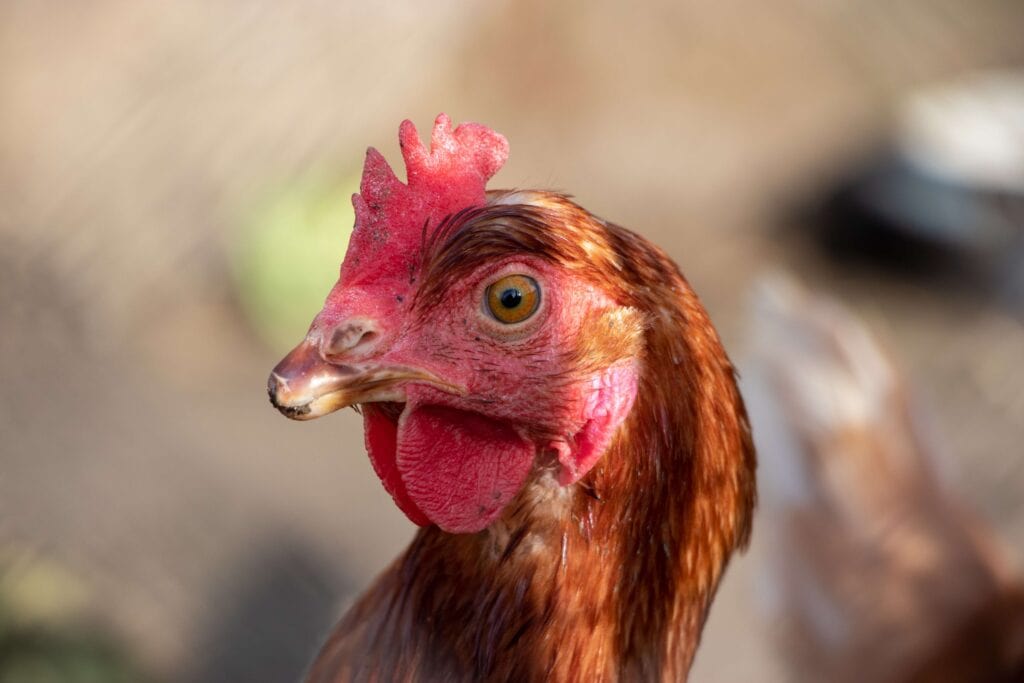
Chickens are fascinating creatures, and their eyes, even more so. Here are some amazing facts about chickens’ eyes that you may not have heard before!
Chickens Can See More Colours Than Us
Chickens are tetrachromatic. They can see the colours we see in (red, yellow and blue), but whilst we have three types of cones in our retinas, chickens have four, which allows them to see in ultraviolet light. This gives chickens access to a much wider range of colours and shades than humans.
Chickens Have a Third Eyelid!
Believe it or not, chickens actually have a third eyelid, on each eye! The third eyelid, called the nictitating membrane, horizontally draws across the eye which helps clean, moisten, and further protect the eyes from dirt. The nictitating membrane is transparent in appearance which means that chickens still have the ability to see, even when the third eyelid is closed.
They Can Use Each Eye Independently
Chickens are able to use each of their eyes independently, with a 300 degree field of vision (humans only have 180!), meaning that both of their eyes can focus on different tasks at the same time. This is also known as monocular vision, which amazingly already begins even before a chick’s arrival. When the chick is still in its shell, it turns towards the right to absorb any light and the left side of the shell is covered by their body. When the chick then hatches, nearsightedness develops in their right eye, which will allow the chick to search for food, as the left simultaneously develops farsightedness. This is to help the chick look out for any potential predators. You will probably notice this from when chickens tilt their heads when a hawk flies over.
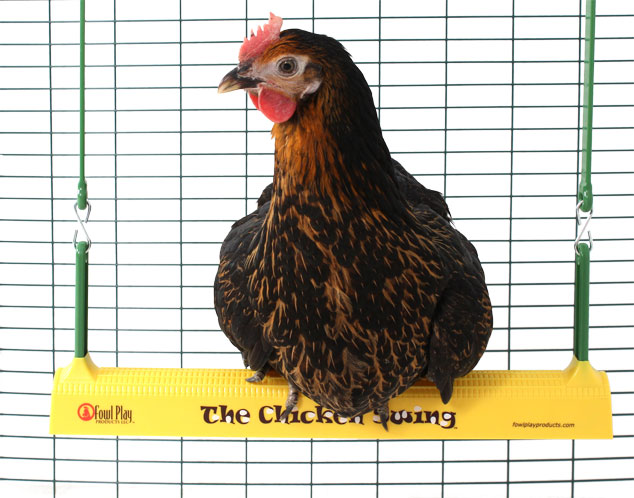
The Omlet Chicken Swing is the perfect toy for keeping chickens entertained!
Chickens Have Terrible Vision in The Dark
Night vision definitely isn’t their strong point! Having descended from dinosaurs all them millions of years ago, as opposed to being preyed on by them like other species, chickens had no need to learn how to run and hide in the dark. For this reason however, chickens today require protection at night because just like humans, they’re awake during the day and sleep during the night, and are highly susceptible to predators.
Chicks Have Amazing Eyesight From Birth
When chicks first hatch, they surprisingly have remarkable eyesight, in fact a lot better than humans. From the minute they hatch, chicks are able to detect small items such as grains of food and even have spatial awareness. A human baby however, lacks this ability and does not develop such skills until a few months down the line.
Chickens Rarely Move Their Eyeballs
Chicken eyes have a very limited range of motion and lack the ability to remain focused on an object whilst the rest of their body is moving. This is why you’ll often see chickens walking around, bobbing their heads, whilst facing onwards. It is not so much a case of chickens not being able to actually move their eyes at all, but rather their eyes cannot move quickly enough to process the image in front of them. Instead, chickens will tend to turn their heads when they want to gain better eyesight of something.
Their Eyes Have a Double Cone Structure
The retina of the eye is composed of rods and cones, the rods being to detect light-sensitive motion, and cones to see colour. As we found out earlier, chickens have more types of cones than us, hence why they are able to enter a fourth dimension of colour, which us humans can’t. A double cone retina structure means that a chicken’s eyes are more sensitive to movement. This is advantageous to chickens as it gives them a greater ability to detect motion, which is helpful when it comes to spotting a perceived threat.
Chicken Eyes Make Up 10% of Their Head Mass
That’s quite a lot, considering our eyes only make up for approximately 1% of our head mass! Although it may look humorous, there’s actually a good reason behind it. Having such large eyes helps chickens to see larger and clearer images as they are produced.
Chickens Can Sense Light Through Their Pineal Gland
Light reaches chickens through either their eyes, skulls, or skin, which activates the pineal gland in the brain. The pineal gland, also sometimes referred to as ‘the third eye’, is something else that makes chicken vision oh so interesting. A pineal gland helps chickens to sense daylight, or the lack of, even if they are unable to see with their eyes. This means that even a blind chicken is able to detect lighting or seasonal change!
They Have the Ability to Recognise up to One Hundred Different Faces
They say that elephants never forget but apparently chickens don’t either! Chickens are able to recognize up to one hundred faces, be it other chickens, humans or any other species. They can also amazingly decipher between their positive and negative encounters.
After a few interesting facts, we’re sure that you’ll now know a whole lot more about the amazing subject of chickens’ eyes, that’ll be bound to get you wondering just what’s really going on through the eyes of your chickens!
Washing a dog bed regularly can help to ensure your pet always has a clean environment. It also minimizes the risk of fleas, germs, and dirt build up. Our guide shows you how to easily wash your dog’s bed, as well as the best beds to keep your dog happy and healthy.
Why do dog beds need washing?
An unclean dog bed can cause serious problems for your beloved pet. Infections can be passed from dog poo and urine or anything the dog has regurgitated. The bacteria in these bodily discharges can linger in the mattress for several months. There are potential problems with an unwashed dog bed that a simple brush or vacuum-clean cannot tackle. Sleeping in this unsanitary condition could result in your dog becoming ill, with the knowledge to keep their dog bed clean you’ll be able to reduce this risk.
All dog beds provide a good night’s sleep for your dog, but the best ones do far more than that. They keep dirt and bacteria at bay and make the home environment healthier for everyone.
Dog beds become dirty and smelly over time. They can also harbour flea eggs or ticks. Washing them is essential, and this can be a simple or complicated task, depending on the type of dog bed your pet has.
Washing a dog bed with a removable cover is simple. Without a removable cover, a thorough clean becomes more challenging.
Simple steps to wash a dog bed with removable covers
Washable dog beds with a cover are easier to clean than ones without a cover. Our easy steps on how to clean a dog bed with removable covers will help you give your pet a sparkling bed in no time.
How to wash the dog bed cover
Vacuum the dust and hair from the dog bed and dog blanket to prevent the fine hairs from clogging up your washing machine filter. A vacuum cleaner with an upholstery attachment is ideal.
Remove the cover and vacuum the mattress and all other parts of the bed.
The cover of the dog bed can then be washed, along with the blanket. Use a pet-safe washing liquid and, if needed, a stain remover.
Washing your dog’s mattress
Depending on the type of bed you have, you will sometimes have to wash the mattress of your dog bed too. A model like the Topology dog bed has a waterproof cover that keeps the dirt away from the mattress. Although there may be occasional leaks if the dog has soiled the bed, in which case the mattress will need washing.
The dog bed mattress should be soaked in a bathtub of hot water using a pet-safe washing product.
Alternatively, it can be soaked for 15 minutes in a tub of water in which two tablespoons of bicarbonate of soda have been dissolved.
Some mattresses are pliable enough to be washed in a washing machine and dried in a tumble dryer.
Otherwise, it will have to dry outside. Choose a warm sunny day if possible – easier said than done at certain times of the year! The important detail is to choose a well-ventilated area, which will prevent mould from growing as the bed dries.
Washing a dog bed without a cover
Even if your dog bed does not have a removable cover, you can still wash it with ease. The following steps detail how to hand wash your dog bed.
First, hoover-clean the bed, getting into all the folds and corners.
Next, use a brush to loosen any hairs caught in the dog bed’s fabric and then vacuum it again.
Individual stains can be spot-treated with an enzyme-based cleaner before soaking the whole bed in hot soapy water for 15 minutes. Squeeze and turn the bed a few times during this time, to remove as much dirt as possible.
If the bed is very dirty and the water turns brown, soak the bed for five minutes and then replace the water.
The bed should then be scrubbed all over using a damp brush dipped in baking soda. Use a toothbrush for the folds, seams and corners. This will add the finishing touches to the cleaning and will also deodorize the dog bed.
Fill the tub with warm water again and soak the dog bed, squeezing and kneading it to remove all traces of detergent.
Repeat until the water shows no traces of soap bubbles.
The dog bed can then be air-dried in a warm and well-ventilated place.
Omlet’s easy to clean dog bed
The perfect easy to wash dog bed is a waterproof one made with cleaning in mind. If it has a machine washable cover that zips on, the bed can be washed and dried within a few hours. This system also has the advantage of longevity, as a worn-out cover can be replaced.
Our Topology dog beds employ this system and come in various versions and colours, all machine-washable at 30C (85F). You’ll also find the Omlet Bolster Dog Beds have removable covers for easy washing too. By matching light and dark colours to your dog’s coat, the hair will be less visible. A minor issue, perhaps, but white hair on a dark mattress, or dark hair on a white bed, looks very messy. The Topology covers are also waterproof, which protects the memory-foam mattress underneath. They come in different sizes, too, to suit all breeds of dog. Topology beds also prevent dirt from accumulating around the bed or mattress, as they have frames with legs that keep the structure off the ground.
How often to wash a dog bed
Now you know how to wash your dog’s bed, you may wonder how often you should be cleaning it. Washing the dog bed cover once every week or so eliminates issues of dirt and germ build up. The frequency will depend largely on how much hair the dog sheds and how dirty it tends to get. If anyone in the household has a dog allergy, frequent cleaning is essential.
To kill any potential nasties lurking in the bedding, it will ideally need to be washed at 60C (140F). Although lots of dog bedding will have washing instructions recommending a lower temperature. A waterproof cover, which is a feature of the Topology range, prevents the mattress from soiling, and these covers can be washed at low temperatures.
As indoor cats frequently use their litter boxes, it is important for cat owners to take the right measures to keep litter box odours under control. Stinky cat litters however, can be more than just an unpleasant aroma in the air around our homes. More worryingly, the smells coming from your cat’s litter box can actually be having an impact on yours and your cat’s health. However, with a few helpful tips on good litter box hygiene, you can be on your way to keeping pungent cat litter smells at bay, all whilst creating a healthier environment for both you and your cats.
What Causes a Stinky Litter Box?
A rancid smell from a litter box can often derive from a lack of, or poor, cleaning. Although you may be cleaning your cat litter box, if not done effectively, you may simply be masking the smell, as opposed to eliminating it.
Before anything else though, make sure that your cat is not spraying outside of their litter box, which can be one reason as to why there is an odour circulating your home. Your cat spraying outside of the litter box can be happening for a number of reasons such as boredom, territorial marking, and sickness. If you do, however, notice that your cat is simply refusing to use their litter box, the chances are, this is due to an issue surrounding the litter box itself. Some suggestions include
the litter box being dirty, (we wouldn’t like to use a dirty bathroom so why would our cats?); your cat disliking the litter you are using, based on either smell or texture (remember, cats have preferences too!); or the location of the litter box not being well suited to your cat/s.
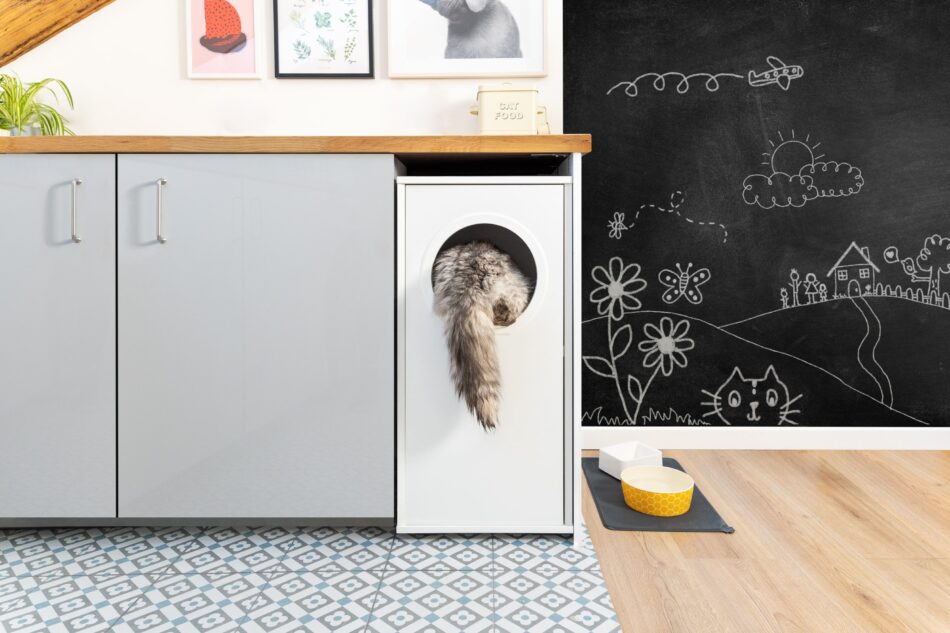
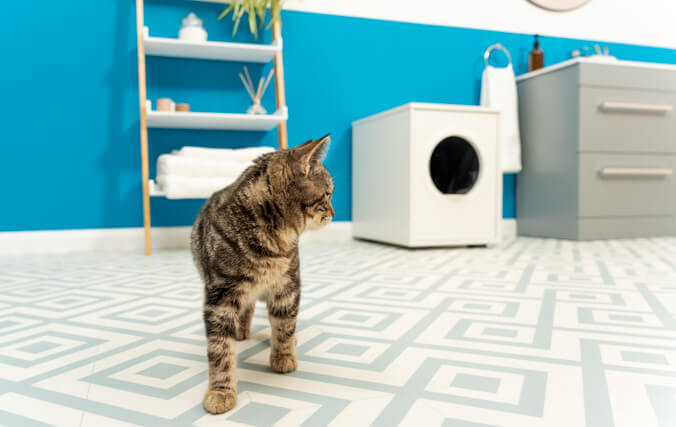
A litter box should be placed in a quiet environment, away from the hustle and bustle of the home or any outside traffic, to ensure peace and quiet. The litter box should also be separate from where your cat eats, have sufficient lighting, and within a room your cat likes or is comfortable in. The Maya Cat Litter Boxes are a great solution for cats who need complete privacy and comfort. With five different styles and entry points, your furry friend is bound to find a way to suit them.
However, if you do decide that it would benefit your cat to move their litter box to a more suitable location, which will in turn hopefully
help with the odour of the house, be mindful that cats are creatures of habit, so disturbing their space must be done with caution. Take it step by step with the litter box transition by purchasing a second box to place in the new location, whilst keeping the old box in its remaining place. After around a week, if your cat is using their second litter box, then feel free to remove the original, as this is a sure sign they have comfortably made the transition. Another top tip is to continue to use the same litter as you had before, which will make sure you’re not putting your cat under any more additional stress than need be when you replace their litter box.
Once you have ruled out that the smell is not from your cat spraying outside of their box, but in fact the odour is coming from what is going on inside of the litter box, you can begin to follow the appropriate steps to eliminate the stench and have your house smelling fresh again.
How to Control The Odour
Regularly Wash the Box
Although it may sound obvious, regularly cleaning the litter box is the starting point to waving goodbye to nasty odours. How often you give your litter box a deep clean really does depend on how often your cat is using the litter box along with other lifestyle factors such as age, diet and exercise coming into play. If you are starting to notice litter box odours becoming stronger with your current cleaning regime, up the frequency of cleaning and start giving the litter box a good scrub once a week. To wash your cat’s litter box, first remove and dispose of any litter, before beginning to scrub the box using warm water mixed with a mild dish detergent. Once cleaned, thoroughly pat dry with a towel. If you’re after an even easier cleaning solution for your litter box, have a look at litter liners, which prevent dirt from sticking to your box. The Maya Litter Box comes with a waterproof and long lasting liner, making it simple for you to effortlessly wipe your box clean.
Keep On Top Of Scooping Out the Litter Box
Scoop out your cat’s litter at least twice a day. It may initially seem a bit of an ordeal but your cat really does prefer plenty of clean and dry space in their litter box to continue using it comfortably. Furthermore, frequently scooping the litter box means a lot less time for litter box smells to accumulate. It’s also important to replace the scoop itself, along with the litter box annually. This is because over time, the plastic scoop reacts with the acid in your cat’s urine, eventually causing the plastic to degrade and then smell.
Use a Clumping Litter
Clumping litter works by forming clumps when the litter gets wet, or your cat’s urine is detected. A great thing about this type of litter is that it makes it easier to scoop out all of your cat’s waste, before it has time to build up and cause an odour. If you’re on the search for a good clumping litter, clay clumping litter is a popular option, due to its absorbent properties. Omlet stock a great range of clumping litters, including clay, which will help to keep your litter fresher for longer. As clumping litter dries out cat faeces, its absorbability makes it fantastic for preventing your cat’s waste from reaching the bottom of the litter box, which makes things a lot more difficult when it comes to cleaning.
Add Another Litter Box
If you’re lucky enough to have more than just the one cat, we’re sure you’re more than aware of how bad litter box odours can get! We all know how bad the smell can become from one cat’s waste, let another one, two, or three…! Purchasing another litter box, however, will definitely help you to fight nasty odours. Adding another litter box will help to control the litter box smell, as the rate at which cat waste piles up will significantly reduce. The general rule of thumb is to use one litter box per cat in the household.
Try a Cat Litter Deodorizer
A cat litter deodorizer should not be used to replace correct hygiene, however they’re a fantastic way to get your cat litter smelling wonderfully clean and fresh, once all other cleaning is complete. Deodorizers can come either as granules, beads, sprays, or in powder form, with a range of different scents on the market. Alternatively, you can use a scented litter, which also comes in a number of fragrances. However, just be mindful that some cats are more sensitive to new smells than others so may not take to scented deodorizers or litters. As another option, you can go for an unscented deodorizer, which works by neutralising odours. These will be best for cats that are more prone to irritation from strong scents.
Charcoal Cat Litter
Just like clay, charcoal, or activated carbon, is highly absorbent, making it perfect for getting rid of nasty odours. To incorporate charcoal/carbon into your routine, you can either opt for a bag of cat litter with activated charcoal or carbon, or purchase a cat litter deodorizer that contains it. The Maya Cat Litter Box comes ready with an activated carbon filter, that will prevent odours from escaping the box. Many of the Omlet cat litters also have an activated carbon composition, to give you maximum odour control.
Use Baking Soda
If you decide that a cat litter deodorizer isn’t right for either you or your cats, using a little baking soda is another sure way to help with the odours coming from your cat litter box, although it may sound like an unlikely fix. Not only is baking soda a completely natural, safe, and pet friendly option for your cats, it can also be used on any type of cat litter, working by absorbing your cat’s urine. A little baking soda goes a long way, so you will only need a couple of teaspoons, even for a large cat’s litter.
Dangers of a Dirty Litter Box
Dangers of a Smelly Litter Box to Humans
Ammonia is the most likely culprit for litter box odours, found in approximately 0.5 percent of your cat’s urine. As the litter box continues to accumulate waste within a room in your house that may not necessarily be well ventilated, the harmful gas of ammonia is formed. Overexposure to ammonia can result in queasiness and headaches, but should it become more serious, it can further lead to pneumonia. For those with a compromised immune system or are pregnant, overexposure to ammonia can be the onset of toxoplasmosis, an infection by the parasite toxoplasma gondii, which can become life threatening.
Cat scratch fever, or cat scratch disease, is a bacterial infection from Bartonella henselae bacteria, associated with cat faeces. Although very rare, the disease can again cause dangerous symptoms such as fatigue, swollen glands and fever.
Dangers of a Smelly Litter Box to Cats
Cats really are clean animals, which means that many will only use a clean litter box, often resulting in cats doing all they can to avoid using a dirty one, even if it means uncomfortably holding in their urine. However, delaying using the bathroom is not a great idea for cats as it can cause urinary tract diseases such as bladder inflammation and kidney blockage, or failure. Although all of which can be treated by your vet, prevention is always better than the cure.
Cats can also unfortunately fall victim to cat scratch fever. Their symptoms are similar to those that we can suffer, with swollen glands, fatigue, and a lack of appetite being the most common.
Having a cat should not mean having to compromise on the smell of your home. Although the unpleasant odour from a litter box can be overwhelming at times, it doesn’t have to remain that way. Hopefully with a bit of advice, you can now be one step closer to saying goodbye to cat litter odours for good.
Moulting is the natural process where chickens shed their old feathers and grow a fresh set. It happens to every chicken, at every age, and while it can make your hens look a little rough around the edges, it’s a completely normal and healthy part of their annual cycle. During a moult, you’ll likely see a drop in egg production as your hens redirect their energy toward growing new feathers, but with the right support, they’ll come through it looking better than ever.
Moulting serves a real purpose beyond appearances. It gives your chickens a chance to repair skin damage, renew their insulating feather coat ahead of winter, and give their reproductive systems a well-earned rest. Think of it as a seasonal reset.
Key point: A moulting hen isn’t necessarily sick. She’s doing exactly what her body is designed to do.
What Is Chicken Moulting and When Does It Happen?
Moulting is the shedding of old, worn feathers to make way for new growth. Feathers are made almost entirely of protein, so producing a full new set takes a significant amount of energy and nutrients. That’s why you’ll see changes in behaviour, appetite, and egg-laying during this time.
Chickens don’t just moult once. They go through several moults across their lifetime, starting from just a few weeks old.
Chick Moults: The Four Stages
Before your chickens reach adulthood, they go through four distinct moults as they shed their downy baby fluff and grow their full adult plumage.
First moult: 1-6 weeks
Second moult: 7-9 weeks
Third moult: 12-13 weeks
Fourth (final chick) moult: 20-22 weeks
By the time the fourth chick moult is complete, tail feathers begin to come in fully, which makes it easier to spot young roosters in the flock. If you’ve been wondering which of your chicks is a cockerel, this is often the moment it becomes clear.
Adult Annual Moults
Once your chickens reach adulthood, they settle into a yearly moulting cycle. Most hens have their first significant adult moult at around 16-18 months of age. After that, moulting typically happens once a year, most commonly in late summer or early autumn as the days get shorter and daylight hours decrease. The exact timing can vary depending on the individual chicken, the breed, and your local climate.
Occasionally, a chicken will moult outside of this seasonal window. This is usually triggered by stress, such as a sudden change in diet, an illness, a flock disruption, or an extended period of extreme weather. These out-of-cycle moults are sometimes called “stress moults” and tend to be less predictable in their duration.
Signs Your Chicken Is Moulting and What’s Normal
The first time you see a hen going through a heavy moult, it can be alarming. Patches of bare skin, a dishevelled appearance, and a noticeably quieter hen are all par for the course. Knowing what to expect makes it much easier to stay calm and respond appropriately.
Common Signs of Moulting
Feather loss – patches of missing feathers, sometimes large, often starting around the head and neck
Dull or frayed feathers before they drop, giving your hen a ragged look in the days leading up to the moult
Reduced or paused egg production as energy is diverted from laying to feather regrowth
Increased appetite since growing new feathers requires a significant protein intake
Behavioural changes including being quieter, more irritable, or less interested in being handledbeing handled
Dull combs and wattles, which may appear paler or less vibrant than usual
How Moulting Progresses
The moulting process follows a fairly consistent pattern across the body. It begins at the head, then moves down toward the breast and legs, and finally reaches the tail. By the time the tail feathers are falling out, the head feathers will often have already started to regrow. This sequential pattern means your hen may look like a patchwork of bare skin and fluffy new growth at any given point.
What about pin feathers? As new feathers emerge, you’ll notice small, waxy-looking shafts called pin feathers (or blood feathers) pushing through the skin. These are sensitive because they contain a blood supply that feeds the growing feather. This is why handling your hens gently during a moult matters so much.
When to Be Concerned
Patchy feather loss during a moult is normal, but unexplained feather loss at other times of year warrants a closer look. If you’re not expecting a seasonal moult, feather loss could point to mites or lice, bullying within the flock, or an underlying illness. Give your chickens a quick health check and contact a vet if you suspect something other than a natural moult is to blame.
Watch out for these signs that something may be wrong:
Feather loss without any new growth appearing after several weeks
Bleeding or scabbed-over bare patches
Excessive lethargy or signs of pain
Feather loss concentrated in one area, particularly the back, which can indicate feather-pecking by other chickens
How Long Does a Chicken Moult Last?
A typical moult lasts around 8-12 weeks, though some chickens can take up to 16 weeks to complete the process. The variation comes down to the individual chicken, her breed, her overall health, and the type of moult she’s going through.
Hard Moults vs. Soft Moults
Not all moults look the same. Chickens tend to fall into one of two patterns:
Hard moult: Dramatic, rapid feather loss across large areas of the body. Shorter overall, with feathers regrowing quickly.
Soft moult: Gradual feather loss that’s less visually obvious. Longer overall, and can drag on for months.
A hard moult can look startling. A hen that was fully feathered one week may look nearly bare the next. While dramatic, this is actually a sign that the process is moving efficiently. Soft moults, by contrast, may be barely noticeable at first glance but can take considerably longer to complete. complete.
Does the Weather Make a Difference?
Yes. Cooler temperatures in the autumn actually help speed up feather regrowth, which is one reason the annual moult tends to happen as summer ends. The body prioritises growing a thick, insulating coat before winter sets in. If your chickens are moulting in warmer months, the process may take a little longer.
A note on egg production: Don’t expect a fixed timeline for when laying will resume. Most hens stop laying entirely during a moult, and egg production typically picks back up 4-8 weeks after the new feathers have grown in. Some hens return to laying before the moult is fully complete, while others wait until they’re fully feathered again. Both are normal. If you’re curious about what affects laying more broadly, our egg FAQs guide covers the full picture.
How to Help Your Chickens Through a Moult
Moulting isn’t an illness, so it doesn’t need treatment. But there’s a lot you can do to make the process more comfortable and to support your chickens’ bodies as they do the hard work of regrowing feathers.
Boost Their Protein Intake
Feathers are made up of around 80-85% protein, so it makes sense that growing a new set puts a huge demand on your chickens’ nutritional reserves. During a moult, switch to a higher-protein feed, ideally one with at least 18% protein content. This is the single most impactful thing you can do.
For more guidance on what to feed your flock and how to balance their diet, take a look at our chicken feed guide.
Keep Handling to a Minimum
Pin feathers are sensitive. Because they contain an active blood supply while the feather is growing, any pressure on them can be uncomfortable or even painful for your hen. During a moult, resist the urge to pick up and cuddle your chickens more than necessary, even if they seem to need reassurance.
Equally, avoid putting jackets or saddles on moulting chickens. While chicken saddles are useful for protecting the backs of hens that are being over-mated, using them during a moult can irritate bare skin and interfere with feather regrowth.
Support Their Immune System
A moult is physically demanding, and a stressed or run-down hen may take longer to complete the process. A few simple additions can give their immune system a boost:
Add a small amount of apple cider vinegar to their water (roughly one tablespoon per gallon)
Offer fresh herbs like oregano, which has natural antimicrobial properties
Make sure they have consistent access to clean, fresh water at all times, since hydration supports feather development
Keep Their Environment Clean and Comfortable
Your chickens will shed feathers constantly during a moult, both in the coop and in the run. Clearing shed feathers regularly keeps things tidy and gives your chickens clean ground to dust bathe in, which actually helps the moulting process along. Dust bathing is how chickens naturally care for their skin and feathers, so make sure they always have access to a suitable spot.
An easy-to-clean coop makes a real difference during moult season. The Omlet Eglu Cube and Eglu Pro chicken coop are designed with hygiene in mind, making the daily removal of shed feathers and debris much quicker than cleaning out a traditional wooden coop.
Keep feeders and drinkers topped up. Chickens may have an increased appetite during a moult so ensure they eat every ounce with a no waste feeder that stops feed being spilt and wasted on the run floor. Use a feeder with a viewing window so you can see when the feed is running low, or opt for a Smart Chicken Feeder that sends a notification when it’s time to refill.
Check on your flock daily. Most hens will move through their moult without any complications, but staying observant means you’ll catch any issues early.
What to Expect When the Moult Is Over
Once the moult is complete, you’ll likely be struck by how different your hens look. Fresh feathers are brighter, fuller, and more vibrant than the dull, worn ones they replaced. Your hens will look like themselves again, and better.
Egg production will gradually return as the moult wraps up. Hens that were strong layers before the moult tend to come back to laying at a similar rate, though it’s worth noting that older hens may not return to their previous peak. This is a natural part of ageing rather than anything to worry about.
If you have a flock rather than a single hen, you’ll notice that your chickens tend to moult on a similar schedule. This means you may face a period of little to no egg production across the whole flock at once. It’s worth planning ahead: save any surplus eggs in the weeks before moult season so you’re not caught short. Unwashed eggs will keep in the fridge for several weeks.
Why Nutrition Matters More During Moulting Season
“Moulting is a pretty demanding process for a chicken.” say Scratch & Peck Feeds, experts in quality, organic chicken feed. “Feathers are made primarily of protein, so when a bird is replacing a significant portion of her plumage, her body is putting a lot of resources toward growing those new feathers. This is why we think of moult as a time to really focus on good, complete nutrition rather than simply adding lots of treats or supplements.”
We’ve partnered up with Scratch & Peck Feeds to bring you the best feeding advice for the moulting season. Read on for everything you need to know about moult nutrition.
What Should Chickens Be Eating During a Moult?
“The foundation should still be a complete, balanced feed formulated for their life stage. During moult, we especially like a feed with a little more protein to help support feather regrowth.
“It can be tempting to throw every high-protein treat in the coop when your flock starts looking a little scruffy, but treats shouldn’t replace complete feed. You still want birds getting the right balance of protein, amino acids, vitamins and minerals, not protein alone.”
Do Chickens Need More Protein During a Moult?
“A little extra protein can be really helpful. Feathers are roughly 85–90% protein, so growing an entirely new set requires a substantial amount of it.
For flocks normally eating a 16% Layer Feed, moult can be a great time to temporarily move to an 18% Layer Feed. You can also supplement with protein-rich treats like grubs, particularly if some birds are moulting while others aren’t.
The goal isn’t necessarily “as much protein as possible.” It’s giving the flock a complete diet with enough high-quality protein and essential amino acids to support what their bodies are doing.”
Practical Moulting-Season Care Tips
Here’s Scratch & Peck’s top moult season tips:
Don’t panic when egg production drops. It’s normal for laying to slow or stop while a hen puts her resources toward growing feathers.
Be gentle with your birds. Those new pinfeathers can be surprisingly sensitive, so moulting chickens may not appreciate being picked up or handled as much as usual.
Keep treats in perspective. Moult is a great time for protein-rich treats, but you don’t want treats filling birds up at the expense of their complete feed.
Keep fresh water available at all times. Good hydration is important year-round, including while birds are going through the stress of a moult.
Remember that every bird moults differently. Some seem to lose half their feathers overnight while others moult so gradually you barely notice. They also won’t necessarily moult at the same time, so pay attention to the individual birds in your flock.
Give them time. A moulting chicken can look pretty rough for a while, but feather replacement is a normal and important part of the yearly cycle.
When to Worry: Signs It May Not Be a Normal Moult
Moulting explains a lot of things that might otherwise seem alarming, but it shouldn’t be used as a catch-all explanation for every change in your flock. There are specific signs that warrant a closer look, regardless of whether your chickens are in the middle of a moult.
Moulting does not explain:
Lethargy, weakness, or a hen that’s noticeably unwell beyond being quieter than usual
Weight loss or a significant drop in body condition
Discharge from the eyes, nostrils, or vent
Severe or persistent distress that doesn’t ease as the moult progresses
Signs that may point to something other than moult:
Localized feather loss in one area, particularly on the back or neck, which can indicate feather-pecking by other flock members
Skin irritation, redness, or visible parasites around the base of the feathers, which may suggest mites or lice
Feather loss with no new growth appearing after several weeks
A hen that isn’t eating, seems very weak, or has symptoms that fall outside a normal moult pattern
If you’re unsure whether what you’re seeing is a moult or something more serious, give your chickens a health check and contact a vet if anything doesn’t seem right. It’s always better to check.
Key Takeaways
Moulting is the natural cycle of shedding old feathers and regrowing new ones. Chicks go through four moults before adulthood, and hens typically experience their first major adult moult at around 16-18 months of age, usually in late summer or autumn.
Expect feather loss starting at the head and moving down the body, reduced laying, increased appetite, and possible behaviour changes like irritability or withdrawal.
Most moults last 8-12 weeks, though hard moults finish faster while slower moults can stretch up to 16 weeks.
Nutrition is the most important thing you can do to support a moulting hen. Switch to an 18% protein feed and offer protein-rich supplements like grubs to help feather regrowth.
Handle moulting chickens gently. Pin feathers are sensitive and your hens may be less comfortable being picked up than usual.
Moulting should not automatically explain lethargy, weight loss, discharge, or severe ongoing distress. If something doesn’t seem right, give your chickens a health check and contact a vet.
Comfort matters during moult. Clean, easy-to-maintain coops and secure runs help reduce extra stress while your chickens are more vulnerable.
Supporting Your Flock With the Right Setup
Comfort matters during a moult. Regrowing feathers can make hens more sensitive to drafts, handling, and stress, so having a clean, well-maintained setup makes a real difference to how smoothly the process goes.
A coop that’s easy to clean means you can clear shed feathers regularly without it becoming a chore. The Omlet Eglu Cube and Eglu Pro are designed with hygiene in mind, so the daily removal of feathers and debris takes minutes rather than a full session.
A secure, well-covered run also reduces stress on moulting chickens. The Omlet Walk In Chicken Run gives your flock space to move freely and dust bathe, which supports the moulting process, while the heavy-duty steel mesh keeps predators out. If you want to give your chickens more flexibility to roam while keeping them safe, an Omlet chicken tractor or chicken pen can be a practical option during moult season.
Keep feeders and drinkers topped up and accessible throughout the moult. Your chickens will be eating more than usual, and consistent access to clean water is essential for feather development.
The Eglu Cube Chicken Coop will keep your chickens content all year round!
World’s Heaviest Chicken
The heaviest chicken breed, White Sully, was developed on a farm in California. It’s a hybrid breed of large Rhode Island Reds and other heavy breeds. The largest chicken ever recorded was a rooster called Weirdo, and he weighed just over 10kg (22 lb). It is said that he was so aggressive that he killed two cats during his lifetime and seriously hurt a dog that came too close to his territory.
World’s Oldest Chicken
The current world record holder is Muffy, a Red Quill Muffed American Game hen, who died at the age of 22 in Maryland, USA. One of the more famous old chickens was a Red Pyle chicken called Matilda from Alabama, USA. She was the first hen to receive the title of World’s Oldest Living Chicken from Guinness World Records, and lived for 16 years. Veterinarians said it was likely she lived for so long because she was kept in her owners’ house as a pet, and never laid an egg in her life.
World’s Heaviest Egg
The heaviest egg ever recorded was laid by a White Leghorn chicken in New Jersey, USA in 1956. It weighed 454g (16 oz), and had both a double yolk and a double shell.
World’s Biggest Egg
The heaviest egg was however not the biggest egg ever found. Tony Barbouti in Eastwood, Sussex, once found an egg in his coop measuring 23cm (9.1 in) in circumference. It only weighed just over 161g, but certainly gave Barbouti a shock! He later said that the hen was noticeably shocked after having produced the egg, and she walked a bit funny for a few days, but recovered completely.
World’s Longest Flight
Chickens are not known for their ability to fly. In fact many mean that they can’t technically fly, but only jump high and flap their wings to stay in the air. The longest flight of a chicken that has been recorded is 13 seconds. A different record for the longest distance flown is just under 92m (301 ft). Pretty impressive for a supposedly flightless bird!
World’s Most Prolific Layer
A Prof. Harold V. Bieller conducted experiments with chickens in the late 1970s at the College of Agriculture, University of Missouri. The highest rate of egg-laying he found was by a White Leghorn in 1979. She laid a whopping 371 eggs in 364 days!
World’s Most Prolific Mother Hen
Northern Irish farmer John Dolan has got two hens that have made it into the Guinness Book of Records. His hen Sally entered by having two sets of chicks in just 55 days, the latest of which produced 11 live chicks from 12 eggs. Chickens normally stay with their young for at least three months, but Sally started laying again after only 21 days. John’s other record breaking chicken Marmalade made it into the Book of Records by hatching a remarkable 107 chicks in two years!
It is a common myth that dogs only see in black and white. This is not the case, although their colour vision is limited compared to humans.
In that case, you may now be wondering “well, what colours can dogs see then?”, and how exactly do we as humans know this?
What colours do dogs see best?
The first question on your mind might be “what colours do dogs see best?”. Well, whilst the average person can see ‘all the colours of the rainbow’, from red to violet, dogs don’t have the same light receptors in their eyes as we do. To them, the rainbow is missing the red half of the spectrum. They can, however, see the yellows and blues. Indeed, a rainbow, to a dog’s eyes, is a series of yellows and blues of different shades.
What colours can dogs not see?
The ‘missing’ reds and oranges will appear to dogs as the various shades of light brown labelled ‘tan’. The greens in grass, trees and other plants are also tan to a dog. That bright red ball lying in the lush green grass may be very clear to you, but to your pet dog, the ball and the grass are both brown. Buy your dog a yellow or blue toy, however, and it will be as visible to your dog as it is to you.
Luckily for dogs, they rely on their sense of smell more than sight, so locating that ball in the grass won’t be so tricky, no matter what colour the toy is.
Can dogs see colours in their beds and toys?
As long as you don’t decorate your dog’s crate, Fido Nook or another cosy corner with reds, oranges and greens (which will all appear brown to a dog), they will appreciate a splash of colour. There’s nothing wrong with shades of tan either!
There is no evidence, either, that a dog prefers a blue or yellow ball to a red or green one. They will, however, be likelier to lose track of a light brown ball in the light brown grass.
How do dogs see colour?
In the earliest research into animal vision, dogs were taught to choose a disc that was a different colour from the others by touching the odd-one-out with their noses. If they chose the right one, they were given a treat – always a great incentive, as any dog owner knows! Sometimes, however, even the most well-trained dogs struggled to identify the odd-one-out. This told the researchers that the dogs were unable to distinguish between certain colours. When the discs were all red, apart from one green one, all the dogs could see were light browns!
Scientists are also able to use electroretinography to measure how animals’ eyes react to light. It was soon confirmed that key ‘cone cells’ responsible for registering colour in human brains were absent in dogs. Humans have three types of cone receptors, while dogs only have two.
Do dogs have good eyesight?
It may come as a surprise to many people that dogs, in addition to their poorer colour vision, cannot see as clearly as humans. Beyond a certain distance, everything becomes blurry for them. They have a genetic short-sightedness that prevents them from seeing distant objects clearly. The degree of short-sightedness varies between dog breeds, and it comes as no surprise to learn that so-called ‘sight hounds’ such as the Afghan Hound, Greyhound, Irish Wolfhound, Scottish Deerhound and Whippet have better eyesight than Chihuahuas, Pugs and Bulldogs. You can find out more about these wonderful breeds in the Dog Breeds Guide.
However, dogs’ eyesight comes into its own at dawn and dusk, when they can see just as well as they do in the daytime. Like cats, they have retinas that function well in poor light. The shape of their eyes’ light receptor cells and a reflective tissue layer at the back of the eye combine to create this low-light supervision.
And yes, that reflective layer is why dogs’ (and cats’) eyes always have a ‘red eye’ effect in photographs, and in car headlights. (Don’t worry though, we’ve got some top tips on How To Take Better Photos of Your Pets!). No wolf pack in a horror film would be complete without those glowing eyes!
Dogs also have a broader field of vision than humans, as their eyes are more on the side of the head than ours. This enables them to take in details that we would either miss or would be half-glimpsed things seen ‘in the corner of the eye’.
Why do dogs see less colour than humans?
Dogs evolved as hunters, just like modern wolves. On the one hand, this might make you assume that fantastic vision would be essential, as it is, say, in a bird of prey. However, the difference between a dog and an eagle is that the dog evolved to hunt at night, or dawn and dusk. A hunter doesn’t need full-colour vision at night, as colours simply disappear when the sun goes down. The key skill is to detect motion and to see things vividly in the half-light. In these respects, dogs’ eyes excel, and their eyes are super-sensitive to movement.
Humans, in contrast, evolved as daytime hunters, and that’s why we have better colour vision. At night, our eyes are hopeless without some kind of artificial light. At dawn and dusk, our brains have great difficulty identifying moving objects with certainty. That’s why ghosts, goblins and other supposedly supernatural sightings occur at these times of day – they are a function of our brain trying to busk in the half-light!
Human vision, then, contains more colour than a dog’s. However, we are certainly not top dogs when it comes to colour vision in the wider animal world. Many insects, including bees and butterflies, as well as many fish and crustaceans, have far more light receptors than we do and can see far more colours in the rainbow and the world around them.
But a dog’s vision is still perfect – for a dog!
We might see the world differently from our pet pooches, but what owner and pet can both agree on is that our furry friends deserve to live a life of luxury! Shop Omlet dog products today to find the perfect Dog Bed, Dog Crates and Dog Accessories for fido!
By clicking "Accept All", you agree to the storing of cookies on your device to enhance site navigation, analyze site usage, and assist in our marketing efforts.
Privacy Preference Centre
When you visit any website, it may store or retrieve information on your browser, mostly in the form of cookies. This information might be about you, your preferences or your device and is mostly used to make the site work as you expect it to. The information does not usually directly identify you, but it can give you a more personalized web experience. Because we respect your right to privacy, you can choose not to allow some types of cookies. Click on the different category headings to find out more and change our default settings. However, blocking some types of cookies may impact your experience of the site and the services we are able to offer.
Manage Consent Preferences
Always Active
These cookies are necessary for the website to function and cannot be switched off in our systems. They are usually only set in response to actions made by you which amount to a request for services, such as setting your privacy preferences, logging in or filling in forms. You can set your browser to block or alert you about these cookies, but some parts of the site will not then work. These cookies do not store any personally identifiable information.
These cookies allow us to count visits and traffic sources so we can measure and improve the performance of our site. They help us to know which pages are the most and least popular and see how visitors move around the site. All information these cookies collect is aggregated and therefore anonymous. If you do not allow these cookies we will not know when you have visited our site, and will not be able to monitor its performance.
These cookies enable the website to provide enhanced functionality and personalisation. They may be set by us or by third party providers whose services we have added to our pages. If you do not allow these cookies then some or all of these services may not function properly.
These cookies may be set through our site by our advertising partners. They may be used by those companies to build a profile of your interests and show you relevant adverts on other sites. They do not store directly personal information, but are based on uniquely identifying your browser and internet device. If you do not allow these cookies, you will experience less targeted advertising.
 Free returns
  180-day guarantee
  10% off your first order
  Chickens sometimes lay eggs that look nothing like a standard supermarket egg. Some are huge, some are tiny, some are ball-shaped, some are pointy, and some are soft-shelled. There are various reasons for these oddities.
 Are oddly-shaped chicken eggs a sign of illness?



 Ammonia is the most likely culprit for litter box odours, found in approximately 0.5 percent of your cat’s urine. As the litter box continues to accumulate waste within a room in your house that may not necessarily be well ventilated, the harmful gas of ammonia is formed. Overexposure to ammonia can result in queasiness and headaches, but should it become more serious, it can further lead to pneumonia. For those with a compromised immune system or are pregnant, overexposure to ammonia can be the onset of toxoplasmosis, an infection by the parasite toxoplasma gondii, which can become life threatening.