Chicks grow up quickly and soon it will be time to transition your chicks into their Eglu chicken coop. Their brooder will start to feel crowded after a few weeks, and your fully feathered pullets will be ready to strut out in a coop of their own. We’re here to help you make moving day an easy and stress-free experience.
What age can chicks move into their Eglu chicken coop?
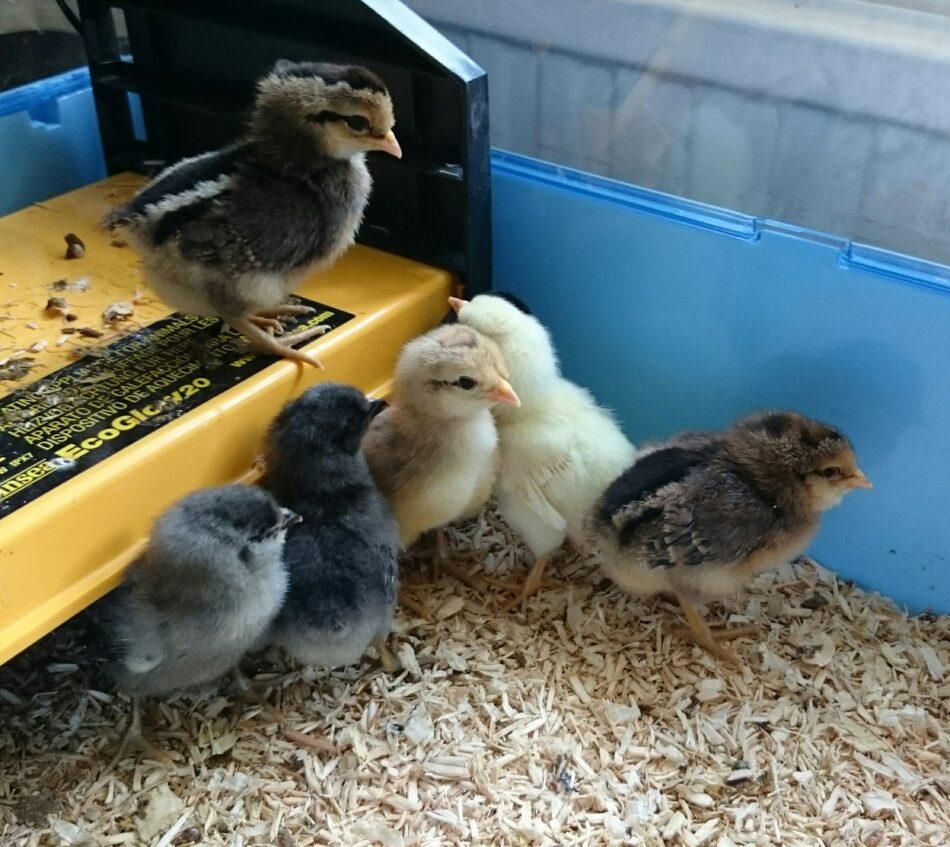
Chicks are usually fully feathered by the time they’re 6 weeks old, but not all chicks are ready to venture beyond their brooder at this age. Even though they’ve traded their fluffy down for mature feathers, they’re still very young. At Omlet, we recommend transitioning your chicks from their brooder to their Eglu chicken coop at 12 weeks of age.
Waiting until your chicks are 12 weeks old will give them time to become more coordinated and build the strength they need to navigate ladders, and give them plenty of time to become familiar with their rise-to-roost schedule.
From brooder to coop
These 12 weeks will go by in a blink of an eye, so be sure to prepare for (and enjoy) your chicks’ time in the brooder. Caring for newly hatched chicks is exciting, and will set the tone for the rest of your relationship with them. Handling your chicks daily will help build a bond and before long your chicks will trust you, and there’s no better time than when they’re in their brooder to kickstart this relationship. Once your little flock trusts you, it will make their transition to their coop even easier.
In the meantime, you can set up your flock’s walk in chicken run to take your chicks outside once they’re fully feathered. Keep these excursions short to make sure they don’t get chilled or draw the attention of other animals (including your other pets). If you plan to use an automatic chicken coop door, you can open and close it while your chicks are on their outing to get them used to the noise. Show your small flock where their chicken feeders and waterers are so that they’ll know where to find them once they move in.
Once your chicks are 12 weeks old and are all healthy and happy, it’s time to make the move to the coop. The big moving day should be based on the weather rather than a specific date. You want to look for a sunny day with moderate temperatures – ideally between 18-26°C Avoid moving your chicks on windy or wet days, and try to move them as early as possible so that they can experience a full day and be ready to head to bed when night falls.
Tips for your chicks’ first night
If your brooder utilises a brooding plate rather than a heat lamp, your chicks may already have the hang of going to bed at nightfall. But, being in a brooder is much different than being out in the big world, so even chicks that have an established sleep cycle may be caught off guard during their first night out.
First and foremost, you’ll want to keep your chicks safe from predators. The attached runs of the Eglu chicken coops are predator-resistant, but they will be much safer and more comfortable overnight in the roosting area inside of the coop. You may need to manually tuck your chicks in on their first night (or two) and close the door until they learn when bedtime is.
If you have an Autodoor, the coop light acts like a nightlight to guide sleepy heads to the roost. This is particularly helpful for chicks that were raised with a coop light – they’ll associate light with warmth and will seek it out when darkness falls.
New chicks and the existing pecking order
If you’re introducing your chicks to an existing flock, your older hens will help them learn the tips and tricks of the coop. But, older hens will also let newcomers know who’s in charge. Every flock of chickens has a hierarchy, and by understanding the pecking order in chickens you’ll be able to recognise what is normal hen behaviour, or what constitutes bullying and the need to remove your chicks for their safety.
Most chicks fall into line quickly, just as most hens at the top of the pecking order aren’t ruthless tyrants. There are exceptions to the rule though, so be on the lookout for concerning behaviour like:
Hens keeping chicks away from food or out of the coop
Scuffles severe enough to draw blood or cause excessive feather loss
Pinning chicks down
If you notice your hens not accepting your chicks into the flock, try setting up an adjacent run or add walk in chicken run partitions to your setup to allow them to get to know each other through a safety barrier. It’s rare for hens to forever hold a grudge against new additions, so be patient, but also conscientious of the safety of your chicks.
Omlet and your chicks
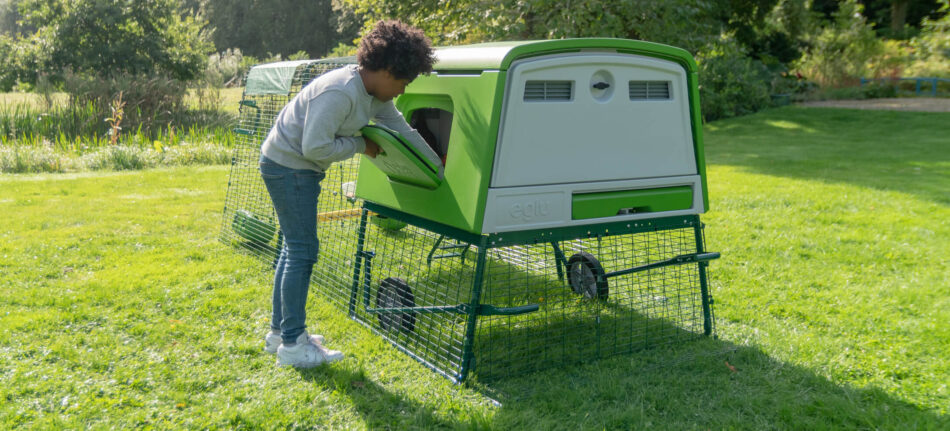
Our products are designed to keep your flock safe – no matter their age, and to make caring for your chickens less of a chore and more of an enjoyable activity. The Eglu Cube chicken coop is perfect for growing flocks, especially when paired with our walk in chicken run. And, by installing an Autodoor, you’ll have peace of mind from the start. Make moving day an enjoyable and memorable experience for you and your chicks, and set the tone for a lifetime of adventures together.
Wondering when your brooder-raised chicks can go outside? Raising hens from chicks is an exciting endeavour, but deciding when it’s safe to transition them to the outside world can seem daunting. As with most plans, timing is key! We’ve taken the guesswork out of transitioning chicks from a brooder and into their forever coop and run. With the help of a comfortable chicken coop and the knowledge to follow, you’ll gain the confidence to know when and how to safely move your chicks outside.
At what age is it safe for chicks to go outside?
If you’ve had your chicks since they hatched, or got them shortly after, you’ll recall how soft and fluffy (and adorable) they looked. The “downy” feathers that give a chick their fuzzy appearance don’t stick around for long. You’ll soon notice your once fluffy chicks start to look a bit bedraggled. This perfectly normal (while unsightly) phenomenon is simply the process of your chicks’ adult feathers growing in. In general, you should see these adult feathers start to peek through sometime between 7 and 14 days old. There are multiple factors that will determine how quickly a chick grows their adult feathers such as:
Once you’ve noticed these adult feathers mottling your chicks’ fluff, it’s time to start slowly decreasing the temperature of the brooder. Aim to reduce their heat by 3°C each week until the brooder and the ambient temperature are the same. This gradual decrease in temperature will further aid in their transition to life outside.
By the time your chicks reach 5 weeks of age, they’ve officially entered their “teenage stage.” They may sport a convincing set of adult feathers, but like most teenagers, are not quite mature enough for the outside world! Once your “teenage” chicks reach 6-8 weeks of age, it’s time to consider letting them fly the brooder in favour of some supervised outdoor excursions.
3 essential factors to consider when taking chicks outside
To help you determine if your chicks are ready to spend any amount of time outdoors, ask yourself:
Do my chicks have all of their adult feathers?
Is the weather above 15.5°C?
Will they have a fully enclosed space?
When your chicks are fully clothed in their adult feathers, they can withstand temperatures as low as 15.5°C. Sunny days are always best for outings with your chicks, and it’s important that they stay dry in order to help them regulate their temperatures. Afully enclosed chicken run is essential for outdoor visits – especially if you’re unable to stay with them the entire time.
Temperature and climate considerations
Timing is key when moving your chicks from their brooder to their coop and run, but if your chicks are at least 6-8 weeks old, they’ll be able to tolerate cooler temperature dips. If you have achicken tractor, you may want to move it around to follow the sun to help your chicks transition from artificial heat to natural heat. And, if your area experiences frequent weather fluctuations in the colder months, you can addextreme weather protection to your chicks’ coop to ensure they stay cosy overnight when they are most vulnerable.
If you’re letting your chicks out during warmer months, araised chicken coop offers additional shelter and shade. Like adult chickens, chicks can become overheated in warm climates. Be sure to have plenty of fresh water available, and usechicken run covers to provide ample shaded areas.
Predator protection for chicks
Once your chicks are spending large stretches of time outside, it’s not always feasible to monitor them. Asafe chicken coop andpredator-resistant walk in chicken run are essential not only for housing hens, but for introducing chicks to the outdoors as well.Chicken predators are mainly active at night, but there are those that would not pass up an opportunity for chicks during daylight hours.
Consider giving your chicks plenty of places to “hide” if they get overstimulated. Simple structures such as upturned cardboard boxes with entrances cut into them, or other DIY hides are sufficient. And while your chicks might not be big enough to fully utilize chicken perches, Omlet’sFreestanding Chicken Perch has easy height adjustable perches to give your chicks an opportunity to practice their climbing skills.
Mother hens
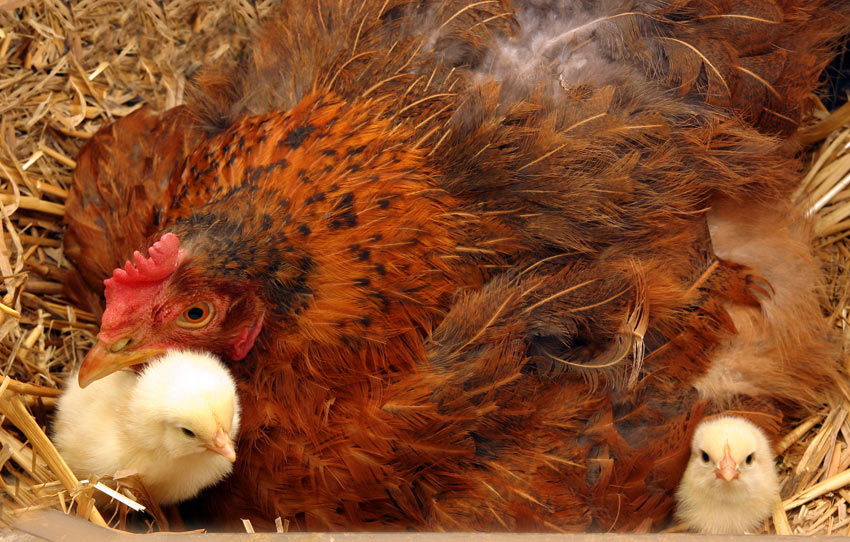
Some chicks are hatched and raised naturally under their mothers. Hens can go “broody” (sitting on a clutch of eggs to hatch) any time of the year, but will usually attempt to hatch eggs in the spring. If your hen is broody in the winter, it’s best to discourage her by collecting eggs daily, as chicks hatched in the winter will have a harder time than those hatched in the warmer months. If your location experiences mild winters, hens can successfully keep chicks warm in below-freezing temperatures, but will need to be monitored to ensure that the chicks aren’t being left unattended for too long when the hen goes to eat or drink.
Nature will take its course when chicks are left to be raised by a hen. Hens will provide warmth to their chicks even after they hatch, making them the “brooder.” Good mother hens instinctively know how long their chicks can withstand the absence of heat, and will help their young adjust to the ambient temperature.
If your hen hatched chicks in an elevated chicken coop, consider moving both the hen and chicks to aground-level chicken coop to avoid chicks accidentally falling while following their mother. Alternatively, you can remove the hatched chicks from the hen once they are dry and place them in a brooder.
Taking chicks outside during the day
If you’ve been decreasing the temperature of the brooder, your chicks should be comfortable outside in temperatures as low as 15.5°C by the time they are 6-8 weeks old. For successful outdoor excursions with your chicks, choose days that are sunny and warm. Start with short visits to yourchicken pen and let them hop and scratch around.
Every chick is different, but expect to see hesitation or uncertainty from your chicks at first. The feeling of grass under their feet is much different from the straw, shavings, or flooring of their brooder. The outdoors hold many sights, sounds and smells that are foreign to brooder-raised chicks, so start with short visits to avoid overstimulating them. Aim for 10-15 minutes once or twice a day to help build your chicks’ confidence. Be sure to stay with your chicks during these first few visits to see how they react to their surroundings.
After several days of short visits, increase outside time by 10-15 minutes every couple of days, keeping the weather in mind. Before long, your chicks will be spending many daylight hours getting used to their permanent home. If you haven’t already, now is the perfect time to start letting your chicks out in their coop and run during their outdoor time.
Checklist for permanently moving chicks outside
Your chicks are fully feathered, have successfully completed outdoor trips to their new home, and are thriving. It’s time to make the move permanent! Make sure the following are met before moving your chicks outside full-time:
Outdoor temperatures of 15.5°C or higher, even overnight
Your chicks are at least 6-8 weeks old
If you are moving your chicks to an Eglu chicken coop, the recommended age is 12 weeks old. This gives them ample time to grow into a size that is appropriate for the design of Omlet coops. Roosting racks and coop ladders may pose a challenge to chicks under 12 weeks of age, and the wire spacing of the run was designed with larger chicks in mind.
Can chicks be outside with other hens?
If your chicks will be joining other hens, follow the same steps as you would whenintroducing new chickens to your flock. Quarantine periods need not apply to chicks you’ve raised yourself in a brooder, as you would see signs of illness during that time. However, you’ll want to introduce chicks to their future flock-mates slowly to minimise the risk of injuries. Achicken pen placed inside or next to your existing flock will allow your chicks to visit your other hens safely.
As always, hens have to establish a pecking order, regardless of how many times they’ve seen each other through a barrier. Always monitor the first encounter when introducing new members to a flock. Quickly remove any chicks that hens appear to pick on, and consider housing them or any aggressive hens separately until your chicks are bigger.
Winter considerations for letting chicks outside
Most chicken keepers will agree that spring and early summer are the best months to move their chicks outside. However, with some climates experiencing dreadful cold for over half of the year, it can make spring chick-raising slightly more difficult. In these situations, it’s best to keep your chicks in their brooder for as long as possible – ideally, until they are 12-16 weeks old. If your chicks are too large to stay in the brooder for that long, be sure to take extra precautions against the cold.Prepare your chicks’ coop and run for the winter as you normally would for adult hens, trusting that yourEglu keeps your chickens warm. Additionalweather protection for your chicken coopcan be added to provide extra insulation.
Are my chicks too cold?
The same signs ofchickens being too cold apply to chicks. Check-in on your chicks routinely and monitor for any signs of them getting too chilly, such as:
Lethargy
Huddling together
Standing with one foot off of the ground
Discolouration of combs, wattles, or feet
If you notice any of these in your chicks during cold weather, bring them inside promptly. Do not warm them up too quickly, as this can cause them to go into shock. Only use a heat lamp if their inside area is in a drafty space such as a garage or barn. Indoor temperatures above 18°C will be adequate to slowly warm up any overly-chilled chicks. Keep them inside until they are eating and drinking normally, and plan to let them back out when the outdoor temperatures stabilise.
When chicks should not go outside
There are some circumstances where chicks should not be transitioned outdoors. These include:
If your chicks are less than 6 weeks old
Sustained temperatures below freezing if your chicks are less than 12 weeks old
During heavy rains or extreme weather
If your chicks cannot easily access their coop
Always check your weather forecast to get an idea of temperatures and precipitation for the week you plan to permanently transition your chicks outdoors. If heavy rains are expected, or any other significant weather events are, postpone until conditions improve. Wet chicks, just like their adult counterparts, have a hard time regulating their body temperatures when they’re wet.
Some chicks get the hang of a chicken coop ladder quickly, while others may struggle to perfect this technique. If you notice that some of your chicks are unable to use a ladder, create a ramp to lay on top of the ladder rungs. Once they’ve gotten the hang of using their growing feet, you can remove the ramp.
Lastly, consideravian flu and its prevalence in your area. Chicks are just as much at risk for contracting avian flu as adult hens, but by usingwaterproof chicken run tarps to prevent droppings from wild birds, you can greatly minimise that risk.
Omlet’s award-winning chicken care products
Omlet aims to help you succeed in all of your chicken-keeping endeavours, including supporting you in your journey of raising hens from chicks.Large chicken coops help accommodate your growing flock, andmobile chicken coops help move your chicks even closer to you for supervision, or to get them closer to their future flock-mates. Ourhen houses make excellent first-time homes for chicks, keeping them safe and comfortable in all climates.
Chickens pretty much take care of themselves from an early age. However, there are certain things you need to avoid if you want your baby chickens to get the very best start in life.
In this article, we present six easily preventable pitfalls.
1. Not having the brooder ready before the chicks arrive
You need to sort out the chicks’ housing – known as a brooder – before the birds arrive. Otherwise, there will be nowhere to put them, and that would be disastrous.
You can buy brooder boxes made specifically to keep chicks in, or you can make a DIY brooder using a cardboard box or plastic bin with holes in the side. Only choose the DIY avenue if you’re 100% confident you know what you’re doing.
The important thing is to keep the birds in a warm and well-ventilated space, but protected from drafts. As a rule of thumb, allow two square feet per chick – this is more than enough space for fluffy newcomers, but remember you will also need to make sure they have enough room when they get bigger – which they will do very quickly!
A chicken wire covering for the top of the brooder is advisable. Chicks can easily ‘fly the nest’ if the sides of the brooder are less than 45cm high. Older chicks need roosting poles for perching when they sleep, and will appreciate the inclusion of these in the brooder.
2. Not getting the temperature right
Too much or too little heat can kill chicks, so this is another life-or-death issue. The chicks need to be kept in a temperature of 35 °C (95 °F) in their first week. The heat should then be reduced slightly every five days or so until you’ve reached room temperature.
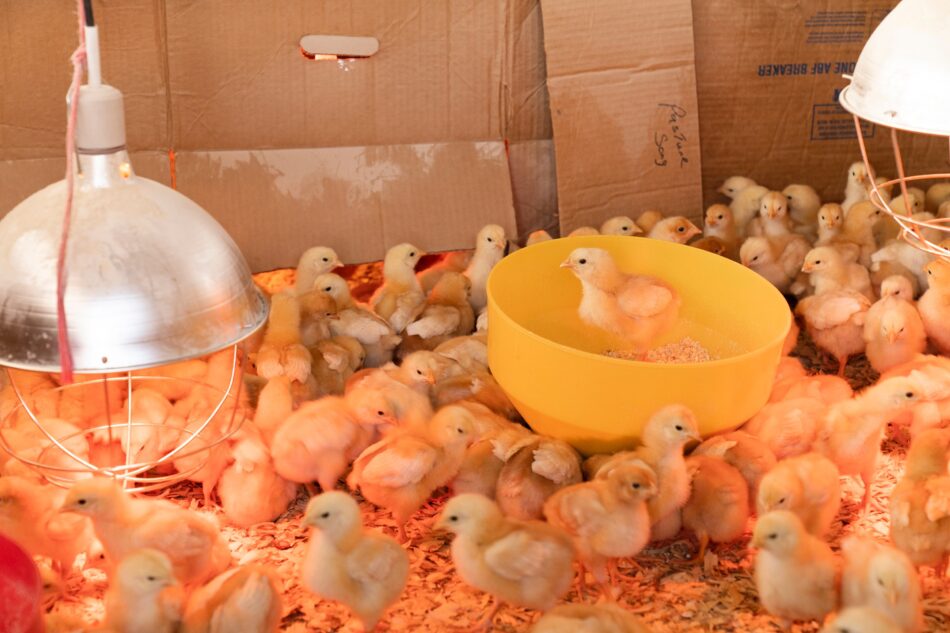
The source of heat is an important detail too. A heater designed explicitly for coops and aviaries is the best option, or a red heat bulb. You should not use a white heat bulb, as these produce glare that keeps chicks awake at night. This will make them irritable, as a result of which they may start pecking each other. Standard light bulbs are not suitable either.
Even the correct type of heater or bulb will need some adjusting in terms of where it hangs, and how high it is from the ground. Watch how the chicks behave in relation to the heat source. If they crowd together directly under the bulb or in front of the heater, it means they’re too cold. Lower the heat source or add an additional one, depending on the situation.
If the chicks cluster away from the heat source, they’re probably too hot. In this case, the heater or bulb will need to be moved further away, or its temperature reduced slightly. The chicks’ behaviour may change as they grow larger and the space becomes more crowded, so watch them carefully each day.
3. Using the wrong type of bedding
With chicks, it’s not a case of “any old bedding will do”. Use wood shavings or other non-toxic, absorbent material recommended for baby chickens. Avoid newspaper or shredded magazines, and don’t use aromatic, oily woods such as cedar. A 2.5cm layer of this bedding will be enough. If you omit the bedding, the chicks are in danger of slipping and sliding on the surface, which can lead to an injury called “splayed leg”, which is a life-threatening condition. The bedding should be changed at least once a week to prevent sticky droppings from accumulating.
4. Getting the wrong type of feed
Starter feed – in the form of either ‘crumble’ or ‘mash’ – is the essential basis of a chick’s diet. If your chicks have been vaccinated against coccidiosis, you will need to buy an unmedicated feed. The starter feed will double as a ‘grower’ feed, intended for chicks for up to 16 weeks. Some varieties, however, are for the first four weeks only, after which you can switch to a ‘grower’ feed.
Chicks will also enjoy a bit of fresh food as a treat, either vegetables or worms and bugs. These should never replace the starter feed mix, however. Chicks only eat as much as they need, and there’s no danger of them over-eating. So all you have to do is make sure the feeders are topped up at all times.
Like adult birds, chicks require grit to grind up their food. It needs to be sand grain-sized rather than the small pebbles and shell fragments that grown birds require.
The chicks will need food and water dispensers. Buy custom-made ones rather than improvising with dishes and trays: these inevitably end up fouled and/or spilt. Very young chicks will need to have their water changed at least twice a day, as they very quickly dirty it.
5. Forgetting to perform daily health checks
A chick health check is a simple case of looking at the young birds and making sure they look as lively and alert as usual. A chick that sits alone and looks lethargic or fluffed up when the others are active may be unwell. An ill chick will deteriorate very quickly and die.
The most frequent health issue encountered in young chicks is ‘pasting up’. This is when their droppings become encrusted on their bodies, preventing them from pooping. An affected bird can be cured by wetting the pasted-up area with warm water and wiping it clean. You may occasionally have to use tweezers to remove a plug of poo from the vent. The chick will need holding securely during this rather delicate and undignified procedure. If left blocked, a pasted-up chick could quickly die.
Note: if there is a thin dark strand hanging from a chick’s rear end, this is NOT pasting up. It’s the dried up umbilical cord that attaches the bird to its yolk inside the egg. It will fall off in a few days.
6. Moving chicks outdoors too quickly
Chicks can spend up to three hours a day outdoors once they’ve reached two weeks, as long as there is someone to supervise them. A large wire cage or portable run will do the job. The birds should only be placed outside if it’s at least 18 °C (65 °F), dry and not too windy. They will need food, water and shade.
Note: If you take the chicks outdoors before two weeks old, or if you leave them for more than three hours, they may catch a chill or sunstroke (depending on the prevailing weather). These shocks to the system can kill a small bird.
By 12 weeks, the young hens are old enough to move into an Eglu chicken coop and run. They will still be too small to negotiate the roosting bars, so these should be removed until the chicks are big enough to perch and walk across them safely. If you have an Eglu Cube Chicken Coop, the chicks may have to be lifted in and out of the roosting and laying area, as they often struggle with the ladder. This can be converted into a ramp during these early weeks, to make things easier for the hens.
The roosting area of the Eglu – or any other walk-in coop and run set up – should have lots of chicken bedding to ensure the hens stay warm at night. The bedding should also be replaced at least twice a week.
Chicks soon pick up the dos and don’ts of life from your other birds. A lot of their behaviour, remember, is based on instinct, so as long as you give them the right environment, nature will take care of the rest.
As long as your chickens are laying and there’s a cockerel in your flock, you can hatch and incubate chicks all year round. However, traditionally the most popular time to breed your own chickens is in the spring. Hatching and rearing your own chicks from eggs is an incredibly exciting and rewarding process. There is nothing better than seeing your tiny chicks grow up in the knowledge that they are getting the best possible life from start to finish. The incubation period for chicken eggs is usually 21 days. The most reliable way to incubate your fertilised eggs and maximise the chance that they will hatch into healthy chicks is to use an artificial incubator. Here’s our step-by-step guide to hatching chicks:
1. Long Term Plan
Before the hatching starts, you will need to have a plan in place as to what you are going to do with the chickens once they hatch. It is a safe estimate that 25-50% of eggs will not hatch due to either not being fertilized or due to some mishaps during incubation. Among those which will hatch, approximately 50% will be cockerels and 50% will be hens. Everybody wants hens and hardly anyone needs cockerels, so there is a question of what to do with the latter. In many breeds, cockerels do not tolerate each other and they will fight vigorously unless they are completely separated.
2. Eggs
First of all, you need to be as sure as it is reasonably possible that the eggs are fertilized, so getting them from a good breeder / farmer is crucial. Eggs of some breeds are quite expensive, so every egg that will not hatch costs you money. A breeder can never give you a 100% guarantee that the egg is fertilized, but an experienced one can be quite confident they are.
The eggs should not have any deformations or bear any other visible defects. Any cracks in the eggshells are a no-go. Any defect of the eggshell might result in the chick having difficulty in hatching, being deformed, or not developing at all.
Once you have the eggs, it is a good practice to wash them with an egg disinfectant. Eggs are porous and the embryos get oxygen and water through their eggshells. If there are any toxins or bacteria on the eggshells, that might endanger the embryos.
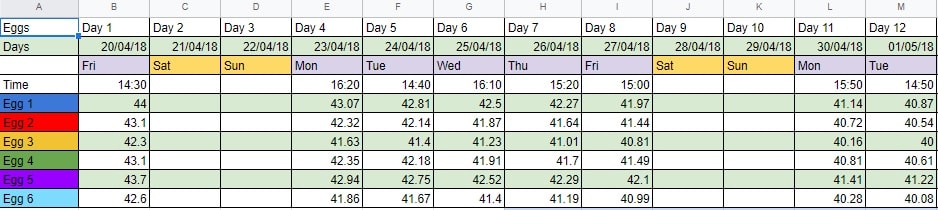
3. Keep a Diary
It is a really good idea to keep a diary of hatching. This includes numbering the eggs and keeping a daily record of each eggs weight. A developing egg will gradually lose weight in its 21 days of incubation. It will lose about 10-15% of its original weight over time. When the egg in the incubator is not losing weight it usually means it is not developing.
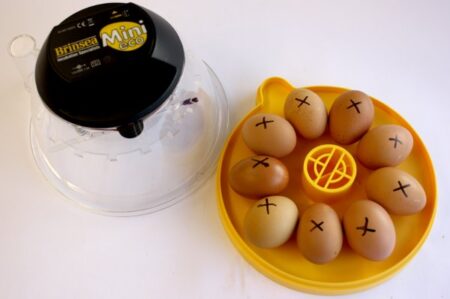
4. Incubator
Turning
Choose your incubator carefully. Some incubators, such as the Brinsea Mini II Incubator have an Auto-turn mechanism built-in. Auto-turn saves you a lot of time and effort. Every egg during the incubation time needs to be turned every 90 minutes in order for the embryo to be positioned perfectly in the egg. A broody hen naturally turns all the eggs she is sitting on as she moves around the nest, so the turning simulates what naturally happens when a hen takes care after eggs. If the incubator does not have the Auto-turn option, you will need to turn the eggs manually. It is therefore a good practice to mark all eggs with a non-toxic marker just to be sure that every egg is being turned every time you visit them.
Temperature control
A good incubator will be able to keep a steady temperature within. One that we recommend is the Brinsea Mini II Incubator. The optimal temperature for hatching chicks is 37.5 degrees Celsius. A good incubator will set its alarm off if the temperature within drops below or rises above a certain threshold. Temperature in the room where the incubator is placed is crucial here, as it heavily influences the temperature in the incubator. You will be opening the incubator during routine controls of the eggs, so it is really important the eggs don’t get a temperature shock in the process – such a shock might kill the fetuses. We advise keeping a steady temperature of approx. 25 degrees Celsius in the room with the incubator. The room should also be draft free.
Humidity control
A good incubator will be able to provide a good humidity inside. Optimal humidity for the eggs during hatching is around 40-50% but needs to be increased on Day 19 in order to soften the eggshells and help the chicks to hatch out. With some Incubators such as the Brinsea II Mini Incubator, there are two water containers inside. Fill one up every day, and fill both of them from Day 19 onward. You can fill up the water container in the Brinsea without the need to open it which is very useful, since you generally don’t want to open the incubator too often. It is perfectly normal that some condensation starts to build up in the incubator after a few days due to high humidity.
5. Daily routine
Cooling
Day 7 is an important threshold. First of all, you need to start cooling the eggs for half an hour a day. It’s best to do this around the same time each day. A good incubator has a fan and you can set an automatic cooling time. If not, you need to cool the eggs down manually by taking them out of the incubator. The cooling temperature should not be shockingly different – a difference of 2 to 5 degrees Celsius will do.
Developing eggs keep their own temperature when exposed. That is how a hen tells the difference between a developing and a dead egg. When the hen gets off the nest to eat and drink, the dead eggs will go cold almost instantaneously. The hen will then get rid of the dead eggs from the nest.
Candling
You also need to start candling the eggs on Day 7 at the latest. Candling will show you which eggs are developing and which are not. If an egg does not show any signs of development on Day 7, it will not hatch. It is essential to take out any eggs which stop developing as they will start to decompose if left in the incubator. From Day 7 onward you should continue candling on a regular basis. It’s not necessary to do it every day, as you won’t see any significant progress on day-to-day basis, but it is a good practice to do it every third or fourth day. Weighing and candling combined are usually good indicators if the egg is developing or not.
From Day 7 up to Day 19 tasks should continue in a routine manner: daily cooling, weighing, and occasional candling.
6. Hatching
Day 19 marks the next important stage. You need to stop turning the eggs and cooling them, and lay out a hatching mat in the incubator (so the chicks won’t slip on the incubator’s surface on their first day of life). You also need to increase the humidity inside up to at least 65%. When using the Brinsea Mini II Incubator you can achieve this by filling up the second water container inside.
At some point during that period the eggs will start wiggling: the chicks will be moving around the egg to position themselves perfectly to hatch out. You might feel the temptation to check on the eggs often, but at this time it is best to leave them be and inspect the eggs every 6 hours or so.
Around Day 20 the chicks should peck out a small hole in their eggshells to catch their first breath of fresh air. It’s best to leave them be. Do not help them by making the hole bigger or breaking the shell apart. They will do it themselves in their own time. In that time they will also consume all the nutrients in their eggshells, so it is vital for them to stay inside for the time being.
Most of the chicken breeds hatch on Day 21 with only a handful of breeds hatching on Day 20 or 22. Do not help the chicks in hatching, they should be able to do it themselves – it’s their first test of strength. Only give a helping hand when a chick is really late (in comparison with its companions in the incubator) and/or the eggshell is really thick and the chick is evidently struggling to get out for a prolonged period of time.
Once the chicks hatch out, leave them in the incubator for another 24 hours. They should be well fed having eaten all the nutrients from their eggs. Apart from that, the incubator provides them with the optimal temperature and humidity.
Now watch our eggcellent egg hatching video to see how easy it is to hatch chicks!
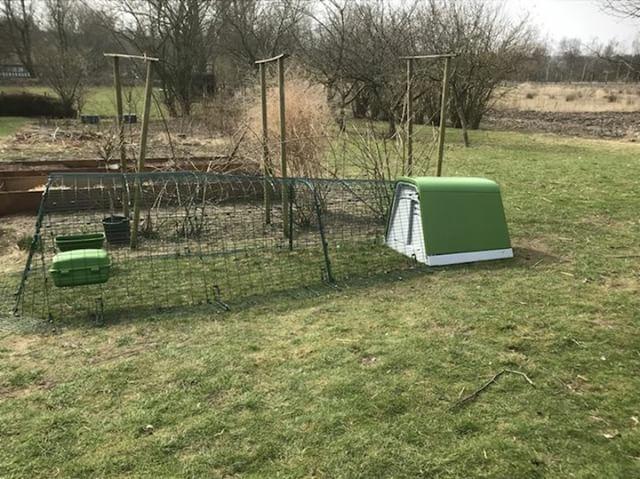
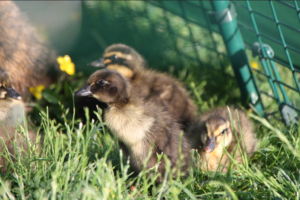
I’ve been lucky enough to be allowed to test the Omlet Eglu Go. Over the spring and summer I’ve first had a brood of chicks and later a brood of ducklings living in my Eglu Go.
The house is awesome to use as a broody coop and for raising chicks. The house is easy to clean, has good draught-free ventilation, it has a good size for chicks and ducklings, and the attached run gives great protection for the little ones early on, when they are very exposed in relation to birds of prey and other unwelcome guests.
Eglu Go for raising chicks
At first, my chicks were living in a cage in our guest room. They were hatched using an incubator and needed a chick brooder in the first few months as it was very cold outside. When the temperatures started to rise and the chicks had more well developed feathers, I moved them out into the coop. I kept them here for about 10 weeks. There were 10 chicks and they fitted easily in the coop until they were large enough to move into the large chicken coop with the grown-ups. I removed the roosting bars in the coop since small chicks don’t sleep on roosting bars in the beginning. I filled the coop with a generous layer of wood shavings and straw since it was still cold in the spring.
The coop is pretty easy to move around, especially if you add the wheels. You can therefore move the coop and run when the grass starts to get dull, this way, the chicks always have fresh grass to walk around on. It’s great to have a closed run for the first while. Small chicks are exposed to birds of prey – this run keeps the birds from attacking. My grown hens were also a danger to the chicks in the beginning. Chickens aren’t always hospitable when it comes to new members of the flock. The small chicks could be left in peace in their run and the big hens could slowly get used to their presence. This made it so much easier to introduce them later, since they were already used to each other.
Hatching and rearing in the Eglu Go
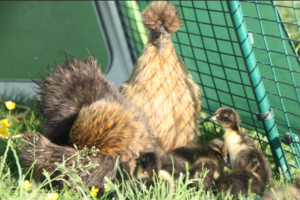
When the chicks were too large to all live in the coop, I introduced them to the large flock, and then I suddenly had an empty Eglu Go. My ducks had laid a lot of eggs in a large nest but none of them were interesting in brooding. I already had two broody silkies, so I tried putting the duck eggs under them. The chickens weren’t discriminative about the eggs, and they happily lay brooding.. About a week before the eggs were supposed to start hatching, I moved the two hens and their eggs into the empty Eglu Go. The hens were very good about it and continued their persistent brooding, a week later 8 large ducklings came into the world.
Again, I had removed the roosting bars from the coop since ducks don’t sleep on roosting bars. This way, there was also room for two nests. The hens got along fine and they didn’t seem to mind that their babies had webbed feet rather than chicken feet.
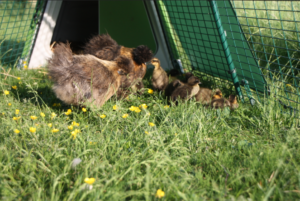
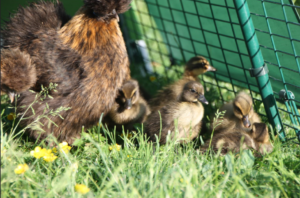
Again, the other poultry in the garden could slowly get used to the new arrivals, and for that reason, there were also no issues when, a few weeks later, I let the ducklings and their mothers out to join the others in the garden.
The benefit of having ducks in an Eglu Go is that ducks often prefer to sleep outside. At night I let them into the run attached to the Eglu Go and close the run door so they are protected from predators. At the same time, they can decide for themselves whether to sleep in the coop or out in the run. In the morning I open the run door, so they can run freely in the garden and collect slugs, snails and insects.
I can definitely recommend this coop both for chicks and ducklings, whether hatched naturally or in an incubator. It’s a good idea to choose the 3 meter run, since it gives the little ones more space to play and explore.
Some hens like to sleep in the nest and while this isn’t necessarily a problem, it can mean that the eggs get very dirty as chickens produce copious amounts of droppings overnight and these can accumulate in the nest, making it very dirty indeed.
Also in warm weather, the nest is a wonderfully cosy, warm place and this can encourage a hen to go broody as this is triggered by a rise in body temperature. If the hens sleep in the nest and get warm overnight, they may like being there so much that they refuse to get off the nest!
A good way to encourage them to roost on the bars where it is cooler and their droppings will fall into the tray beneath the bars is to put something in the nest to block it overnight. A football, brick, upturned plant pot or even a garden ornament will do the job nicely and if you remember to remove it in the morning to allow them to lay eggs, this should do the trick and they’ll learn that the roosting bars are for sleeping on.