We all know that pets are not just animals, they’re members of our family. So for the pet parents who are also human parents, why not foster an even stronger bond between your children and four-legged friends by engaging them in exciting activities that promote laughter, joy, and unforgettable memories? Get ready to unleash the fun with this treasure trove of ideas that will ignite imaginations and provide endless hours of entertainment of engaging activities for your kids and pets to do together.
Bake treats for your pets
Kids love to help in the kitchen! And when they know their culinary efforts will end in a delicious delight for their favourite furry family member, they’ll be sure to raise their helping hands. Just make sure the recipe you choose for your pet is safe for them to eat, and abide by the same rule used with kids – treats are to be enjoyed on a limited basis.
Have a hamster in the house? Grab some of your pantry staples to make these yummy honey homemade hamster treats. For a tail-wagging breakfast, let your kids break the eggs and blend the bananas to make these dog-friendly pancakes. The best part of this activity is that every member of the family can taste the treats.
Find new games to play with your cat
When the cat’s away, the mice will play. But when kids and cats are together, play is even better! Most cats love to play games because it mimics their natural instincts to pounce and bat with their paws. So before allowing your child to play closely with any pet, make sure they understand how to handle them safely.
An interactive game of chase with feathers, cat toys, or scarves makes for a fun-filled time for both kids and cats alike. Want to take the fun outside? Let your littles roam free together in a safely enclosed Catio while chasing bubbles all around. And for the senior cats who may find the chase games too much, encourage your child to stretch alongside their favourite feline on a sturdy cat scratching post.
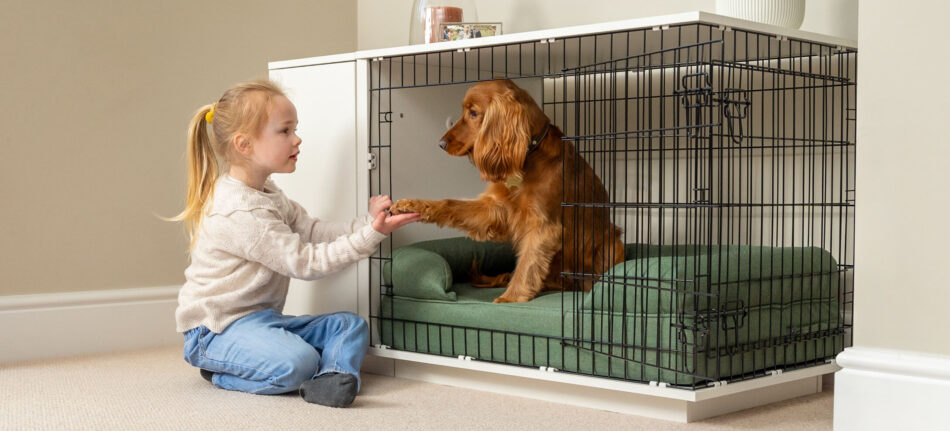
Teach your dog a new trick
They say you can’t teach an old dog new tricks, but that’s simply just not true. With the right encouragement, some patience, and lots of love, your dog can learn new things at any age in life. And what better way for your kids and canine to spend some quality time together than with a fun new trick?
Summer is a great time to let your kids get involved in teaching Fido how to fetch a stick or even learn a new command like “sit and shake”. Make sure your child keeps plenty of dog treats in their pocket to give as a reward for the newly learned behaviour. And because new tricks require lots of mental stimulation, make sure you have a comfortable and supportive dog bed where your furry friend can rest after all their hard work. By the time summer is over, your kids and dog will impress the whole family with all they have both learned.
Pocket money
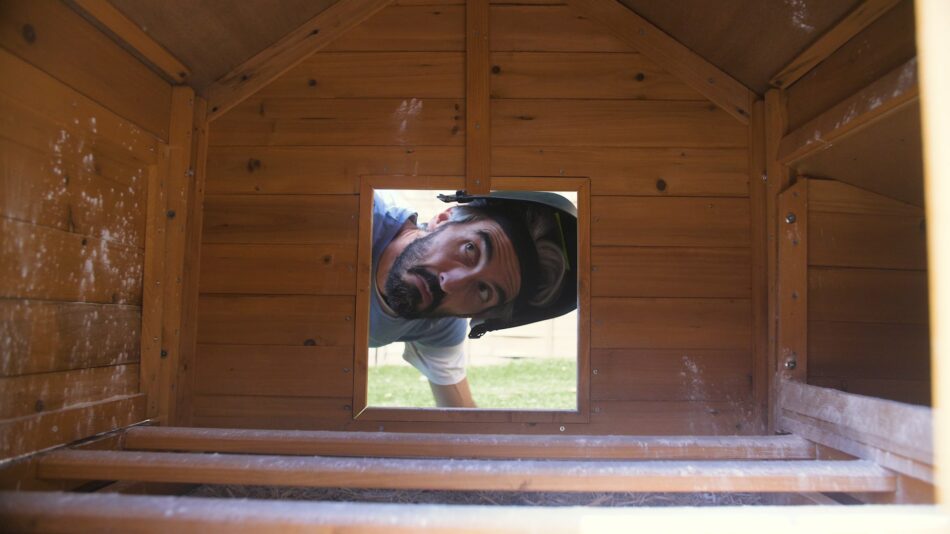
Chores are a great way to teach your kids the importance of responsibility, but they’re also a great way to let your child earn some spending cash. And learning the value of work at a young age will always pay off later. So in an effort to get your kids and pets more time together while also completing needed work around the house, why not have them clean out the chicken coop to earn a bit of extra pocket money?
The Eglu chicken coops are so easy to clean that anyone tall enough to reach in and touch a hen will be able to get it spotless with ease. With a little bit of pet-safe disinfectant and water, your chickens’ home will be sparkly clean and hygienically healthy in no time. Plus, what kid doesn’t like to use a water hose? This simple chore of cleaning and collecting eggs not only allows your child more interaction with the hens, but it makes one less task for you to do. Win-win for everyone!
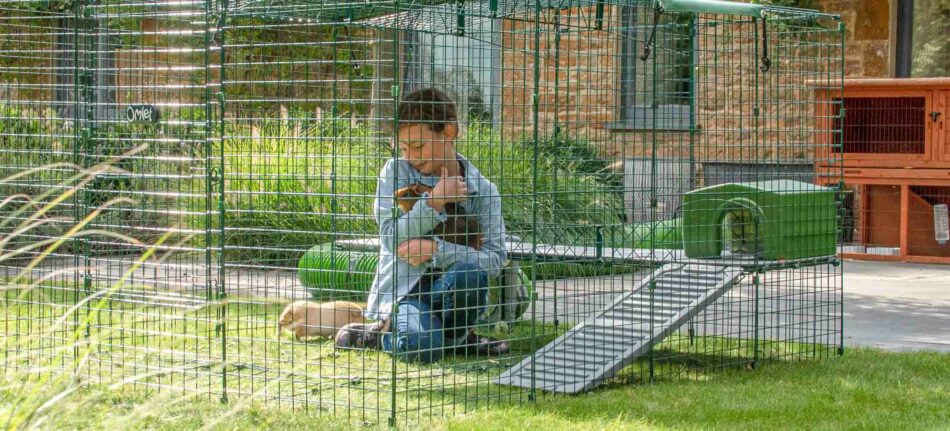
Homemade toys for rabbits
When it comes to fun for rabbits, Omlet has you covered. But if you’re looking for activities for your child and rabbit to enjoy together, look no further than your own garden. One of the best ways to get everyone outside and having fun is to go on a garden scavenger hunt. Have your kids locate a willow tree and collect some twigs to weave into a ball or a wreath. Your rabbits will love playing with their new toys as well as nibbling on the nutritious wood, and your kids will feel accomplished in creating a new rabbit masterpiece.
But the floppy-eared fun doesn’t stop there! If you’ve got an old towel or a ripped pair of jeans you’re getting rid of you can make a rag doll for your rabbits. Have your kids use their creativity to make something beautiful. Even just tying a knot in the middle of a strip of sturdy fabric will provide hours of fun for rabbits to tear apart in their outdoor rabbit run. Just make sure to take it away before they’ve ruined it completely – you don’t want them to ingest too much fabric.
Build an obstacle course for your hamster
Hamsters are the curious and energetic pets of the animal world. So engage both your child’s and hamster’s love of running, jumping, and climbing by helping your kids build an obstacle course for your hamster. Start by finding a safe area in your house where the hamster can be let out, away from open doors and other pets. You might want to build the course inside a playpen or create a barrier using books or other heavy objects. Just make sure they can’t fall over and hurt the hamster.
Have a LEGO-loving kid in your house? Get them to use their brick-building creativity to make the outline of the obstacle course. LEGO pieces will also make great jumps and steps for your hamster to navigate. Use clean popsicle sticks to build a ladder or a ramp for the hamster to climb up on, and build tunnels and hiding places with toilet paper rolls and cardboard boxes. Glue them together to create a hamster mazewithin the obstacle course and have your kids hide treats to encourage your hamster to explore.
Photoshoot
Capturing the bond between children and their furry companions in photos creates cherished memories that can be treasured for years to come. During a photoshoot, kids and pets can engage in various poses and interactions that showcase their special relationship. This activity not only allows kids and pets to have fun together but also encourages their creativity and self-expression. It’s also a great opportunity to teach children about patience, empathy, and respect for animals. Have fun with different locations and colourful outfits (if your pet obliges!) and make the photos as creative as you want. Here are our best tips for taking better photos of your pets.
Abstract paw art
If you have children, you likely have several crayon drawings hanging on your fridge. Why not add to the gallery with some abstract paw art made by your favourite furry child? Let your dog’s creative juices flow by helping your child work with your pup to create a beautiful piece of art.
Get some toxic-free, water-based paint and gently put your dog’s paws in it. With the help of some dog treats, guide your dog to a blank canvas and let them walk all over it, creating an abstract paw-print painting. You can even have your kids get in on the fun by adding their handprints as well! Be sure to have water on hand to clean everyone’s paws and best to do this activity outside to avoid the risk of paw prints on carpets and furniture.
Omlet brings kids and pets together
At Omlet, we know the bond between kids and their pets is a truly special one. Engaging in activities together not only strengthens their connection but also offers countless benefits for both of them. With our personal pet experience and ingenious expert designs, we create products for dogs, cats, chickens, rabbits, and more, that will bring out the best in everyone in the family. So try out one of these shared experiences with your kids and pets and create a lifelong friendship that will leave pawprints on their hearts forever.
Summer may be the season for sunbathing, but for rabbits it’s more about survival. Because bunnies aren’t built for extreme heat, many owners wonder how to keep rabbits cool in summer. Here’s a practical approach to help you keep outdoor rabbits cool during the hottest part of the year, and how to stay vigilant against heat exhaustion.
Why rabbits struggle during the summer
Rabbits are much better suited to cool weather than they are to heat. Native to underground burrows and shady environments, their bodies are designed to retain warmth, not expel it. This can become a potentially life-threatening issue when the temperatures rise. But with the right summer rabbit setup, your bunnies don’t have to be burdened by the season.
How hot is too hot for rabbits?
The ideal temperature range for a rabbit is between 12-21°C. Once temperatures climb to 26°F and beyond, heat stress becomes a real possibility. Heat stress can progress to heatstroke rapidly — which can be fatal without immediate intervention.
Heat-sensitive breeds
While any bunny can overheat, certain rabbit breeds are more prone to trouble from hot temperatures:
Lop-eared rabbits like English Lops have limited airflow around their ears.
Flat-faced breeds including Holland Lops or Netherland Dwarfs can suffer more in the heat due to the structure of their respiratory system.
Long-haired breeds like Angoras or Lionheads trap more heat in their thick coats.
Other rabbits at an increased risk of heat stress include overweight rabbits, or those with underlying health conditions.
Keeping rabbits cool in summer
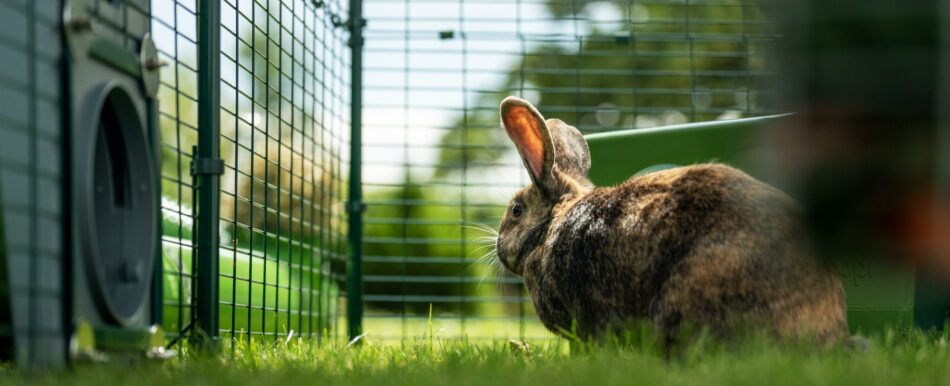
Depending on your area and the summer temperatures, most rabbits can thrive outdoors all year round. The key is to provide them with essential elements for staying cool and safe. For outdoor rabbits, ensuring plenty of shade is the first task at hand, followed by supplemental steps.
Create shade
Use rabbit run covers to provide shade for your bunnies and keep their food and water under the cover to prevent them from heating up in the sun. An insulated rabbit hutch will help stave off some of the sun’s heat, but all rabbit hutches should be placed out of direct sunlight — especially during the hottest part of the day.
Keep them hydrated
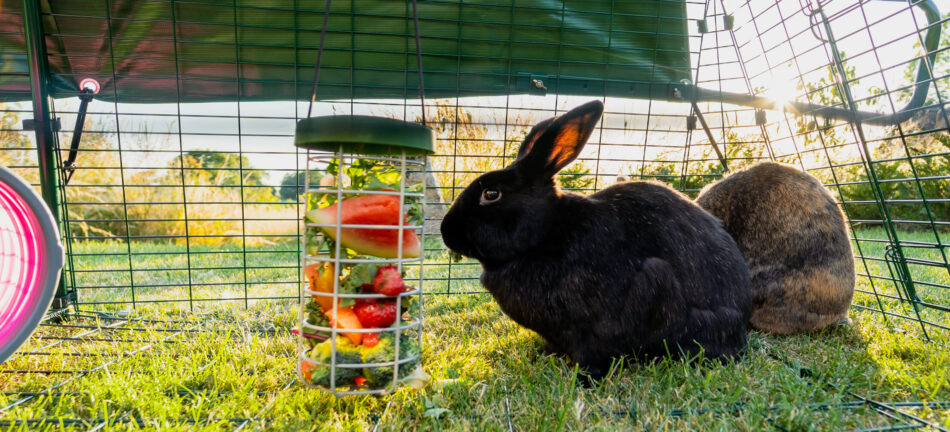
Dehydration can sneak up on bunnies during the summer. Make sure your rabbits have access to multiple water sources through a combination of bottles and bowls, and offer fresh, cool water several times a day. Offer leafy greens in an elevated rabbit treat holder to help hydrate them — romaine lettuce or dandelion leaves are good options.
Try safe cooling techniques
In some climates rabbits may need more than shade and water. Help your bunnies beat the heat with some tried-and-true tricks to keeping rabbits cool on hot days:
Place frozen water barrels or ice packs wrapped in a towel in their run or hutch for them to lean against.
Use ceramic tiles or slabs that have been chilled in the fridge (not frozen) for them to lay on.
Drape damp towels over part of their hutch or run, but ensure there’s ample breeze to prevent mildew.
Use a fan near their space to circulate air, but not pointed directly at your rabbits.
Groom regularly
Rabbits can overheat more readily if they’re carrying extra fur. Help them stay cool by brushing them regularly to remove excess from their coat and to reduce their heat retention. Pay close attention to matted or thickened areas, especially around the bottom and belly. These sessions are the perfect time to check and see how well they’re grooming themselves. Some rabbits that struggle with self-grooming can fall victim to flystrike, which is a medical emergency.
What to do if your rabbit is too hot
Even with precautions, rabbits can still overheat. Catching heat stress in bunnies early on can help provide the best outcome. Watch for these signs:
Panting or rapid breathing
Lethargy or weakness
Red, hot ears
Drooling or wet nose.
Unresponsiveness or collapse
If you notice these signs in your rabbit, it’s important to take immediate action. Heat stress can progress to heatstroke very quickly, at which point your rabbit’s organs will begin to shut down. The following steps should be taken if you think your rabbit is headed toward heatstroke:
Move your rabbit to a cool, shaded area immediately.
Gently wipe their ears with a cool, damp cloth, as this is where they release body heat.
Offer fresh, cool (not ice cold) water, but don’t force them to drink.
Call your veterinarian if your rabbit doesn’t respond right away to these measures.
While it might be tempting to cool your bunny down as quickly as possible, doing so can cause their body to go into shock. Here’s what to avoid if you are trying to relieve heat stress in rabbits.
Don’t:
Place your rabbit in cold water
Apply ice directly to their body
Cause a sudden change in temperature (like placing them in front of air conditioning).
Give frozen food or ice cubes, as these can disrupt digestion.
Keep cool and carry on
Summer doesn’t have to be a drag for you and your bunnies. With thoughtful planning and a good understanding of how rabbits handle the heat, you can make even the hottest days a breeze. Stay vigilant and monitor your rabbits closely to ensure they’re holding up in the heat.
Some final tips for helping your bunnies beat the summertime heat:
Use a digital thermometer to monitor the temperature in their hutch or run.
Rotate ice bottles and ceramic tiles throughout the day.
Plan grooming or playtime with your rabbits during the morning or evening hours to avoid the hottest part of the day.
If, despite your best efforts, your rabbits aren’t thriving in the heat, it may be time to bring them inside for the rest of the summer. It’s important to remember that if you do choose to bring your bunny indoors, they’ll need to remain there until the outdoor temperatures align with the indoor temperatures to avoid stressing their system.
Red mites are a sure way to put a damper on your flock’s coop life. Learning how to protect your chickens from red mites is essential for their overall health and happiness. While pesky and persistent, red mites can be prevented and treated – especially when you have the right setup.
What are red mites?
Red mites, or Dermanyssus gallinae, are small, red parasites that lie in wait in your chickens’ coop, ready to strike during the nighttime hours. Often known as one of a chicken keeper’s worst foes, these tricky little bugs can prove challenging to locate and eradicate. Being nocturnal, they hide in the nooks and crannies of wooden chicken coops and roosting bars, and sneak their meals of chicken blood while your flock sleeps.
How do I know if it’s red mites?
Red mites are most active in the warmer spring and summer months. The first symptoms of red mites infiltrating your flock will be distressed or lethargic behaviour. Bites from red mites are itchy and uncomfortable, and since they prefer to feed through midnight snacks, your hens won’t be getting their required beauty rest. Your flock may appear sleepy, or display scratching or excessive preening behaviors.
As the infestation progresses, your hens can become anemic through losing too much blood to the parasites. Their combs and wattles may appear pale rather than red. You may also notice a reluctance to go to roost at night, as they will have come to associate roost-time with painful bites.
How to remove red mites from your coop
If you’ve come to the conclusion that your flock’s coop is under attack from red mites, you’ll need to take quick, aggressive action against them. Clean the coop thoroughly, removing all bedding, nesting material, and all detachable components like roosts or racks. Scrub the coop thoroughly with warm water, and clean any feeders or waterers. If possible, use a pressure washer to clean the coop and its components.
Once the coop is cleaned, leave it to air out in a well ventilated, sunny area. If you see mites making their escape, wait 10-15 minutes before pressure washing again. After any repeated washings, allow the coop to dry fully, and then treat it with a red mite product that is safe for chickens. There are powders or concentrates to mix with water and spray onto affected areas, so choose which you’re most comfortable working with. Diatomaceous Earth (DE) is also an excellent choice for preventing and treating red mite infestations, and it’s perfectly safe for your flock. You can add this ingredient to your chickens’ dust baths, or sprinkle it directly into their feathers.
How to treat chickens for red mites
If your flock has been infested with red mites, you’ll need to treat any affected chickens along with their coop. DE will kill the existing red mites, but your chickens’ skin will likely be raw and sore from the bites. There are other homemade remedies like garlic or other herbal sprays that will kill mites, just be sure that all of the ingredients are safe for chickens. Apple cider vinegar and electrolytes in your flock’s water will help boost their energy and healing, as well as promote healthy feather growth. If your flock appears to be anemic, ask your veterinarian for advice on any other supplements that might be beneficial. Treat bare areas where feathers have been preened out with anti-peck and healing topicals for chickens.
Preventing red mites
It’s far easier to prevent red mites than it is to treat them. Choosing a plastic chicken coop eliminates the fine cracks and crevices that wood allows for red mites to hide in, and they can be pressure washed and cleaned in mere minutes with little dry-time afterward. Wooden chicken coops have far too many opportune hiding spots for red mites, making them hotspots for the offending parasites.
In addition to having a plastic chicken coop instead of a wooden chicken coop, you can treat the inside of the coop and the ground around the coop with DE to act as a natural deterrent for red mites. Regular cleanings will help keep parasites of all varieties at bay, and will ensure that your flock stays comfortable during peak-pest season. And, unlike wooden coops, plastic chicken coops don’t need to be treated with sprayed insecticides to prevent red mites.
Omlet and your flock
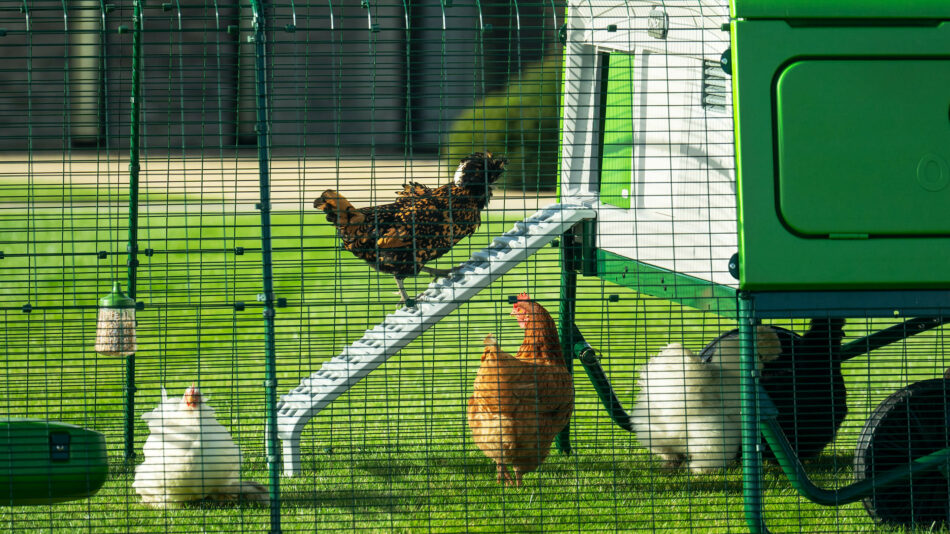
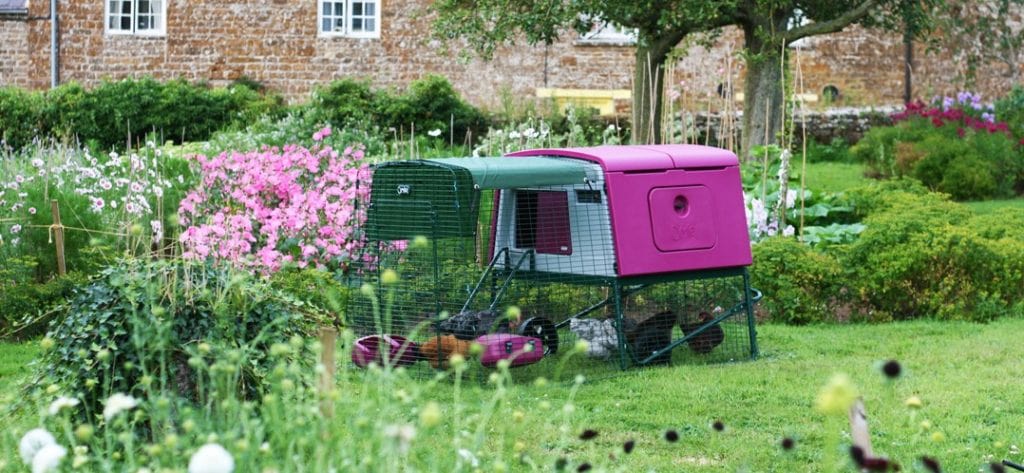
The smooth surfaces of Omlet’s plastic chicken coops prevents red mites from setting up shop, and will keep your flock comfortable all summer long. Worried about outside of the coop? Our chicken toys and perches are all made from mite-resistant materials to ensure that your flock can have their fun without the threat of parasites. Combined with a walk in chicken run for plenty of outdoor space, your chickens’ setup will be perfect and parasite-free for the summer, laying the groundwork for those leisurely days together.
Keeping your pets warm in winter and cool in summer is one of the best ways you can help them stay healthy. But this is often easier said than done. Traditionally chicken coops and rabbit hutches have been made from wood. This has its advantages: it’s an easy material to work with, it’s customisable and it looks attractive. However, when it comes to coping with the weather, it can leave a lot to be desired. Wood is not a very good thermal insulator, meaning if it’s hot outside the temperature will transfer through to the inside quickly.
Air as a Thermal Insulator
Perhaps surprisingly, a much better thermal insulator is air. But how can something so thin that you can’t even see keep our pets comfortably insulated from the elements? It’s precisely because it’s so thin that it’s so effective. Heat is conducted between an area of more heat to an area of less heat by one of three processes: conduction, radiation or convection. In conduction warmer molecules vibrate rapidly and collide with other nearby molecules passing on that energy. If the material that the heat is trying to pass through has few molecules in it then it will be harder for the heat to transfer through it. This is precisely what happens if you have a warm surface separated from another surface by a layer of air.
Because air is not a good conductor it is commonly used as an insulator in everything from buildings (double glazing, cavity walls) to cooking utensils, drinking flasks and even the high tech chicken coops.
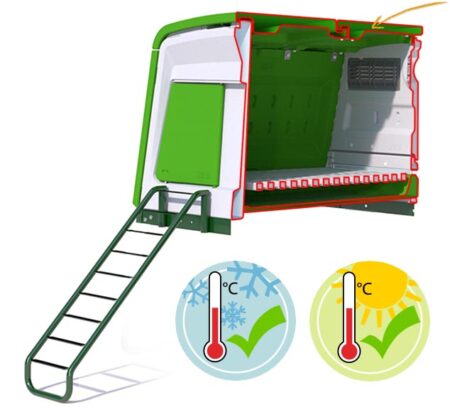
Eglu chicken coops have a unique twin wall system that takes full advantage of air’s great insulating property to keep your pets comfortable all year round. Within the walls of the Eglu is an air pocket which acts as a barrier, stopping hot and cold temperatures penetrating into the inside of the house, so your chickens can stay warm in winter, and cool in summer.
The Eglus also feature a draft-free ventilation system designed to increase the air flow throughout the coops, keeping chickens at a comfortable temperature. These air vents are discretely located around the coop, and specifically designed so they do not allow drafts over the nesting box. A well ventilated coop is not only beneficial for keeping chickens cool, but it is also extremely important for preventing your hens from suffering with respiratory issues.
For evidence of the Eglu’s cooling properties, take a look at this video showing how much slower an ice lolly melts when inside the coop…
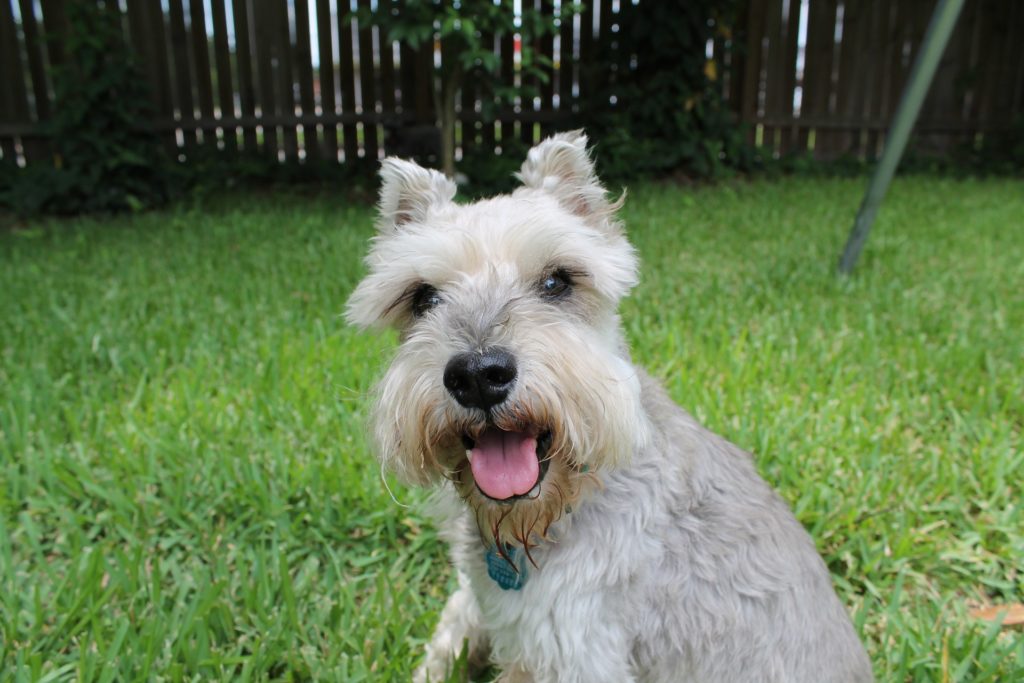
When we got our Miniature Schnauzer, we had already had a catflap in the garden door for years. We soon realised that our little dog would easily also fit through the cat flap, and this would allow her to go in and out of the garden whenever she liked. We decided to pin it open to see if she would even use it at all, and it turned out to be a hit. It worked perfectly and in the summer it was nice to have a light steady breeze from the door. But we all know, summer must come to an end one day. And it did.
Winter came and with that freezing air blowing through the cat flap every day, all day. Unpinning the door meant having a sad little furry dog staring at it in disbelief “This used to be open all the time! Why is it locked now? And since when can the cat walk through walls?” The surprised look on our dogs face every time the cat appeared and vanished in the door was adorable and yet a little upsetting. How she wished to have the cats ability of passing through closed doors. And I wished that too. The comfort of going in and out whenever she wanted proved to make for a demanding dog, that needed help to open and close the door. Countless times a day.
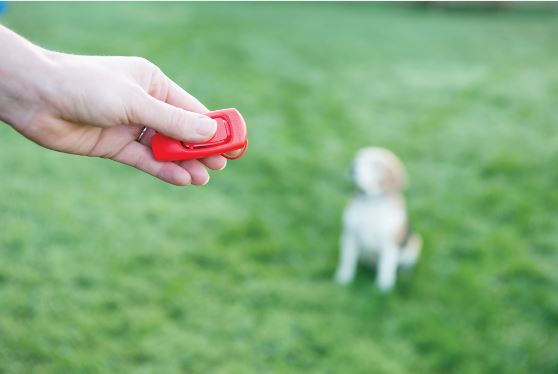
Something had to change. As she didn’t understand how the door worked, we would have to show her and help her a little. I had used clicker training with other dogs before, and it was not only fun for me but also for the dog. Somehow we had never started training our newcomer with it, but now I dug out the clicker from the ominous corner drawer in the kitchen that hardly ever gets opened these days and made a plan.
Teaching my dog to use the cat flap!
My dog got the concept in a matter of hours and used the door by herself on the next day. Now she is young and very intelligent, but older dogs should also be able to learn this trick in no more than a few days.
Dog Clicker Training for flap doors – let’s get started.
Four essential things you need:
A clicker
Small dog treats or favourite toys
A cat flap
A dog (any dog will do…)
Clicker Training
If you’ve never heard about clicker training, then I will try to quickly introduce you to it. In short, clicker training conditions the dog through positive reinforcement to repeat certain behaviours. There is no such thing as active punishment in this training – “punishment” is shown in a passive manner by ignoring the dog. Dogs thrive on attention, they mostly don’t mind if it’s positive or negative attention – they often might not even be able to tell them apart. As long as their favourite humans interacts with them, that’s great news. Nothing is worse for a dog than being ignored. This is very useful when it comes to training.
A click tells the dog “That’s exactly what I wanted you to do!”, then a treat follows. Click means treat – that is very important. Never click without it being followed by a treat – even if you click by accident. Click and treat go hand in hand. For most dogs, food treats work great, it is possible though to offer toys as a reward instead. Depending on the dog or the situation – I don’t take the clicker on walks for example, but I use the same method of “Do well and something good happens” to train my dog to, for example, stay sitting while I walk away. If she waits for my release command and comes running, we play with her toy. If she runs towards me without the command, we don’t play. That way she realises that, even though staying put might not be the most fun thing to do right now, but when that’s done, there are better things to come!
Step one
But let’s go back to the cat flap. If your dog already works with clickers, then great, skip this paragraph and read the next. For everyone who has never used a clicker with their dog, you will want to get your dog accustomed to the clicker, what it does, how it works and how he/she can actually “make it click” to get to that tasty treat.
I admit, I am very impatient and extremely lucky with my dog. I have done all this in fast forward mode, but generally it is best to take some time and be patient… Start with teaching your dog what the noise means. With your dog in the same room, click the Clicker. Your dog will most likely look up at the noise, but even if he doesn’t, make sure to click and immediately offer him a tasty, small treat.
Click again, give the treat.
Click again, give the treat. Repeat.
Click again – does your dog already look a little excited about the noise? Good, he is starting to realise that a treat follows the click every time he hears it.
This stage shouldn’t take long at all, and it’s soon time for the next step.
Step two
I thought about what skills the dog would need to open the door. To go through the door she would have to push it with her nose. So my next goal was to get her to touch the cat flap with her nose. The direct approach didn’t seem to be very successful, so I got a colourful Post-It note out of the cupboard. Maybe this isn’t necessary if you manage to make your dog touch the door with its nose. However, I wiggled the bright pink piece of paper in front of her nose and the first thing she does is give it a quick sniff. As soon as her nose touches the paper – CLICK! and treat.
Move a few steps away and show the paper, have the dog follow you, trying to touch the paper with its nose.
When the dog touches the paper reliably, you can now introduce a command such as “Touch” every time the dog does the action. Your dog will soon connect the motion of touching the paper with the word.
Keep this up until she touches the paper with her nose every time she sees the paper. Once this works well, phase three can begin – stick the Post-It on the flap door.
Step three
With the Post-It on the flap and the dog knowing the “touch” command, the next step was quite easy.
Ask your dog to touch the paper. Click when they do. Your dog might not push the door yet, so start to encourage him to touch it harder. Stop clicking if the nose only just touches it, instead click only when the dog put enough pressure on the door and the door slightly wiggles.
Does the door wiggle a little every time now? Great, then take away the click again until your dog starts to push the door harder.
This is a gradual process and encourages the dog to think about what you want it to do. When he figures it out himself, he learns a lot faster. Teach him gradually to not just make the door wiggle but to push so hard, that he has to stick his head through – at this point he will usually have realised that he can walk through as the door actually reveals what’s behind, and eventually you will be able to gradually change the slight door touching to actually walking through. Like magic!
Done!
My dog was finally able to make her way in and out of the house whenever she wanted – and we could finally take off the second layer of socks.