Exercising doesn’t always come easily — in fact, lack of motivation is one of the most common reasons people don’t participate in physical activity. But having a partner to work out with can make all the difference, especially when that partner brings a positive attitude and a wagging tail to the table. Here’s why dogs make great workout buddies, and how you can start exercising with your pup to give you both a healthier leash on life.
5 Reasons why dogs make great workout buddies
There are several reasons to exercise, and they’re as true for you as they are for your dog. Better physical health, maintaining a healthy weight, and increased mental well-being are just a few benefits that physical activity offers for humans and canines alike. Here’s how you and your dog can keep each other accountable and motivated throughout your healthy lifestyle journey.
1. Dogs are energetic
When’s the last time you saw a human jump for joy at the sight of their running shoes? In contrast, a dog’s reaction to seeing their leash is usually a mixture of unbridled excitement and elation. Depending on the dog, this energy can last anywhere from several minutes to the duration of your workout together, lending you the support and motivation you need to get going.
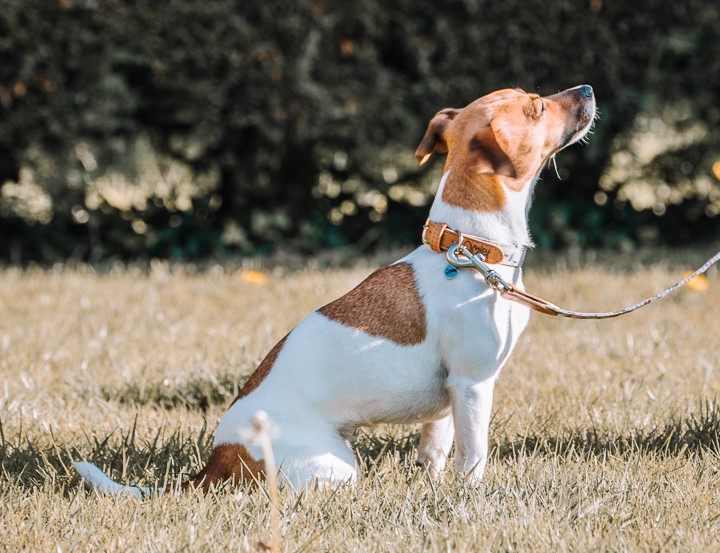
2. Pups set the pace
Dogs are very good at setting a steady pace. Once they find their stride, you can count on your pup to help set the pace for your workout. Match your cadence to canine’s, and find a familiar rhythm in the wag of their tail or the pattern of their panting. This natural soundtrack to your workout is soothing and motivating, and gives you a focal point if you start to lose steam.
3. Safety in numbers
Running or walking alone isn’t just dull, it can be dangerous. Depending on when and where you do your workouts, there can be concerns of various types. The presence of your pup can provide peace of mind, as their ears and noses are much more sensitive than a human’s. Your dog will be able to sense trouble before you do, and will help deter unwanted encounters.
4. Their schedule’s always open
No more waiting for schedules to align with your human workout buddy — your dog is always available. Since your dog is part of your household, your schedules are already in sync with each other, making exercising together even easier. Dogs are also habit-forming animals, so by setting a schedule to workout with them, they’ll come to expect it. Keep their leash in its designated spot, and try to workout at the same time each day. You’ll soon find your pup gravitating toward their leash as your regular exercise time nears to help keep you accountable.
5. Good vibes only
You’ll never hear a complaint or criticism from your canine, only quiet companionship and confidence. The positivity from your pup is often one of the greatest motivators you can find. No more listening to a personal trainer yell instructions to you — let your dog do the barking.
Dog breeds that make the best workout buddies
Exercise benefits all breeds of dogs, but depending on your level of intensity, you may need to modify your workout to your dog’s ability. For example, dogs with short legs like Dachshunds or Corgis won’t be able to run an entire 5k with you, but they can work up to walking one. Similarly, dogs with “smooshed” faces like Pugs, Bulldogs, or Boston Terriers have restricted airways and shouldn’t be pushed to the point of exertion. Puppies and senior dogs also may not be able to keep the pace with you over long distances.
If you’re looking to adopt a dog and want to incorporate them into your active lifestyle, consider these breeds:
High energy, athletic dog breeds
- Australian Shepherds
- Border Collies
- Boxers*
- Dalmatians
- Doberman Pinschers
- English Springer Spaniels
- German Shepherds
- German Shorthair Pointers
- Greyhounds
- Jack Russell Terriers
- Labrador Retrievers
- Siberian Huskies
- Vizslas
- Weimaraners
*Boxers are a brachycephalic breed, which means they are “snub nosed” and more prone to respiratory distress.
Other breeds may be up to the task of exercising with you, including mixed or smaller breeds. The most important thing is that your pup has received a clean bill of health from your veterinarian, and that you modify workouts as needed to adjust to their ability.
Exercises to do with your dog
So, you’ve decided to be disciplined with your dog and commit to working out — but what disciplines can dogs join you in? The most common exercises that owners take their dogs along for include running and walking, but there are some other activities you can include your dog in. Consider these dog-friendly workout ideas:
- Hiking
- Swimming*
- Kayaking, rowing, or canoeing*
- Yoga
- Cycling
- Dance
*Make sure your dog is fitted with an approved life jacket during these activities.
If you’re heading outside for a workout, choose a time of day where the temperature is moderate. Never exercise outside with your dog in the middle of the day during the hotter months — this can cause heat exhaustion or even heat stroke in dogs, especially breeds with heavy coats. So what temperature is too hot for your dog? When the real-feel temperature reaches 85°F or higher, it’s best to stick to indoor activities. And be sure to check the pavement with the back of your hand before you set out with your dog — if it’s too hot for your hand, it’s too hot for their paws.
Take plenty of water and offer your dog small sips every 15-20 minutes during activity. Plan their mealtimes at least 2 hours before exercising, and wait at least an hour after a workout to feed them to prevent digestive upset. Be sure to take cleanup bags with you — what goes in, must come out, and exercise often stimulates the intestines.
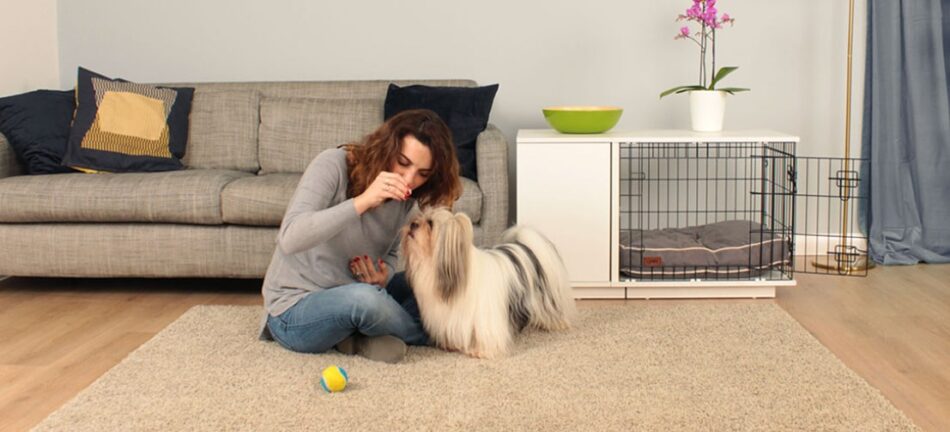
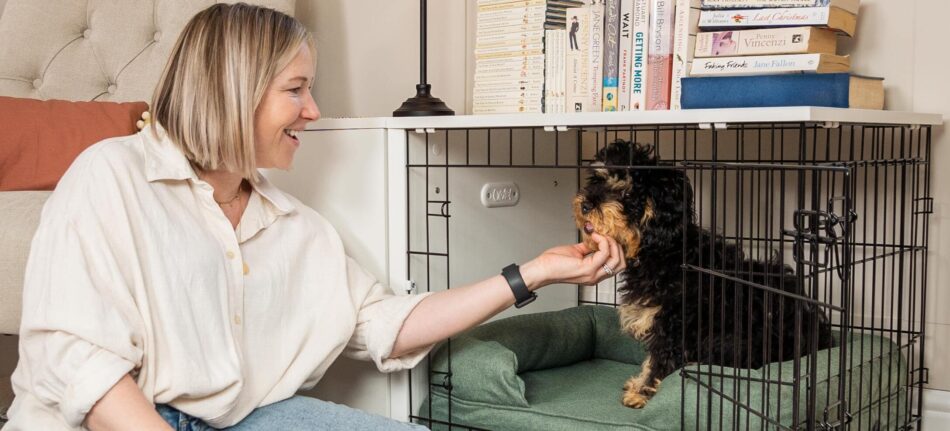
Omlet and your dogs
There’s nothing quite as sweet as that post-workout nap. Give your pup a comfy dog bed to sink into, or a supportive dog crate to retreat to after their cool down. Offer them nourishment and hydration in stylish dog bowls to help them feel their best, so they’re always ready for adventure. With Omlet, you and your dog can enjoy a lifetime of companionship together — both at home and on the go.


This entry was posted in Dogs
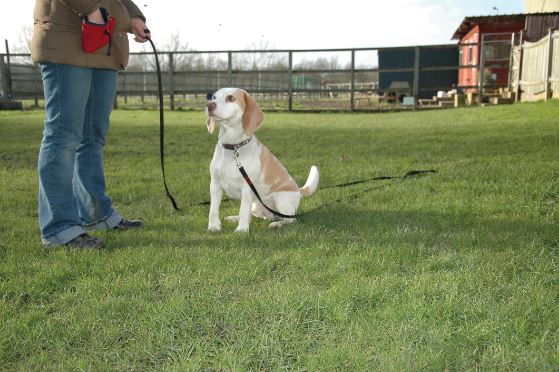
 A dog who has been taught positive behaviour will be your best friend – fun, affectionate and reliable. It’s straightforward teaching your dog this canine version of positive thinking, but it won’t happen unless you lead the way.
There are many ways of teaching a dog the rights and wrongs of living in the human world, and that extends to how they interact with other dogs and the world around them. In this article, we reveal the five rules of thumb for all dog owners – whether you’re training an adult dog or a puppy.
Encouraging Positive Behaviour in Puppies
Puppies recognise when we’re pleased or displeased. It’s all part of their instincts, and in the wild this instinct helped their wolf ancestors find their place in the pack very quickly. Learning their place in the big wide world is all about positive reinforcement.
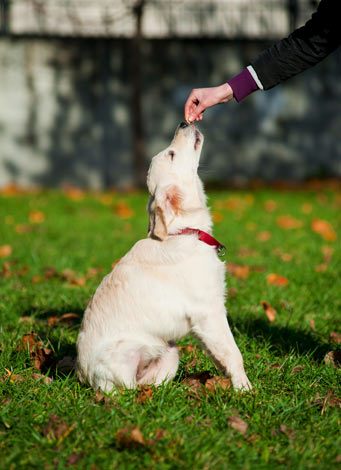
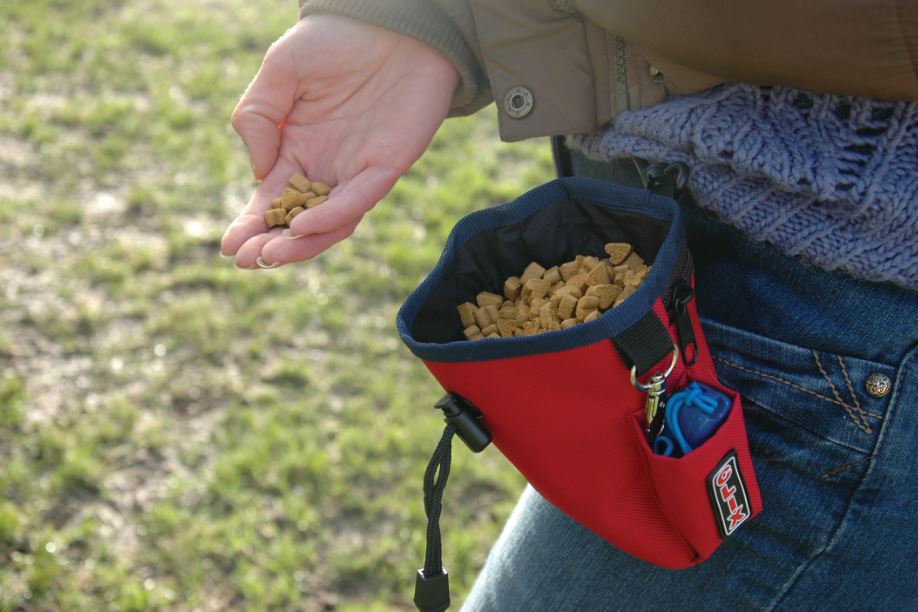
1. Puppy Treats. Dogs of all ages love food and will put lots of effort into doing what you want them to do as long a there’s a yummy treat at the end of it! This means treat-based training can be used for everything from toilet training to basic obedience training and that all-important early socialisation. The message here is simple and timeless – do this right, and you’ll get a treat!
 2. Affection. This is arguably even better than a food treat! Bonding with a puppy involves physical contact in the form of belly-rubs, back stroking and lots of gentle words of affection and encouragement.
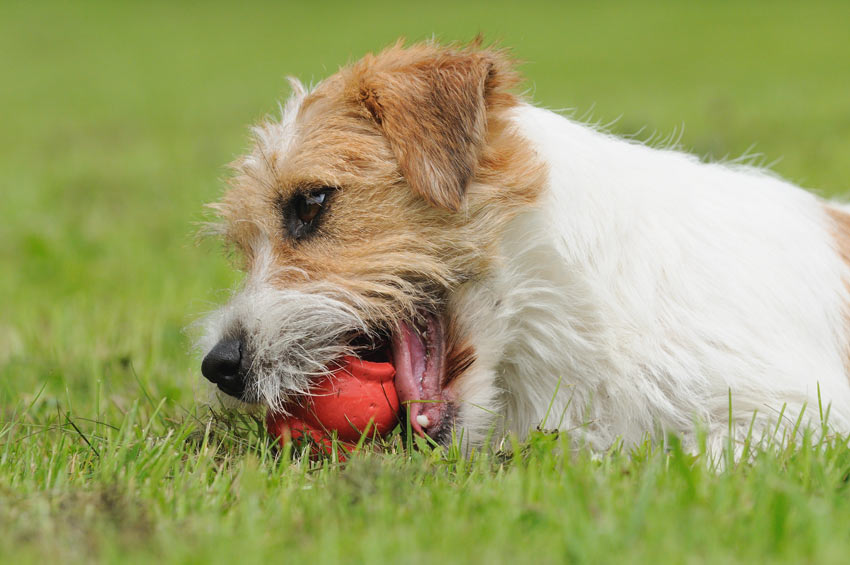
3. Fun and games. Tug-of-war, fetch and simply running around the garden with you are games that puppies love. What’s more, they strengthen the bond and love between you and your pet, and that’s the perfect groundwork for training and encouraging positive behaviour.
 4. A trip to a favourite place. This is a great treat for dogs, and can be as simple as a trip to the park, or perhaps to a favourite street for an on-lead walk, or maybe a shop that sells some of those yummy treats! If this is being done as a reward for good behaviour, make sure your puppy knows it by telling them what a good boy/girl they are as you put the lead on or get into the car!
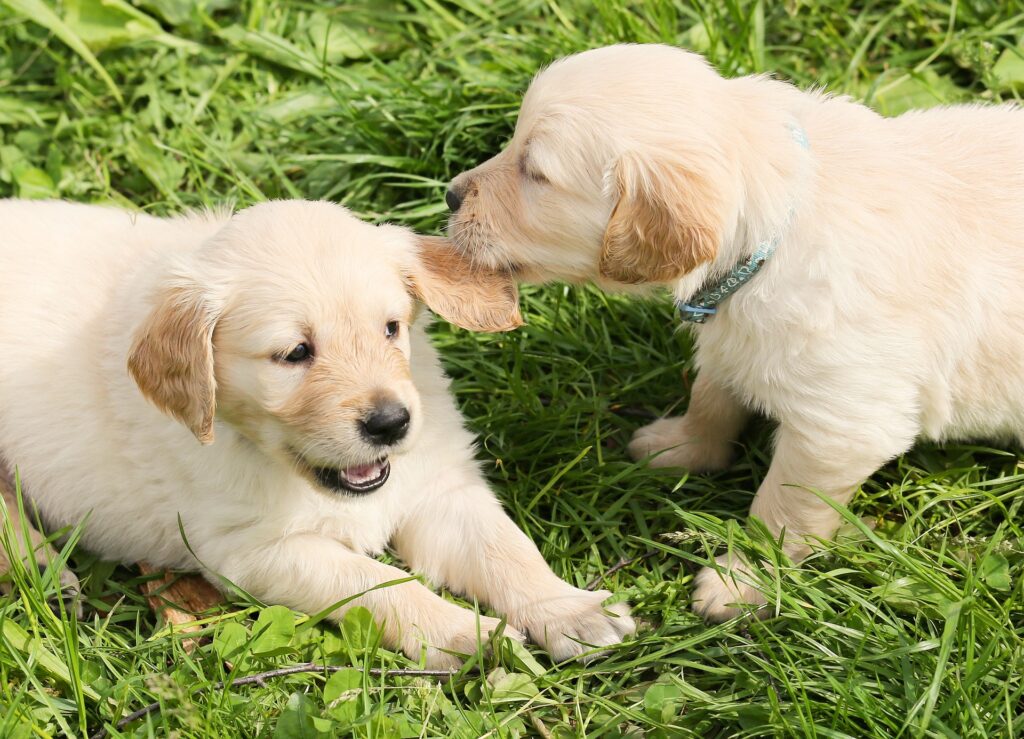
5. Puppy playdates. Starting these early is a great way to socialise your puppy, and that provides the basis for all the positive behaviour training. Young dogs love meeting each other – it’s not going to be a quiet morning out with your furry friend, but it’s one that will give him or her essential social skills.
Encouraging Positive Behaviour in Adult Dogs
The basics are simple. Positive reinforcement rewards a dog for good behaviour and ignores, rather than punishes, undesirable behaviour. Punishment will only lead to confusion and fear in your dog, reducing your chances of achieving the full benefits of positive-behaviour training.
Here are the five ways to make everything go smoothly, no matter which dog breed you have.
 1. Keep it simple. One-word commands are better than complex ones. We’re talking here about sit, come, sat, etc. Save the long-winded exchanges for praise and affection! A training session based on simple commands and treats is a great start for encouraging positive behaviour. Which brings us to…
2. Treats. Just like puppies, adult dogs will be well and truly ‘reinforced’ if treats are involved. Some breeds are more food-obsessed than others, but all types of dog will quickly learn that good behaviour results – at least in the early days of training – in a yummy treat.
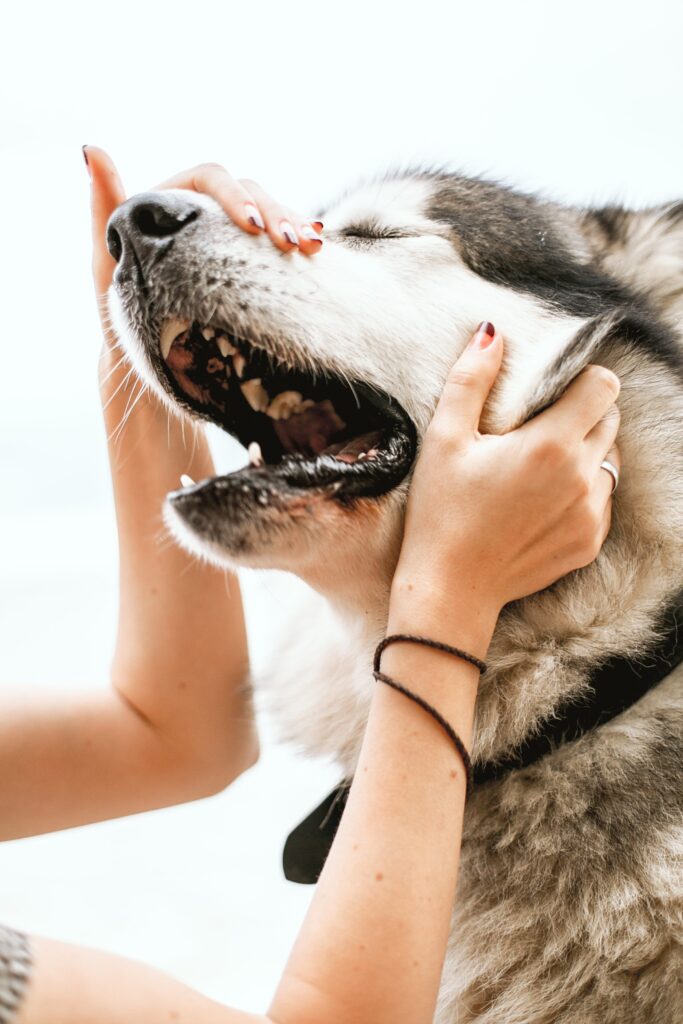 3. Quality time. Dogs are social animals by instinct, and they will thrive in human company. Once you and your pet are the best of friends, the positive behaviour training will be much easier. If there’s any nervousness or standoffishness in your dog, they will be less able to take on board the things you’re trying to teach them. So, keep up the contact, and play with them every day.
4. Make it fun. A long session of ‘sit, lie down, stay, come’, etc. will soon become boring for a dog. A short session of command-based training followed by a bit of fun, however, will make your dog look forward to the sessions every time. After five or ten minutes (depending on your dog’s stamina), round off the proceedings with a game or a walk. The dog will soon realise that “If I do this tricky bit, I get that fun bit afterwards!” It’s a trick that works just as well with young children – “Finish your homework, and then we’ll go out on the bikes!”, that kind of thing.
5. Get everyone involved. Once your dog has grasped some of the basics, other members of the family, or friends, can reinforce the good behaviour by running through some of the training with your dog. Your pet will then learn that positive behaviour is part of their general lives and applies in all situations with all people.
This latter point is the ‘quantum leap’ for a dog – the idea that positive behaviour extends beyond their immediate owner to the big wide world around them. Getting them to this point takes time, there’s no doubt about that, and some breeds are a lot easier to train than others. However, once the work has paid off, you’ll have a doggy best friend you can be truly proud of!
This entry was posted in Dogs
Teaching your dog tricks is not that difficult. Your pet is very intelligent and in fact, training a dog is much easier than training other animals! We know that sometimes it’s hard to find inspiration and ideas, so we’ve put together a list of 5 must-do tricks to teach your dog!
Dogs are very attentive to their environment, they are able to learn several commands and quickly assimilate what you tell them. However, you will need to be patient and rely on rewards and encouragement to get results. Never spend more than 10 minutes on an exercise per day and make sure you are in a good mood to praise your dog. Frustration must be put aside or your dog will feel it and may perform less well.
Do you know that the tricks and exercises taught to your dog will stimulate him physically and mentally? They also allow you to enrich the bonds that unite you.
This list is far from exhaustive and we assume that your dog already knows “sit”, “down” and “stay”.
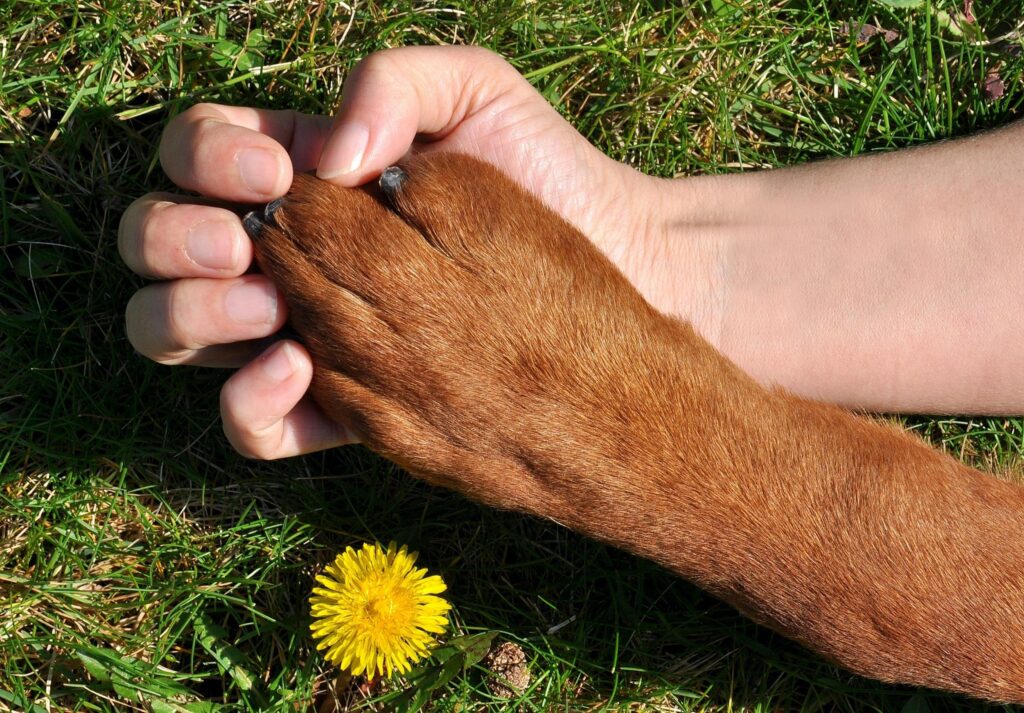
1- Pawing or shaking hands
As you may have noticed, dogs sometimes instantly raise their paws when they ask for food. So this trick is not fundamentally complicated to teach your dog. You just have to find the right word, the right signal to give your dog to obey.
Omlet’s tip: Keep the treat in your hand, show the treat to your dog and tell him to wait. Slowly lower your hand and when your dog lifts his paw, make the sound you want to associate with the command. “Shake”/”Paw” is an easy sound for your pet to remember, so use short words. Add emphasis to the word and enthusiasm. Once the dog has the treat in his mouth, congratulate him with a pat.
Gradually, you won’t need to lower your hand too much. Each time you repeat this command, make sure you raise your hand a little higher so that your dog’s paw is raised to chest level. Repeat with the same paw.
Once your dog has mastered this command, you can train him to lift the second paw. However, the sound/word should be different from the previous one. Use the word “other” for example.
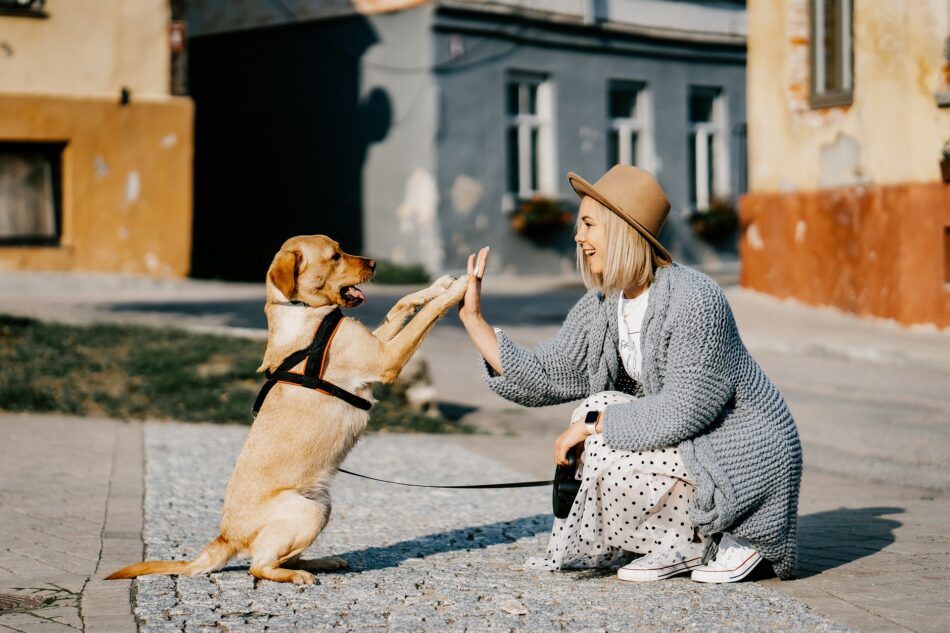
Afterwards, you can easily teach him the “high five” command. You will have to show him your palm and encourage your dog to go even higher with his paw. Once your dog does this, reward him.
2- Rolling over
This is a trick that many owners want to teach their dog, but many don’t know how.
Omlet’s tip: First, you get your dog to “lie down”. Place a treat in your hand and let your dog smell the treat without giving it to him. The goal during this exercise is that your dog should not get up. If it does, don’t get upset and try again.
Use your hand to guide your dog. You must make the movement and the trajectory that you want your pet to follow. Use your hand to turn your dog’s head and make a backward movement. As your dog tries to turn his head to grab the treat, he will end up rolling. Repeat the exercise several times, but don’t spend more than 15 minutes doing it. You can come back to the exercise later in the day.
3- Speak
This command can be easy to learn for expressive dogs but a little more complicated for calm dogs.
Omlet’s tip: Excite your dog a little with your voice. Ask him to sit and put a treat in your hand. Wave your hand but don’t give him the treat. Repeat the word/command you want him to learn several times, perhaps “bark” or “speak”. Wait for him to bark or whine. After a few seconds give him the treat and praise him. If you want your dog to calm down, repeat the word “quiet” or “enough” and walk away.
Never encourage or praise your dog when he barks out the window or at people. Barking can be frightening to some people.
4- Dance
Good news, your dog can also learn to dance! Maybe he can even dance better than you…
However, this trick is easier to learn for small dogs. Larger dogs have a harder time standing on their two hind legs. This trick is also not recommended for dogs with back problems.
Omlet’s Tip: Ask your dog to sit. Put a treat in your hand and put your hand over your dog’s muzzle slightly backwards. Your goal is to get your dog to sit on his hind two legs, and he will only do so if he sees no other way to get his treat. Once both front legs are up, praise and encourage your dog. Repeat this trick several times until he can quickly stand on both paws.
Once he does, you can move on to the next step. When your dog is on his two feet, hold the treat and move your hand in a small circle over his head. After a few seconds your dog should be able to twirl or at least move both paws on the ground. As you do the movement, remember to say the word you want to associate with the command. In this case that word could be “dance”. Once your dog has taken several small steps, give him the treat and praise him.
5- Playing dead
This is a challenging trick! It’s a great way to impress those around you, although it is not so easy to teach your dog, especially if he tends to be dynamic. However, nothing is impossible, you will just need more patience.
Omlet’s tip: As with the “roll over” command, have your pet lie down. Take a treat in your hand and put it over his head. Once your dog turns around, stop the process by asking your dog to stop moving. Repeat this process several times until your dog understands that it should not move. It is very important to say the word you want to associate with the command. For this trick it could be “Bang”.
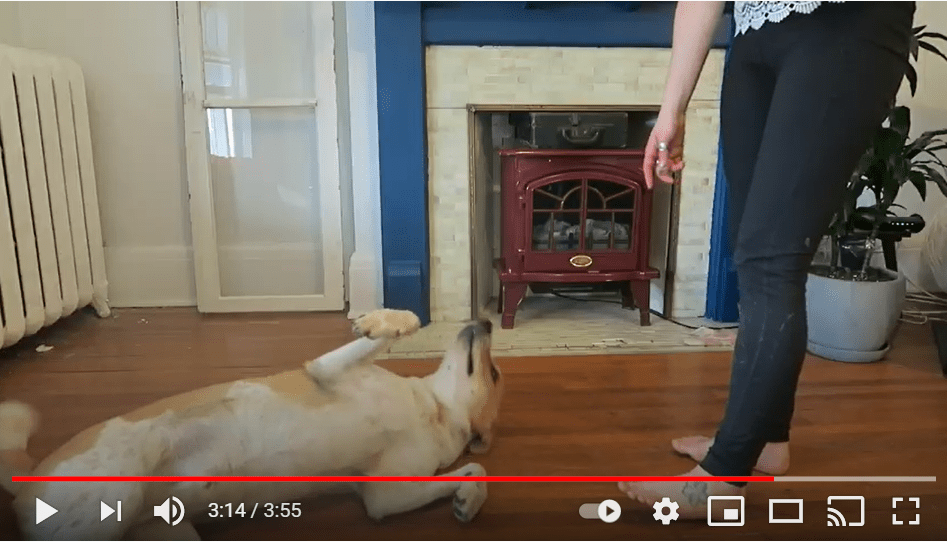
This trick is not easy to describe, a video is sometimes worth a thousand words. We advise you to watch this video to teach your dog to play dead.
No matter what tricks you teach your dog, patience is the key and the only way to succeed and achieve your goals. Never forget to congratulate and encourage your pet. Finally, never force him. If he doesn’t want to learn a command or doesn’t understand it, don’t be obstinate. If you are afraid of doing the wrong thing, many resources are available on Youtube. Don’t hesitate to watch several videos to find the best technique for your dog.
Tag us on social media if you manage to do one of these tricks with your dog. We would love to share your pet’s achievements.
Tag us on Instagram omlet_uk or send us your video to the following address: blog@omlet.co.uk
This entry was posted in Dogs
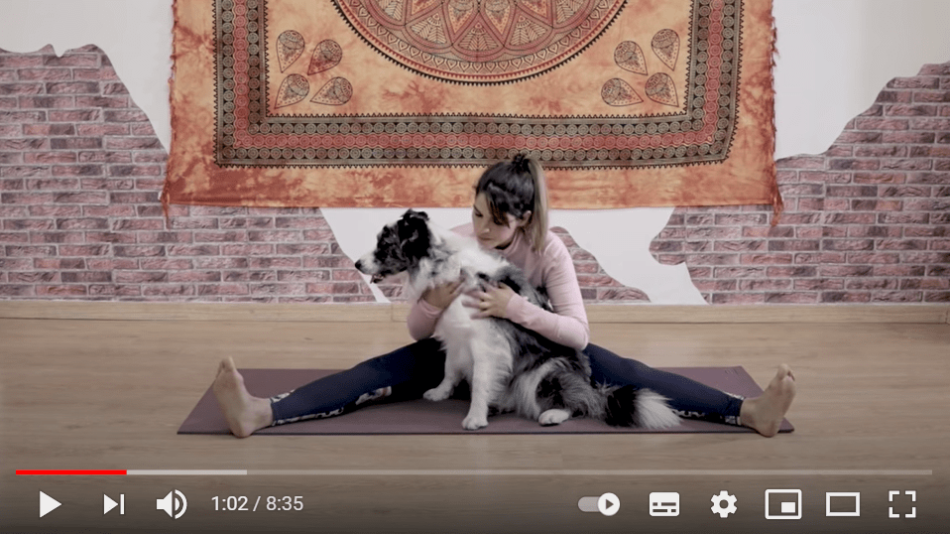
Taking your dog on a long walk is one way to help you both relax, but sometimes, it isn’t always possible to get outside, which means finding other ways to stimulate your furry friend from the comfort of home. Introducing doga…
What is Doga and what do you need?
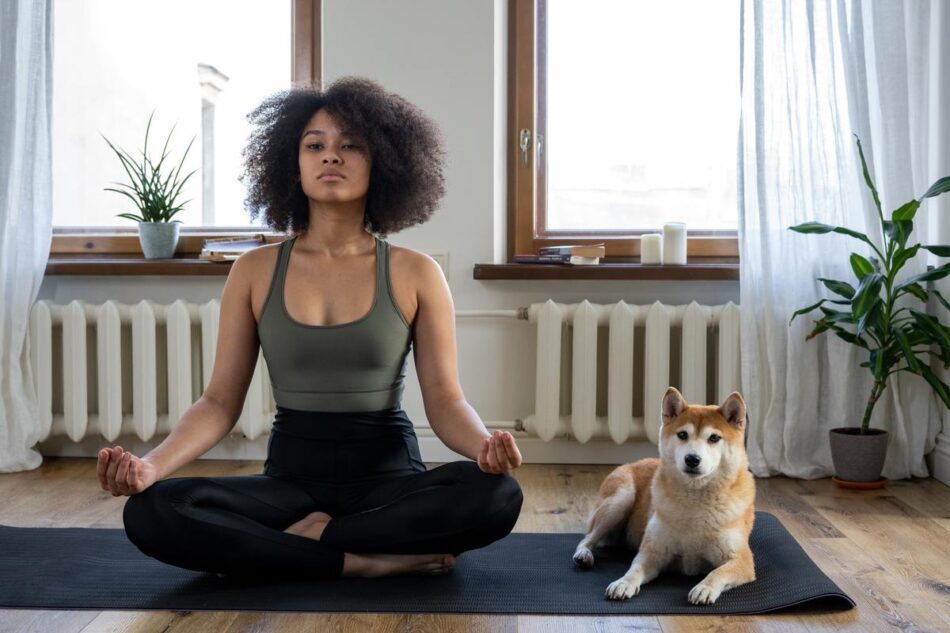
You’ve probably already heard of yoga, but what about doga? Born in the United States in the early 2000s, dog yoga, AKA doga has quickly spread across the globe. This activity is an opportunity to spend some quality bonding time with your dog and keep fido entertained.
To begin your doga journey, you’ll simply need a yoga mat and a comfortable outfit! This sport can be practised outside, but if the weather isn’t looking great, it’s just as fun to have a go indoors, too! If you do choose to carry out your session inside, make sure to stick to a room your dog feels comfortable in and is familiar with. Having a routine for your dog gives your pet confidence, and they’ll soon associate the yoga mat and the room with spending a moment of relaxation just with you.
The benefits of doga
Doga largely incorporates the benefits of yoga: relaxation, concentration, meditation, and refocusing on yourself. And when done with your dog, it brings new advantages.
Make your dog’s day more zen
Our dogs know when we’re stressed, and picking up on these behaviours in turn affects their mood, too. But, by taking time to breathe and relax with a spot of doga, both you and fido can destress.
There’s no specific doga rulebook, which means tailoring your sessions to meet you and your dog’s needs. If during the earlier sessions, your pup would prefer to stay by your side without joining in, don’t force them. Remember – it’s supposed to be fun for you both.
Learn to speak dog
Well…kind of! Guiding your dog throughout the doga session means taking the lead and communicating to your dog what you would like them to do, just as you would teaching them a new trick. Repetition is the key to a successful session with your dog and adding this new activity to your schedule will be an opportunity for you to enjoy your dog’s company while strengthening how you interact with one another.
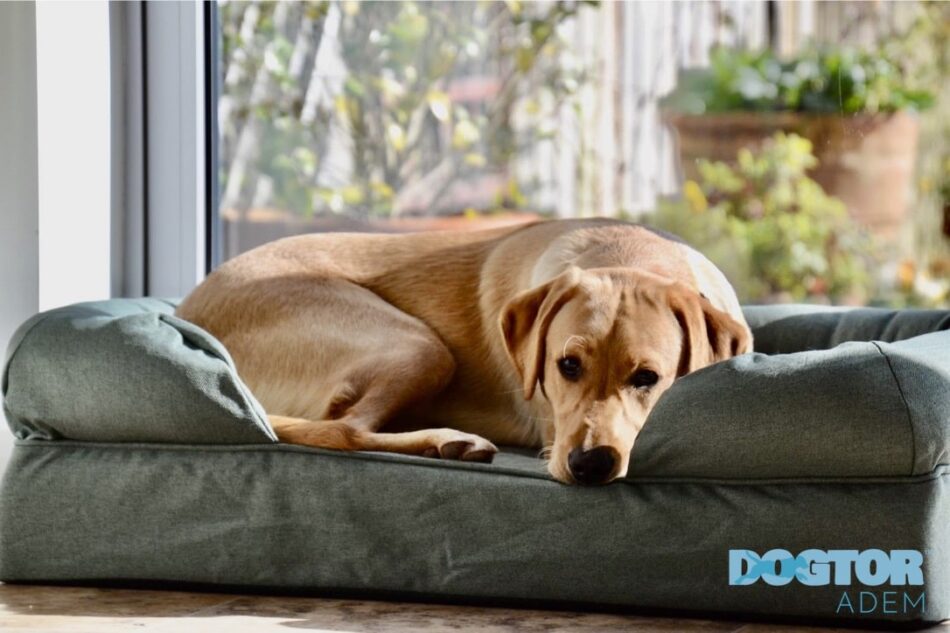
Improves sleep
Dogs love to sleep and we know just how important it is for them to get plenty of shuteye. If your dog is struggling to settle into a sleeping pattern, a physically and mentally stimulating activity like doga is one way to help them out. And don’t forget after a workout session to treat fido to a dreamy Omlet Dog bed to upgrade their sleep to another level!
Can my dog do doga?
Doga is made for all types of dogs – young, old, large, and small! Doga can be especially useful for older dogs or dogs that suffer from arthritis. But please note, if you have any concerns about your dog’s condition before beginning doga, consult your vet. Stretching, if done correctly, and massages can have real positive impacts on your dog’s body.
How to practice doga
To get started, take a look at our top book recommendations and videos for the best ways to practice doga.
It’s essential to spend time with your dog so that they can develop to their full potential. Just doing one doga session alone won’t suddenly improve your relationship with your pet pooch, but once you establish this activity as a routine not only for you but also for your pet, you may well be surprised at the benefits you can derive from it.
In addition to this fun activity, don’t forget that the well-being of your dog depends on a balanced diet, daily walks and special attention to their needs.
This entry was posted in Dogs
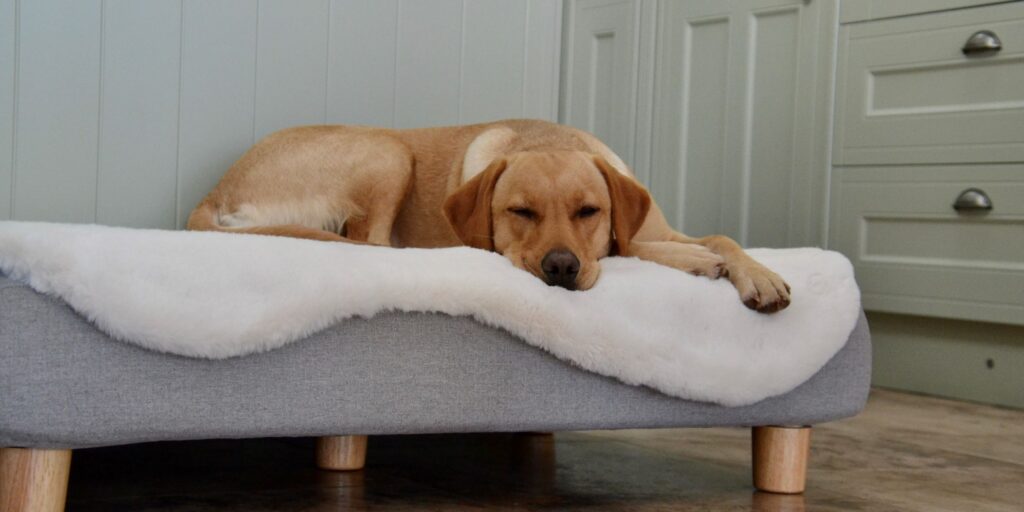
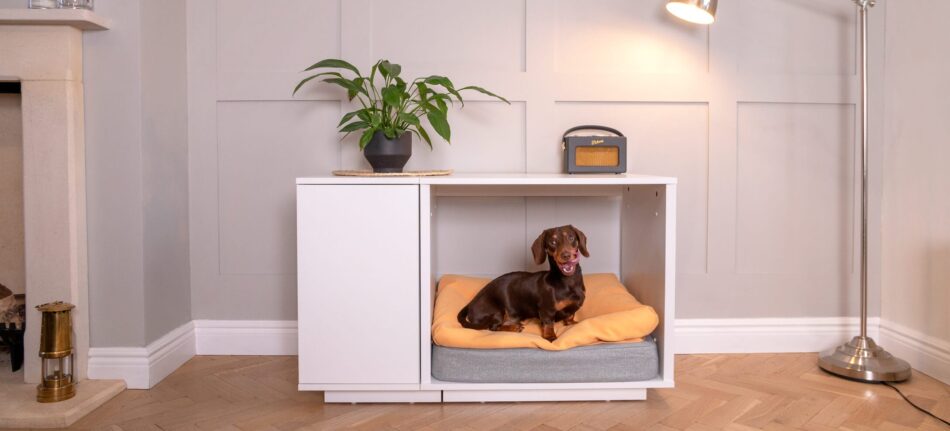
Dogtor Adem, founder and owner of Dog-Ease, is a dog behaviourist and trainer with over 15 years experience working with dog owners and their canine best friends. In this blog post, Adem talks you through everything you need to know about dog hygiene, and shares his thoughts on the new, easy clean Topology dog bed from Omlet.
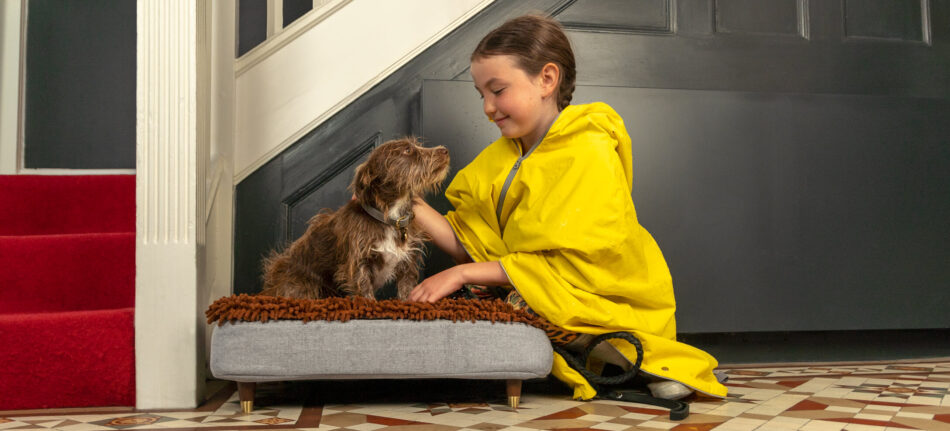
With the nights drawing in and the wetter weather becoming more frequent it’s always a struggle to keep the mess out of the house and the dog beds clean and smelling fresh (aux de dog, anyone?) So, when Omlet asked me to review their new Topology dog bed I couldn’t help but get a little excited! The bed features an extremely comfy memory foam mattress that sits raised from the floor on stylish legs (that you can choose to match your style of décor!), has a fully removable and washable cover, and can be ‘topped’ with several styles of zip off top covers that make it easy to keep clean and hygienic.
Firstly, let’s talk about dog hygiene and why it’s important.
Our dogs naturally try to keep themselves clean through the act of licking themselves. To help to keep themselves clean they also try to keep their beds clean and comfortable by ‘clearing the ground’ through digging and circling on their bed areas. In years gone by, when dogs were less domesticated, this was an important act and allowed them to clean and clear their bed area of uncomfortable vegetation, parasites and small creatures that could cause them harm. In fact, our dog’s wild ancestors such as wolves and wild dogs still very much display this type of behaviour. Clearly, in our homes, our dogs do not need to remove vegetation or small creatures from their bed areas before residing in them, however their dog beds if not washed can harbour other harmful organisms – bacteria and fungi. Studies have found bacteria and fungi such as MRSA, Salmonella, ringworm and listeria, as well as fecal matter, on our beloved dogs’ beds. Pollen can also be brought in, as well as general dirt and grime, which can aggravate allergies and skin conditions that both we and our dogs may have. It is also important to remember that bacteria and infectious diseases can be passed from animals to humans (these are known as zoonotic diseases). As a result, it is important for both our dog’s health and our own health that we regularly clean our dog’s body and bed area so that they are less likely to be carrying any harmful organisms that could make them or us unwell.
So, how can we keep our dog’s clean?
The key to keeping your dog clean is to regularly groom your dog. Whether you choose to do this yourself or perhaps book a professional to carry this out (or choose to combine both approaches!) It is a good idea to ensure that your dog is confident and finds being groomed and handled in this way a positive experience. This will not only make it easier to fully groom and fully clean your dog, it will also help to ensure that your dog enjoys the experience and does not become stressed or fearful. If your dog has never been groomed before, or perhaps already shows an aversion to be groomed, take your training for this slowly. Start with short sessions that simply introduce your dog to the type of items they might encounter or need to be touched with when being groomed. Think brushes, nail clippers, towels, and so on. It is a good idea to just allow your dog to observe these to begin with whilst you praise positive and confident behaviour around these objects with a tasty treat. Once your dog is confident around the chosen grooming objects you can then progress on to bringing them closer and perhaps interacting with and touching your dog with the grooming tools. Again, don’t forget to reward positive and confident behaviour as you do so. Continue with this approach slowly, building up your dog’s understanding and confidence, until you are able to fully handle and groom your dog as is needed. If your chosen method of cleaning your dog is a grooming parlour, you might also want to visit this location a few times prior to leaving your dog there. Remember to take your introduction of these items and to this new experience at your dog’s pace and don’t be afraid to go back a step if needed.
What actions can we teach to help make cleaning our dog easier?
In order to help you to groom and handle your dog with ease there are a few key actions I like to help owners to teach their dogs and would recommend that you structure into your training schedule.
The first is ‘stand’. Although at first glance this might seem like a bit of a boring ‘action’ (they’re just standing still, right?!), this is actually a very useful command. If your dog understands this command they will be able to stand still whilst you perhaps wipe their paws and legs when coming in from a wet or muddy walk, when needing to check for grass seeds or sticky fauna that might have attached itself to their coat whilst walking, or when brushing their body – particularly their chest and stomach area. It can also be useful to you or a groomer when washing your dog, allowing you or your groomer to clean all parts of their body with ease.
The second command is ‘flat’. This is where the dog lays flat on their side. Again, this can help with general grooming of their coat and, in particular, being able to easily clean ears and eyes as well as enabling easy access to clean your dog’s paws and clip their nails.
The third command I would recommend is ‘twist’. This is where you teach a twist or spin command and I like to use this whilst my dogs are standing on the front or back door mat after a walk so that effectively they are wiping their own feet! This action can also be a fun one for children to practice alongside their parents to help keep the family dog clean as well as be an entertaining party trick!
How can we keep our dog’s bed clean?
If we are keeping our dog’s nice and clean it makes sense to also keep their beds clean – if you think about it, you wouldn’t shower to then get into a bed that hadn’t been washed for months! The most obvious way to keep our dog’s bed clean is to wash their bed. This is easier said than done with many beds on the market being too large for the average washing machine or not having removal covers that can be washed. At minimum, loose debris needs to be regularly removed from the bed and the bed should then be disinfected with a suitable animal friendly cleaner. Ventilation is also key to ensuring beds stay clean and hygienic as airflow ensures that any moist areas are able to dry quicker and that bacteria is limited in its ability to grow (dark, warm and moist areas encourage bacteria growth). Hanging your dog’s bed out in the sun to dry can also assist with elimination of any remaining bacteria after washing and of course after cleaning your dog’s bed it is also important to ensure it is fully dry before allowing them to use it again.
What if my dog doesn’t seem to like to sleep on their own bed?
In order to minimise the built up of dirt, fur and bacteria in places in your home that you may not want them, it’s important that we make our dog’s designated bed area as inviting as possible so that this is the area they choose to reside in. Think about the type of bed your dog prefers. Some breeds like to stretch out whilst others like to curl up. Some prefer a comfortable flat surface, whilst others prefer to cuddle into sides that make them feel cosy or more secure. The more inviting and comfortable your dog’s bed is, the more likely your dog is going to want to reside and sleep on it. It is good practice to observe how your dog likes to reside so that you can buy a bed for their individual preference. This is the first step to encouraging your dog to reside on their designated bed area.
If you have ensured that your dog’s bed is as inviting as possible and your dog still does not seem to want to sleep on it, think about the location of your dog’s bed. Is it in a draft free area? Is it away from direct sunlight that could make them hot or is perhaps uncomfortable on their eyes? If so, the next step is to practice making their bed area a safe and fun place to reside. You can teach the action ‘go to bed’, offering a tasty reward for their compliance. You can also offer food items such as chews and food dispensing toys on their bed, encouraging them to stay in this area and making it fun to do so.
It is also important to ensure that your dog is ready to settle and lay on their bed area by ensuring they have had enough mental and physical stimulation across the day to tire them and help them to then relax. This last point can also help with addressing the behaviour issue ‘separation anxiety’, which may be another reason why your dog might prefer to perhaps sit physically close to you rather than on their bed. If you suspect your dog has separation anxiety it is advisable to seek help from a behaviourist to address this issue so that your dog is able to lead a confident and stress-free life.
What does this mean we should ideally be looking for in a dog bed?
Given the above, my recommended ‘wish list’ for a bed would be that
- It is easy to clean with removable covers
- It is easy to clean around and under the bed, and ideally raised off of the floor to allow ventilation
- It suits your dog’s individual preferences i.e. is big enough to lay flat on, or perhaps has comfy bolster sides if your dog likes to snuggle into these.
The Omlet Topology ticks all these boxes, plus looks super stylish and can be styled to fit a range of interiors. The zip off top also makes extremely light work of regularly cleaning the bed, and if you purchase more than one topper your dog never needs to be without a clean place to reside! After trying out the Topology bed for a few weeks now, I’m about to purchase another, my dogs love this bed and so do I!
Dogtor™ Adem
Dog Behaviourist and Trainer
Owner of Dog-ease
www.dog-ease.co.uk
This entry was posted in Dogs
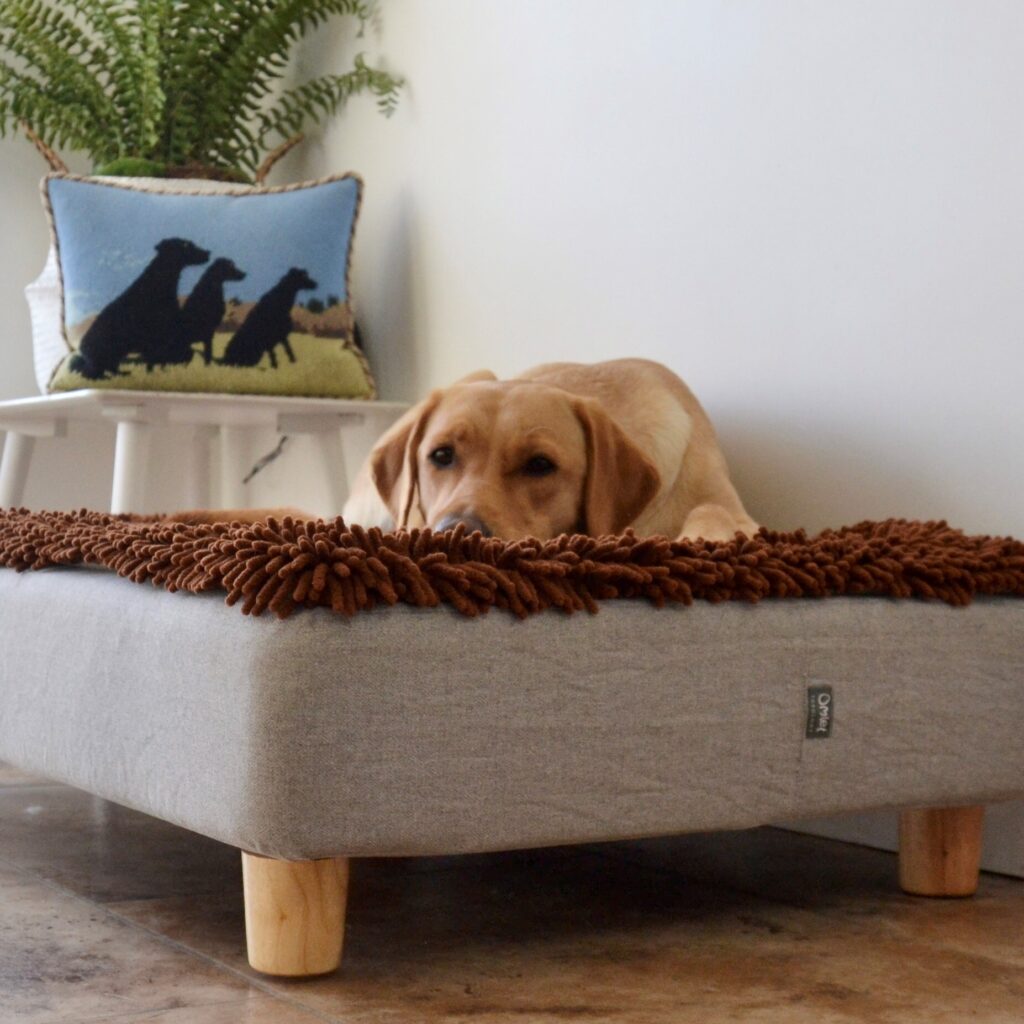
Dogtor Adem, founder and owner of Dog-Ease, is a dog behaviourist and trainer with over 15 years experience working with dog owners and their canine best friends. In this blog post, Adem shows you how to teach your dog the “go to bed” command.
Using their fabulous new Bolster Bed, I have teamed up with Omlet to guide you through the basics of how to teach your dog the ‘Go to Bed’ command. ‘Go to Bed’ is a useful exercise for dog owners and can be used in a variety of situations, from being able to answer the front door knowing your dog is safely on their bed, away from external risks, or to allow guests to enter the home, to encouraging your dog to settle on a blanket or bed whilst visiting family, friends or even the local coffee shop!
Furthermore, whilst teaching this command you can also start to teach the basics of the commands ‘sit’, ‘heel’, ‘down’ and ‘leave’. All in all, it’s a great all round training exercise that can help you to be able to communicate with your dog effectively as well as helping our dogs to understand a range of commands that can be useful in our everyday lives in a variety of situations.
What you will need
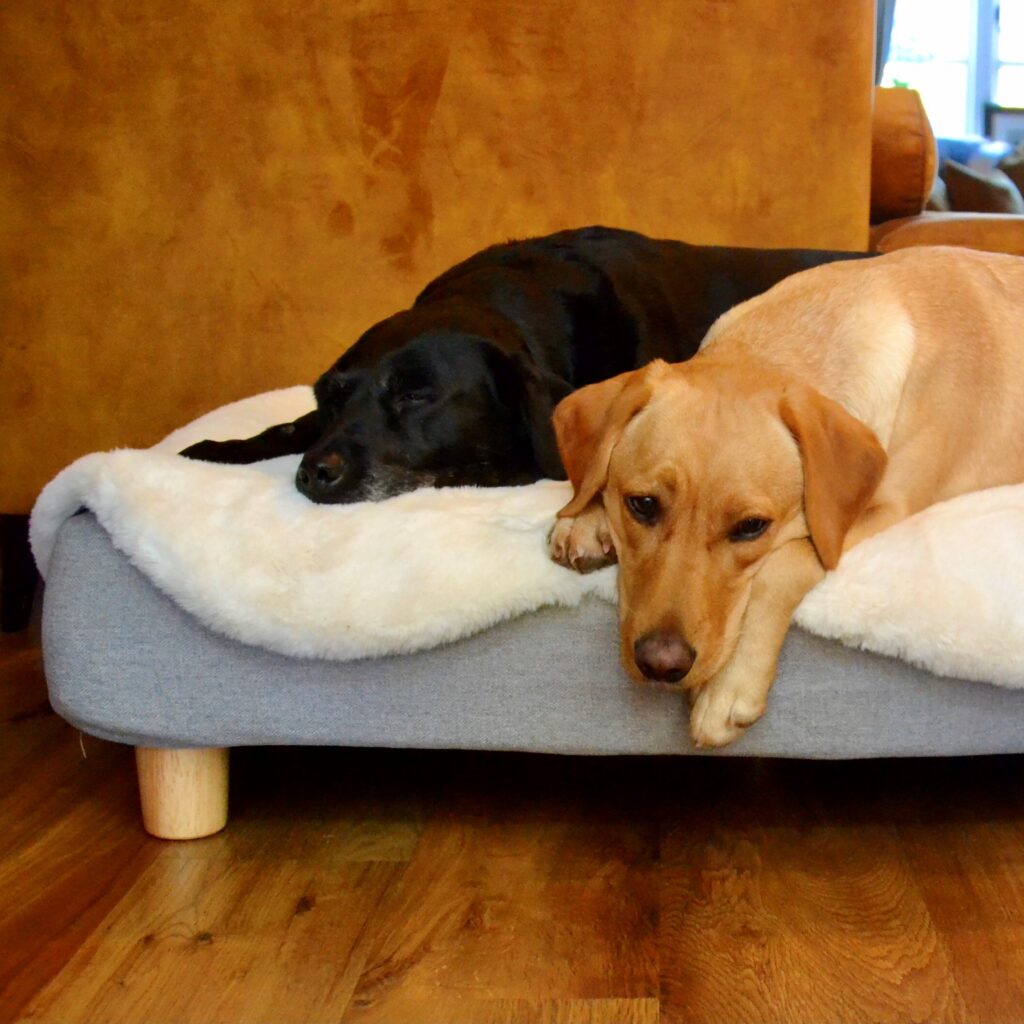
- A comfortable dog bed (we can vouch for the Bolster Dog Bed!)
- Some tasty treats your dog likes
- Your dog on a lead and collar
- A clear area where you can walk at least 5-10 paces away from the dog bed
Helpful tips for beginning your training
1) To teach your dog the command ‘go to bed’, follow the steps outlined below. Start slowly, taking your time with each step. Your dog will need time to understand each step and master it. The training is designed to be carried out, repeated, and built on over time. Your dog will not be able to learn the command within a day! Just like us, dog’s need time to process, practice and fully learn new skills. It’s even harder for them to learn a skill when they speak ‘dog’ and we speak ‘human’! Our job as teachers is to help them to understand our language. This will take time and patience.
2) Use your tasty treats to reward your dog when they achieve what you are guiding them to understand. Give the treat as your dog carries out the command you are saying e.g. sit, helping them to associate the word you are saying with what they are doing at the time.
3) Carry out the training positively. Avoid telling your dog off and never force them into positions. They will not understand what this means and can form negative associations as a result. If your dog is not understanding, this is because they haven’t made the relevant connection between what you are saying and what they are required to do. Go back a step if this happens. It is your job to be a good and patient teacher!
4) Practice little and often. A good guide is to aim for 10-15 minutes of training at least once a day.
5) End your training sessions positively and on a ‘good note’. Accept small wins and small amounts of progress over pushing too quickly for too much from your dog, resulting in them not being able to do what you have asked of them. If the latter happens, go back to what they can do confidently and end there. You can come back to the next step another day. You want your dog to feel positive about what they have learnt and achieved, even if this is small, encouraging them to make the connections between what you are saying and what this means they should be doing at this time. This will also help them to want to participate next time!
6) Once you have mastered steps 1-5, repeat again using the ‘HOW TO PROGRESS’ tips to advance your training.
7) Finally, please do not attempt this training if your dog is showing signs of possessive or aggressive behaviour around food or items as this could put both yourself and your dog at risk. You should seek advice from a qualified behaviourist if this is the case.
And now to begin…
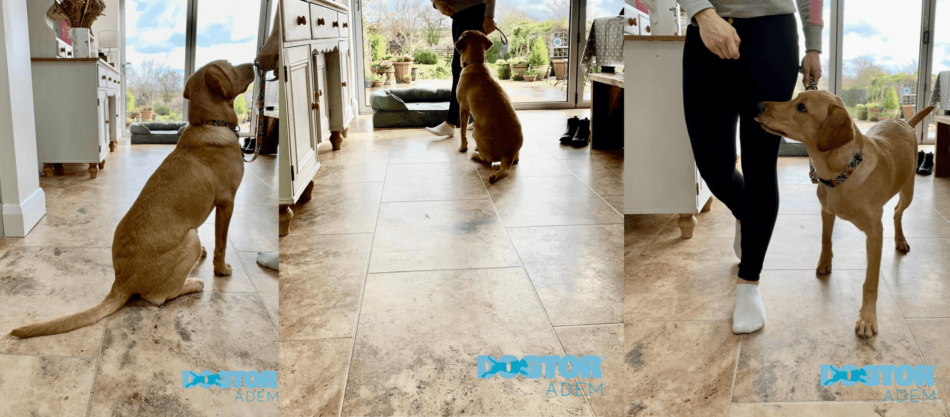
Step one: Set up your bed area and, with your dog on a lead, walk towards the bed
As outlined above, ensure that your dog bed is laid out in an area clear of obstacles. Ideally, you need to be able to walk 5-10 paces away from the bed in a relatively straight line. Put your dog on a lead and have your treats ready – preferably in a treat bag or easy access pocket so that you can access them quickly, ready to reward your dog for their achievements and cooperation!
Once your area and dog bed is set up, you have your tasty treats ready, and your dog on a lead by your side, walk up to your dog bed. You don’t have to walk far at first, 5 paces is sufficient at this early stage!
If your dog does not understand the ‘walk to heel’ command, hold a tasty treat to their nose as you walk to encourage them to walk on a loose lead by your side. Give the treat as a reward as you say the command ‘heel’ when your dog assumes the desired position by your side. You may need to hold the treat close to your dog’s nose to begin with if they don’t understand this command, helping them to stay close to your side as you walk.
HOW TO PROGRESS
- Increase the distance between you both and the bed so you have to walk further.
- When teaching ‘heel’, start to bring the treat away from their nose so they walk loosely on the lead without having to be directly lead by the scent of the yummy treat. Once your dog starts to understand they need to stay by your side, you can then progress to walking to ‘heel’ with the lead in your pocket, then to dropping the lead and the lead trailing on the floor, then finally to taking the lead off entirely! Take this slowly if your dog doesn’t know the heel command already.
Step two: Ask your dog to ‘sit’ in front of the bed
Stop in front of the dog bed and, holding a treat to your dog’s nose, guide your dog into the ‘sit’ position. As they place their bottom on the floor, say the command ‘sit’ so that they associate this word with the action of sitting. You can give a treat for assuming the sit position if they do not already know this command.
TOP TIP: If you haven’t already taught them, your dog will not understand the command words such as ‘heel’ or ‘sit’ at the beginning. It is your job as their teacher to be clear and help them to learn. Always and only say the command words when your dog is physically doing the action you desire so that they can learn to understand what you mean. Ensure the treat you give as a reward follows within a couple of seconds.
HOW TO PROGRESS
- Once your dog is sitting on command each time using the treat and word ‘sit’, start to complete STEP 2 without offering the treat so your dog begins to further understand what this word means when you say it.
Step three: Place a treat at the back of the bed and walk your dog back to the start position
Holding your dog’s lead in one hand, use your other hand to place a treat at the back of the dog bed.
Using a second treat, guide your dog away from the bed and the first tasty treat that you have placed at the back of the bed. As you move away from the bed and first treat you could also say the command ‘leave’. Remember, as with ‘heel’ and ‘sit’, say the command ‘leave’ as you move away and your dog assumes the correct action, following you rather than advancing towards the treat on the bed. To encourage your dog to move away from the bed, place the treat close to your dog’s nose to begin with to help them to understand what you are asking and to incentivise them to follow you.
Move back towards your start position by using the command ‘heel’. Remember to guide your dog with your treat, as before, back to the start position. Keep the treat close to their nose to begin with to help them walk closely by your side until they start to understand this command.
TOP TIP: As you guide your dog away from the treat, make it easier for them to leave the treat and follow you by turning into your dog, placing yourself in between them and the treat as you move away. This helps to limit the ‘temptation’ factor of advancing towards the bed and treat, helping them to understand what you mean!
WHY TEACH THE LEAVE COMMAND?
The ‘leave’ command can be useful in everyday life, from teaching your dog to leave a child’s toy that is not suitable for them to play with, to asking them to leave a piece of food that you have dropped on the floor or they have found whilst walking that might not be suitable for them to eat. It is useful not only for helping your dog to understand what is his or hers, but also useful in keeping them safe from ingesting harmful objects or food items.
Step four: Turn to face the bed and ‘send’ your dog back to the bed using the ‘go to bed’ command
Once back at your start position, turn to face the bed and continue to use the treat to guide your dog into the ‘sit’ position once again. Give the treat as you say the command to once more positively reward the action as your dog carries it out.
Next, walk your dog back to the bed whilst saying ‘go to bed’ as the dog advances towards the bed (and the tasty treat you have placed there!)
HOW TO PROGRESS
- As with teaching the ‘heel’ command, you want your dog to eventually be able to complete this off lead. Start by dropping the lead on the floor and sending your dog to their bed whilst saying ‘go to bed’. You could add a hand signal, such as pointing at the bed, at this stage to help your dog to understand.
- Complete this step with your dog off lead and say ‘go to bed’.
Step five: Allow your dog to find the treat, say their name so they turn towards you, and then ask them to sit whilst on the bed
After walking or sending your dog to their bed, allow them to find and eat the tasty treat you placed on the bed earlier. Next, call their name to get their attention and, using another treat if necessary, ask or guide them into the ‘sit’ position. They should now be sat on their bed and, as a result, they have completed ‘go to bed’ in it’s simplest form! Move to your dog’s side (so they don’t advance forwards and off the bed) and give them the tasty treat for sitting on the bed.
HOW TO PROGRESS
- After you are consistently able to achieve a ‘sit’ on the bed, use a treat start to guide your dog into the down position instead of asking them to sit on the bed. Say the word ‘down’ as they assume the correct position. Reward as before by the dog’s side rather than in front to encourage them to stay laying on their bed.
- Once your dog is confidently laying down on the bed each time you say down, increase the distance from which you ask them to assume this position. If your dog is doing well with this, increase your distance from them each time by a step or two. The eventual aim is that you will be able to say the command from the other side of the room and your dog respond appropriately! As before, always go back to your dog’s side at the end of the exercise to reward them with a treat for laying on their bed.
So there you have it, the five steps to teaching your dog to ‘go to bed’! Over time, the repetition of this training along with your clear giving of commands and timely rewarding of their actions in response should help your dog to understand exactly what you are asking of them.
Let me know if you give it a go!
Dogtor™ Adem
Top UK Dog Trainer and Behaviourist
Owner of Dog-ease Training
www.dog-ease.co.uk
This entry was posted in Dogs
Richard Whately, 19th century Oxford academic and Bishop of Durham, taught his dogs to climb trees on the banks of the river Cherwell, and jump into the water from the branches.

Fortunately, there are much easier ways of getting your pet dog used to taking a dip. But the key word in the previous paragraph is ‘taught’. Dogs are not born swimmers – they need teaching to a certain extent, even though most of them can stay afloat and doggy-paddle their way back to shore if you throw them in. But this is certainly not a recommended way to introduce pooch to the pond!
Many of them need no persuasion at all, and jump into rivers, ponds and the sea at every opportunity. Others are less eager to take the plunge, and some breeds are simply not built for the doggy paddle.
Sorting the Water-Dogs from the Non-Swimmers
Dog breeds with no snout, such as the Boxer, English bulldog, French bulldog, Pekingese and Pug, have great difficulties keeping their noses above the water. Their squashed muzzles – ‘brachycephalic’ is the proper term – means they are simply not built for swimming. Similarly, breeds with large heads and muscular upper bodies such as American bulldogs and Staffordshire bull terriers are not able to swim well, or at all.
Dogs with short legs find it hard to get very far in the water, even though they are capable of holding their heads above the surface. This applies to such breeds as the Basset hound and Dachshund.
Taking the First Dip
For dogs that can swim in theory but are a bit nervous, or simply not yet used to taking a dip, there are a few tips and tricks that should turn them into water dogs in no time.
- Choose a location with water shallow enough for you to easily rescue the dog if it starts to panic. Somewhere with a slope is ideal – a lakeside, a gentle river, or a coastal pool. A paddling pool at home is where many dogs take their first swim.
- Try to choose a quiet location, to minimise distractions and enable the dog to concentrate on the swimming lesson.
- Keep the dog on a long lead during these early dips.
- Take a stick or toy to tempt your dog into the water. If you go in first, the dog will be more inclined to follow. Some will leap in at once, others need more time to get used to the idea. Never drag, throw or otherwise force a dog into water.
- Doggy lifejackets can be bought, if your pet is particularly nervous, or if you’re not sure whether he will be able to swim very well, based on his body shape.
- Once the dog is used to being in the water, wade further out (tricky in a paddling pool!) and encourage him to follow you. It’s all about building confidence.
- To help a nervous dog get used to having its feet off the bottom of the pool or river, hold him by the middle for reassurance. Paddling with the front paws will be instinctive, and you can encourage use of the back legs by raising the dog’s back end slightly. He will instinctively kick his hind legs to regain equilibrium.
- Once the dog is paddling at the front and kicking at the back, he’s cracked it. You can now let him test his new skill – but stay close and be prepared to hold him by the middle again, in case he tires or suddenly panics.
- It’s a good idea to take a towel to dry the dog once it’s emerged from the water. Smaller ones in particular can get cold very quickly. Be prepared for a gentle soaking as your wet pet shakes the water from its coat!
For many dogs, the so-called training process will be over in a couple of seconds. Many hounds swim as naturally as they woof – breeds such as Newfoundlands, Poodles, Otterhounds, the various Retrievers, Spaniels, Setters, and – surprise surprise – Portuguese and Spanish Water Dogs, for example.
And rest assured – you don’t need to teach them to climb trees as well!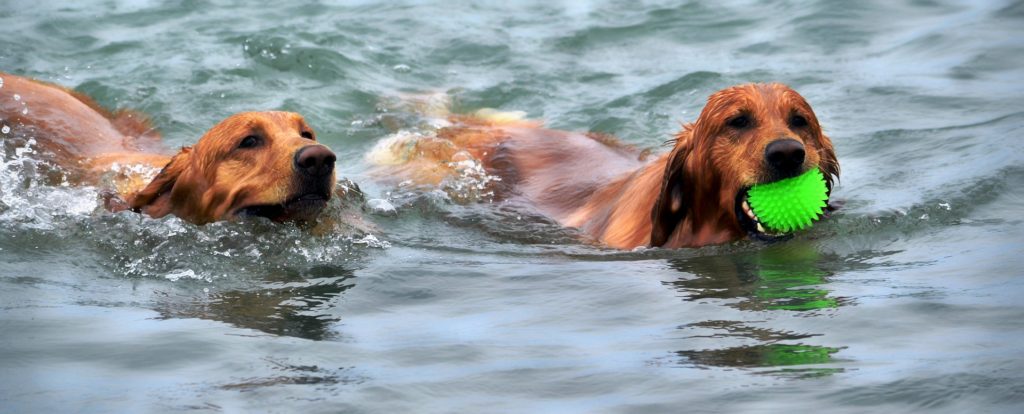
This entry was posted in Dogs
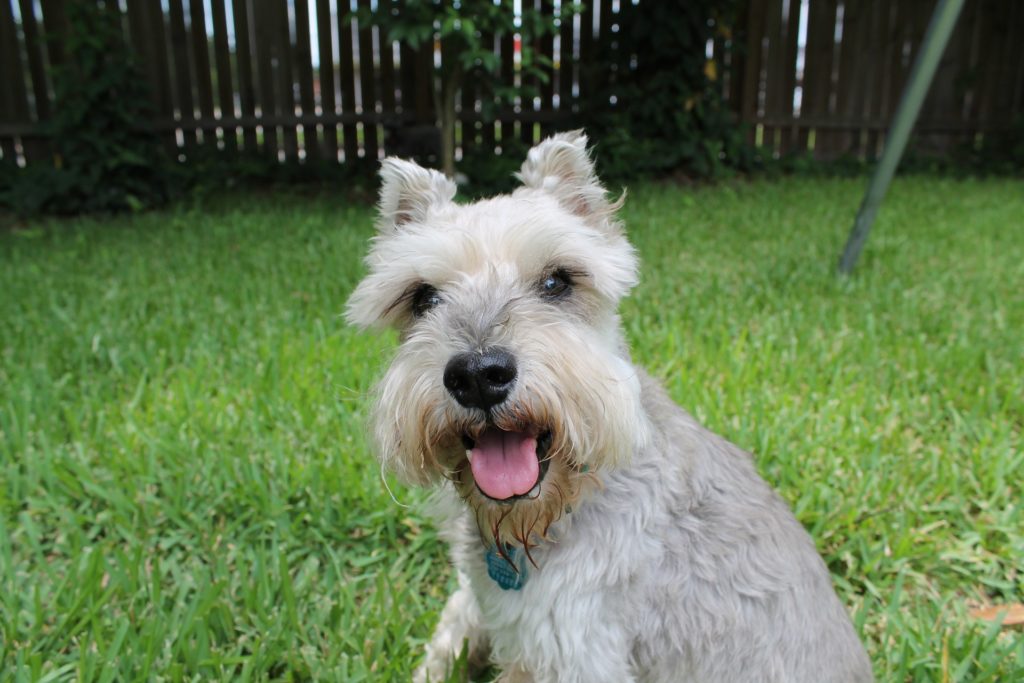
When we got our Miniature Schnauzer, we had already had a catflap in the garden door for years. We soon realised that our little dog would easily also fit through the cat flap, and this would allow her to go in and out of the garden whenever she liked. We decided to pin it open to see if she would even use it at all, and it turned out to be a hit. It worked perfectly and in the summer it was nice to have a light steady breeze from the door. But we all know, summer must come to an end one day. And it did.

Winter came and with that freezing air blowing through the cat flap every day, all day. Unpinning the door meant having a sad little furry dog staring at it in disbelief “This used to be open all the time! Why is it locked now? And since when can the cat walk through walls?” The surprised look on our dogs face every time the cat appeared and vanished in the door was adorable and yet a little upsetting. How she wished to have the cats ability of passing through closed doors. And I wished that too. The comfort of going in and out whenever she wanted proved to make for a demanding dog, that needed help to open and close the door. Countless times a day.
Something had to change. As she didn’t understand how the door worked, we would have to show her and help her a little. I had used clicker training with other dogs before, and it was not only fun for me but also for the dog. Somehow we had never started training our newcomer with it, but now I dug out the clicker from the ominous corner drawer in the kitchen that hardly ever gets opened these days and made a plan.
Teaching my dog to use the cat flap!
My dog got the concept in a matter of hours and used the door by herself on the next day. Now she is young and very intelligent, but older dogs should also be able to learn this trick in no more than a few days.
Dog Clicker Training for flap doors – let’s get started.
Four essential things you need:
- A clicker
- Small dog treats or favourite toys
- A cat flap
- A dog (any dog will do…)
Clicker Training
If you’ve never heard about clicker training, then I will try to quickly introduce you to it. In short, clicker training conditions the dog through positive reinforcement to repeat certain behaviours. There is no such thing as active punishment in this training – “punishment” is shown in a passive manner by ignoring the dog. Dogs thrive on attention, they mostly don’t mind if it’s positive or negative attention – they often might not even be able to tell them apart. As long as their favourite humans interacts with them, that’s great news. Nothing is worse for a dog than being ignored. This is very useful when it comes to training.
A click tells the dog “That’s exactly what I wanted you to do!”, then a treat follows. Click means treat – that is very important. Never click without it being followed by a treat – even if you click by accident. Click and treat go hand in hand. For most dogs, food treats work great, it is possible though to offer toys as a reward instead. Depending on the dog or the situation – I don’t take the clicker on walks for example, but I use the same method of “Do well and something good happens” to train my dog to, for example, stay sitting while I walk away. If she waits for my release command and comes running, we play with her toy. If she runs towards me without the command, we don’t play. That way she realises that, even though staying put might not be the most fun thing to do right now, but when that’s done, there are better things to come!
Step one
But let’s go back to the cat flap. If your dog already works with clickers, then great, skip this paragraph and read the next. For everyone who has never used a clicker with their dog, you will want to get your dog accustomed to the clicker, what it does, how it works and how he/she can actually “make it click” to get to that tasty treat.
I admit, I am very impatient and extremely lucky with my dog. I have done all this in fast forward mode, but generally it is best to take some time and be patient… Start with teaching your dog what the noise means. With your dog in the same room, click the Clicker. Your dog will most likely look up at the noise, but even if he doesn’t, make sure to click and immediately offer him a tasty, small treat.
Click again, give the treat.
Click again, give the treat. Repeat.
Click again – does your dog already look a little excited about the noise? Good, he is starting to realise that a treat follows the click every time he hears it.
This stage shouldn’t take long at all, and it’s soon time for the next step.
Step two
I thought about what skills the dog would need to open the door. To go through the door she would have to push it with her nose. So my next goal was to get her to touch the cat flap with her nose. The direct approach didn’t seem to be very successful, so I got a colourful Post-It note out of the cupboard. Maybe this isn’t necessary if you manage to make your dog touch the door with its nose. However, I wiggled the bright pink piece of paper in front of her nose and the first thing she does is give it a quick sniff. As soon as her nose touches the paper – CLICK! and treat.
Move a few steps away and show the paper, have the dog follow you, trying to touch the paper with its nose.
When the dog touches the paper reliably, you can now introduce a command such as “Touch” every time the dog does the action. Your dog will soon connect the motion of touching the paper with the word.
Keep this up until she touches the paper with her nose every time she sees the paper. Once this works well, phase three can begin – stick the Post-It on the flap door.
Step three
With the Post-It on the flap and the dog knowing the “touch” command, the next step was quite easy.
Ask your dog to touch the paper. Click when they do. Your dog might not push the door yet, so start to encourage him to touch it harder. Stop clicking if the nose only just touches it, instead click only when the dog put enough pressure on the door and the door slightly wiggles.
Does the door wiggle a little every time now? Great, then take away the click again until your dog starts to push the door harder.
This is a gradual process and encourages the dog to think about what you want it to do. When he figures it out himself, he learns a lot faster. Teach him gradually to not just make the door wiggle but to push so hard, that he has to stick his head through – at this point he will usually have realised that he can walk through as the door actually reveals what’s behind, and eventually you will be able to gradually change the slight door touching to actually walking through. Like magic!
Done!
My dog was finally able to make her way in and out of the house whenever she wanted – and we could finally take off the second layer of socks.
This entry was posted in Dogs
Bringing home a puppy is a very special time for everyone involved. And as with welcoming any new family member, your tiny, furry addition will inevitably change the dynamic of your household. With that, may come a few bumps in the road, also known as puppyhood. It’s important not to forget that as exciting as this time can be, it can be quite a daunting experience for you and your puppy. But, seeing the exciting world through the lens of your new forever friend makes the first few restless nights and teething issues all worth it. Here are our top tips for the first week with a puppy.
Take some time off work
Once you know when you’ll be collecting your puppy, it’s wise to take at least a week off work to stay at home. The first week will be a learning curve for you and your puppy, so it’s a good plan that you spend this time together building a bond, establishing a routine, and of course, having fun. It’s also an opportunity to start toilet training with your puppy, and since dogs of this age need to go potty a lot more frequently than their adult counterparts, you’ll need to be on hand to let them in and out of the home.
You should also have considered what your arrangements will be after the first week off work with your puppy. Will you be available to frequently check in on them? Is your partner going to be working from home? Most puppies under 10 weeks old can’t hold their bladders for more than an hour, so you should think about whether you’re able to make this big commitment with your current lifestyle. Fortunately, many workplaces are now dog friendly, so this might be an option for you as your puppy gets older.
First impressions count
The first few days with your puppy are crucial for establishing a strong and positive relationship with your pet. Take the time for everyone in the household to interact with your dog; playing, cuddling, and stroking them. Your new puppy may also be a little weary of you, to begin with. Be very gentle when you’re handling them and slowly you’ll be able to develop their trust in you and become familiar with your touch, voice and scent. Introduce them to a couple of dog toys and reward any good behaviour with dog treats.
Once the news gets out that you’re getting a puppy, friends and family are bound to want to visit, but take it slowly. Socialization is key to having a well-rounded dog but there will be plenty of time for others to meet your new furry friend. Introduce people to your puppy gradually and don’t forget that your pup shouldn’t be interacting with unvaccinated or unknown dogs, as well as visiting areas by freshwater, areas that are known to have a rodent infestation, or anywhere that unvaccinated dogs could have visited until they’re fully vaccinated themselves.
Be consistent with feeding time
Dogs love routine, so to maintain as much consistency as possible, it’s wise to follow the same diet as the breeder or rescue was feeding the litter. This is especially important while your puppy is already navigating a confusing change to their environment. Find out as much information as possible before you go to collect your puppy, so you have time to research and purchase the appropriate food. Once your puppy is home, follow the diet as closely as you can, and if transitioning to a different type of food, do so gradually to avoid upsetting their sensitive stomachs.
Find a dog bed that will stay with them forever
Puppies sleep…a lot. In fact, they can spend up to 20 hours of their day snoozing away but after a day filled with zoomies and making mischief, it’s hardly surprising they need somewhere super comfortable to get some shuteye. It might be tempting to let your dog sleep on your bed, especially with their irresistible puppy eyes but in the long run, they’ll thank you for providing them with a bed designed just for them.
Omlet’s Topology Dog Bed was built to last. With a memory foam mattress base that moulds to the shape of your dog and a choice of removable toppers for you to easily wash clean, the Topology is what dog bed dreams are made of. For puppies, The Quilted topper is perfect, made from an ultra-durable, hard-wearing material that even razor-sharp puppy teeth can’t rip through. Plus, you can even add a puppy pad beneath your topper for an extra layer of confidence. Should your pup manage to chew the cover on the Topology’s memory foam mattress within 6 months to the extent of exposing the waterproof mattress cover beneath, we’ll even replace the mattress cover for free. Find out more about the Omlet 180 Day Puppy Guarantee here.
Getting your puppy’s bed right in the first week means that they’ll soon associate it with their safe space from a young age. And since you can choose from 3 sizes, you can find the perfect fit for when your dog is fully grown. This bed will truly take your four-legged friend through from puppy to prime.
Use a crate
Dog crate training is invaluable, and can be started during your puppy’s first week at home. Since you’ll be unable to monitor your puppy’s every move day and night, using a dog crate to use for short periods of time means that you’ll be able to keep them out of harm’s way when you cannot be with them. Dog crates are also a very useful training tool, and provide nervous puppies with a den they can call their own.
You can even add a dog bed, super soft puppy blankets and a couple of dog toys to your puppy’s crate to create a cosy space. As your puppy gets older and begins travelling in the car, you can even take their crate with you so that they’re secure and safe on their journey.
Omlet and your puppy
We’re committed to bringing people closer to their pets, which is why we designed and carefully crafted the Omlet Puppy Bed and dog crates with puppies in mind. The joys of puppyhood also come with a few challenges but with this advice and Omlet’s innovative products, the first week with your new puppy can be made as stress-free as possible.
This entry was posted in Dogs
You’ve seen it on some TV programmes or driven past small-holdings and seen canines and chooks living in harmony. Maybe they’re a working dog? Maybe they’re a family dog? How do they do it? We’ve put together 7 expert tips to help you introduce your new dog to a flock of chickens.
Understand how dogs and animals learn
Our canine companions, on the whole, are super intelligent and trainable, providing we know how they learn and what we need to do to train them. Introducing them to our chooks can be done and co-habiting harmony does exist. It’s through this small thing we call desensitization. Stay with us for a short Psych 101 and we promise it’ll be worth it.
Desensitization is a process where, through graded exposure, an emotional response is diminished and adapted to a specific stimulus. Now, what the heck does that mean I hear you yell?
In short, you expose your dog to your chooks, from a distance. As they behave how you expect them to, you gradually move them closer to the chooks. You eventually get to the stage, that through the gradual exposure, they’re not that interested in the chooks after all. Their emotional response has diminished, and they have adapted which results in a calm response.
Stay safe
Start with your chooks in their chicken coop or a fenced in area. Keep your dog on leash and feed them treats, providing they are ignoring the chooks. If your dog is paying too much attention to them, move to a greater distance. The aim is to find a distance where they are not having any emotional response towards them.
Grade the exposure
Providing your dog is ignoring the chooks at a certain distance, you can move gradually closer to them. Say you start at 50 feet away, slowly reduce to 45 feet, 40 feet and so on. Continue to praise and reward them for ignoring the chickens. Remember, you want their emotional response to diminish. Keep training sessions short, you don’t want to over tire your dog. Some dogs get hyper-aroused just by being over-tired.
The big moment!
You’ve finally made it to near the coop or chicken fence, providing they are still pretty chilled out in ignorance of the chooks, ask them to sit next to the fence or coop. Praise and reward. If they behave how you expect them to, lengthen the leash, so they can move around the border of the coop or fence, and they can sniff and explore. If they’re calm, the chooks may even come over to investigate. Stay calm. If they start getting excited or lunge/bark at them, remove your dog to a safe distance where they will ignore them again. You may need to do this a few times. What they learn is that to be around the chooks, I must stay calm. If your chooks will stay in a coop or fenced area, this may be where you spend the time repeating the behaviour and praising and rewarding. You may sit with them with a chew or just work on some commands. Again, the aim is to encourage them to ignore the chooks.
If you plan on having free range chickens, and canine and chooks will be mingling daily, read on.
The great escape
When you feel confident that your dog has so far, happily ignored the chooks and not shown any aggression or heightened arousal towards them, you can let them out of their coop/area to roam freely. Keep your dog on their leash. Ask them to sit or lay down if this makes you feel more comfortable. As the chooks are roaming, providing your dog shows little interest, praise and reward them. Again, you may want to give them a chew or even a slow feeding puzzle game for dogs. Your dog just needs to learn than they can co-exist with the chickens without interacting with them a great deal.
Patience is a virtue
You may have to spend a significant amount of time working through these steps, but done in the right way, it will be worth it. Whilst on leash you can walk them through the chooks, they may sniff, and the chooks may also show interest too. The only behaviour you don’t want to see is aggression, lunging or chasing. If this happens, go straight back to the beginning and work on the gradual exposure again.
Riding solo?
The most nerve-wracking part will likely be when you feel they’re ready to be let off leash to mingle on their own. Again, take your time. You may pop the chickens back in the coop and let them explore off leash around a fence. You may prefer to put your dog on a long line (50ft) when in with the free-range chooks. This way, they feel like they have more freedom, but you still have control if it goes pear-shaped. Be realistic though, some dogs just never quite make it to being able to mingle unsupervised with chooks, so watch the behaviour of your dog and make the call.
Conclusion
Chooks to dogs are super interesting, like most things. The long and the short of it, successful introductions mean the chooks are no longer that interesting and your dog learns that to be around them, they simply just need to be calm. Arm yourself with some high value dog treats, chews and any other slow feeder puzzles; start from a distance and encourage the behaviour you want to see. Praise and reward when you do. Grade the exposure. Always stay calm and in control and don’t be afraid of going back to square one if things don’t go as you’d hoped. It may take time, but it will be worth it when you have canine and chooks living in harmony.
This post was written by John Wood at All Things Dogs.
This entry was posted in Chickens

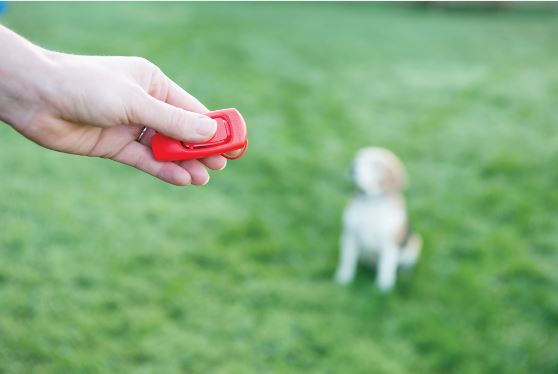
What is a clicker?
A clicker is a little box with a button that gives a “click” sounds once pressed, In the ‘50s it was mainly used as a training device for dolphins and cetacean, but it quickly became extremely popular among dog trainers.
Why use a clicker instead of just voice commands?
Using only voice commands to train your dog can be quite challenging and confusing. The same word can be pronounced with different intonations and used in different contexts, while a clicker always produces the exact same sound, giving you the opportunity to train your dog in an efficient and straightforward way.
The basics:
- Arm yourself with patience
- Choose a suitable training place, without many distractions for your dog
- Start the training when your dog is still hungry, otherwise the treats won’t be much of an incentive
- Make sure your dog has already peed so you can have its full attention
Step 1: positive reinforcement (clicker, treat)
The clicker wants to be a training device based on positive reinforcement. With clicker training you want to encourage and reinforce a particular positive behaviour rather than punish your dog’s “bad” actions. As a first step, you will need to teach your dog to associate the sound of the clicker to a prize. Click the device and immediately offer a treat to your dog. Repeat the action for around 10 times then take a break. Repeat this at various times during the day and in different places so that your dog will associate the clicking sound to the receipt of a treat, regardless of the location.
Remember that the “click” sounds becomes a promise, so if you click the device by mistake you’ll still need to treat your dog.
Step 2: teaching the action (command, action, clicker, treat)
Once your dog learns that for every “click” sounds he gets a treat you can start the proper training. For instance, if you want to teach your dog the command “sit” you will need to command the action with a specific word and gesture of your choice (and that will always stay the same). As soon as your dog sit, immediately press the clicker and give him a treat. Repeat the cycle “command-action-clicker-treat” until your dog has learnt it.

If you’re not confident or not sure you can train your dog with a clicker, do contact a professional dog trainer.
Resources:
https://www.companyofanimals.co.uk/brands/clix-training
https://www.petsafe.net/
Immagini prese da The Company of Animals UK
This entry was posted in Dogs
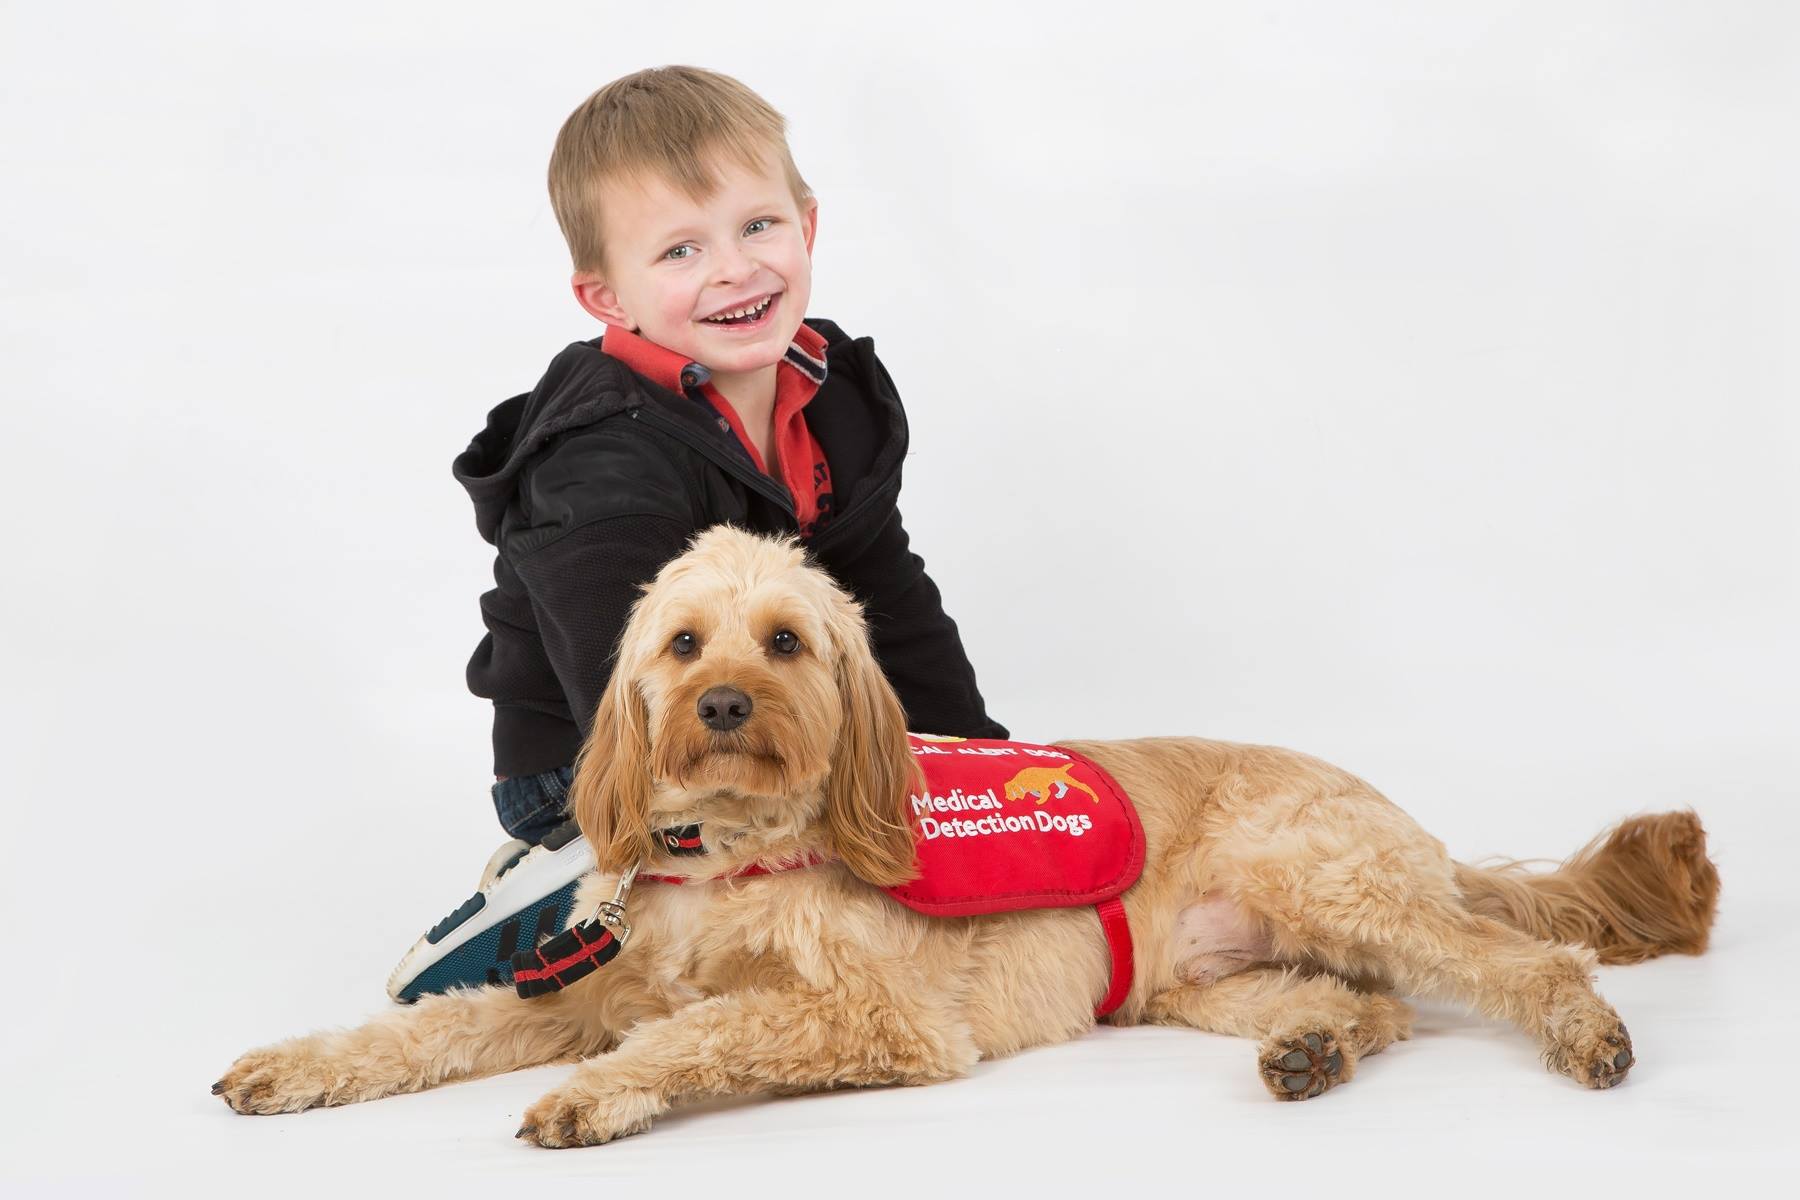
Rocky is a Medical Alert Assistance Dog and a fantastic companion for 7 year old Josh who has unexplained hypoglycemia and Epilepsy and has had many hospital stays since he was born. Rocky has been trained by the Medical Detection Dogs charity to alert Josh’s family when his blood sugars drop dangerously low and could trigger a seizure.
We spoke to Josh’s mum Paula to find our more about this delightful friendship!
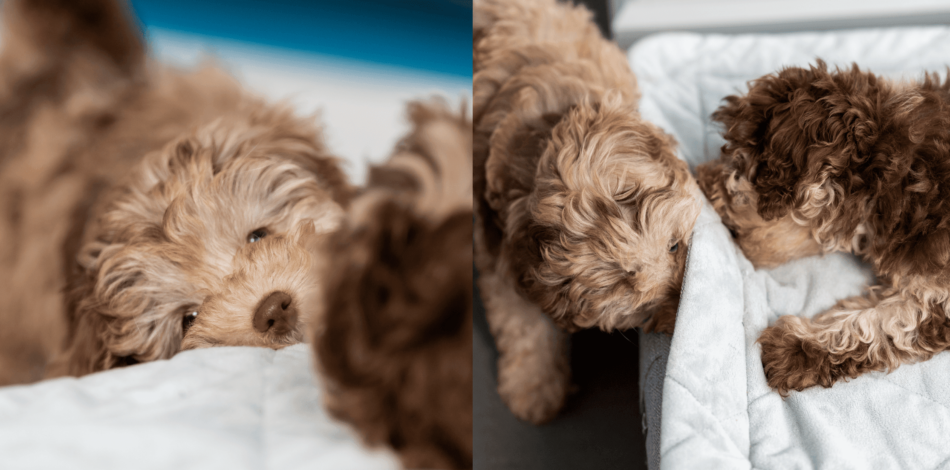
What type of dog is Rocky? He’s a Cockapoo
How old is he? He’ll be 2 on the 28th September. He joined our family when he was 9 weeks old.
What does Rocky do to help Josh on a daily basis?
Rocky spends all his time with Josh and alerts us when his blood sugars drop too low by sense of smell. Josh has unexplained hypoglycemia along with epilepsy and his seizures can be triggered by low blood sugar. We test Josh’s blood sugar numerous times a day but are extremely lucky to have Rocky with us who has alerted us many times when his blood sugars drop to a dangerous level which has fortunately stopped things escalating to a medical emergency. Rocky sleeps in Josh’s room and we are confident he will come and wake us if he ever senses a problem.
If Rocky wants to alert Josh, he stands on his back legs and puts his paws on Josh’s shoulder and licks his face. If Josh is asleep he comes to find me and licks my hands to wake me.
Did the Medical Detection Dog Charity advise you about what type of dog to get? We had spoken with the charity prior to buying Rocky and knew what to look for when looking for a puppy to give us the best possible chance of buying a puppy that we may be able to train successfully. Obviously we knew there were no guarantees on this and also looked for a puppy we thought would be the ‘best fit’ as our new family member.
Did you have to crate train him or was he already crate trained when you got him? We chose to crate train. He was used to a crate from being with Mum so it was very straight forward. He took his blanket in with him and was always happy. The training we did with Rocky with the crate was very easy, primarily due to him already being used to one.
During Rocky’s Medical Detection Dog training did you have to attend lots of classes? Rocky and I used to have one to one training on a weekly basis. Josh attended the training whenever possible. I would also send off any records of alerting behaviours along with all of Josh’s blood sugar recordings.
What did the training include? Where was the training held? The training was held at a variety of places. It included public access, off lead walking, heal work, distraction work etc etc. We had a train trip, a bus trip, taxi ride, public access – so inside shops, supermarkets etc, in school, busy places and quieter places, all to see how Rocky would react. And of course, a vet visit.
How long did the training take from start to finish? Rocky qualified at 18 months of age. The youngest possible age to qualify. We were training with him from the moment he came home at 9 weeks of age.
Do you have to go for additional training even now he has qualified? We have a first post qualification check 6 months from qualification and then every 12 months after. If we come across any problems at all at any point, we are fully encouraged to speak with MDD for full support wherever it is needed. We will also attend regular refresher training to ensure Rocky maintains his high standard of behaviour and alerting.
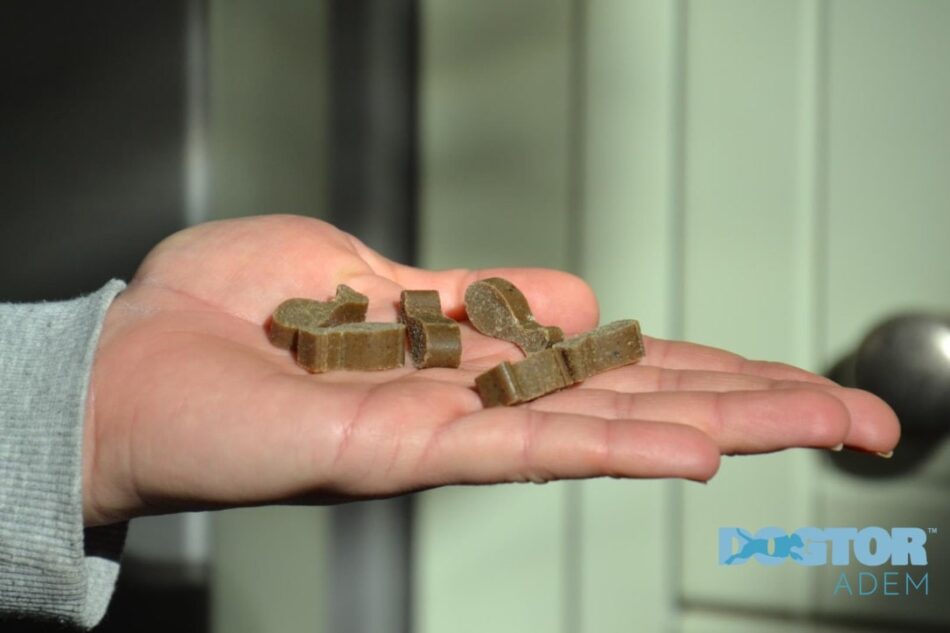
What type of treats do you feed Rocky as a reward? Rocky always has the same reward, dehydrated hotdog sausage – his absolute favourite!
Is Rocky allowed to go everywhere with Josh?
Yes he is. Rocky has to wear his ‘Medical Alert Assistance Dog’ tabbard whenever we are out in public and is allowed in all public access areas including shops, restaurants, beaches and cinemas.
Rocky and Josh are best friends. Josh trusts Rocky completely and understands that he helps to keep him safe. Rocky is simply a life changing member of our family.
—————————–
Medical Detection Dogs is a fabulous charity that trains dogs to detect the odour of human disease. It is at the forefront of the research into the fight against cancer and helping people with life-threatening diseases. To find out more about the amazing work that they do click here
If you are looking to crate train your dog, click here to find out more about the new Fido Nook 2in1 Luxury Dog Bed and Crate
This entry was posted in Dogs
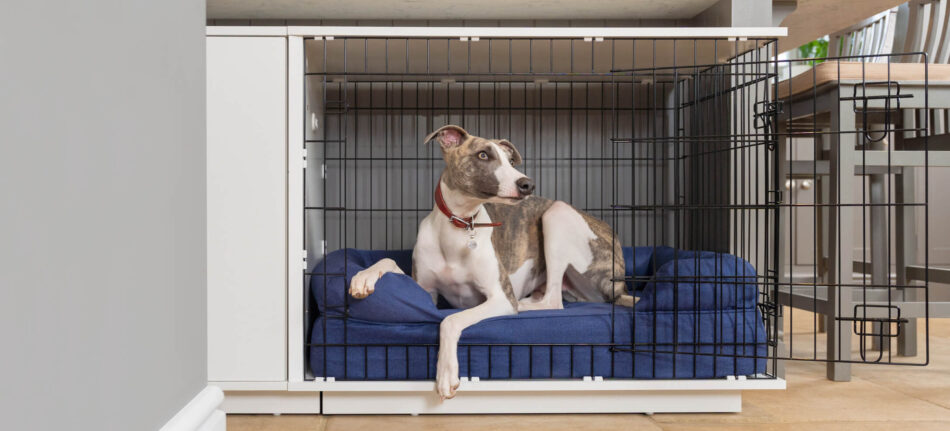
Considering crate training for your puppy or dog? While many people view dog crates as cages with cruel intentions, it’s actually been proven that dogs love a calm, safe place where they can rest and be by themselves. When introduced properly, crate training is an excellent way to give your dog a comfortable space of their own and help them learn new behaviours in the process. We’ve uncovered all the benefits and tips you need to know on when and how to use crate training as a tool and resource. Keep reading to learn more about crate training.
Why crate train?
Crate training is an important process in your dog’s life. Not only is it really helpful in potty training, but it’s also a great way to provide them with a secure space where they can retreat to in order to feel safe. So if you have a dog or new puppy in your life, take a look at all the ways crate training can be a useful tool in raising your new family member:
- Security: In the wild, dogs are naturally denning animals, which means they instinctively seek out small spaces to create a den-like feel. Offering your dog a crate to use at any age actually appeals to their innate behaviours and desires.
- Self-confidence: Think of how proud a toddler is when they learn how to use the ‘big potty’…the same is true for dogs! Through crate training, you set your pup up for success by helping them learn to reduce their wee and poop accidents.
- Self-reliance: As much as we wish we could spend every waking hour with our furry friends, the fact remains that sometimes we have to leave them at the house alone. When you crate train your dog, you give them a stronger sense of confidence to be ok by themselves when you have to be away from them for a while.
- Privacy: A dog crate can serve as a very useful time-out device for overtired puppies who need a break. It’s also a great place for your adult or senior dog to escape to when they want to be alone.
- Practicality: Being comfortable with a crate is important for dogs as they will be exposed to one eventually. Whether at the vet, the groomer or travelling in a car, crates are often used in other places to keep your dog safe and secure. So best to get them comfortable with a crate at home first.
Make crate training an enjoyable experience
A dog crate is meant to be a positive environment for your dog to see as an enjoyable place to be. The best way to ensure they have this association is to create that positive feeling from the moment of introduction to the crate. Here are some ways you can make crate training a truly enjoyable experience for everyone.
Choose the right crate
Finding the best dog crate is key to the success of your dog learning to love it. Depending on what dog breed you have, you want to make sure the crate fits your dog’s size and ability to turn around while in it. Other features your dog crate should have are durability, comfortability and transportability. The Fido Nook dog crate is a wonderful option as it provides all of these features while also doubling as a sleek piece of furniture in your home.
Create a positive association
One of the fastest ways to a dog’s heart is through their stomachs. So in order to encourage a positive association with the dog crate, use food and dog treats as tools. You can even move their dog bowls closer to the crate so they see the positive connection of eating and crate naps so close together!
Create a comfy spot
Some dogs prefer laying on hard surfaces and might be quite content just napping on the bottom crate tray. However, most dogs (and their owners!) prefer a more cosy spot to sneak away to. Try a comfortable plush dog bed that fits inside the crate so they can have more padding to snooze on. Or, just lay down a few cosy dog blankets so your dog can create the nap nest they desire.
Play crate games
It’s completely normal for dogs and puppies alike to be uncertain of a crate at first. How would you feel about seeing something so foreign and new for the first time? One of the best ways you can make crate training a less scary experience is by making it fun – and what is more fun than playtime? Get on the floor and use different dog toys to throw in and out of the crate to encourage a fun and playful game that makes your dog more comfortable with the new space.
Have patience
Any dog can learn new tricks and that goes for crate training, too. But only if you have patience and take it slowly. Like anything new, if you rush the process it is unlikely to stick, which can lead to frustration for you both. So take your time and allow your dog to warm up to the crate in their own time. Before you know it, they will be sneaking away to it all on their own!
Omlet and crate training
At Omlet, we believe having a dog is more than just owning a pet, it’s a relationship that is to be fostered. So we design our products to cultivate that connection so you two can spend more time together building those bonds. We believe crate training is an invaluable tool and while we didn’t invent the dog crate, we did perfect it. The Omlet Classic Dog Crate is engineered with durable welded steel and two door options for easy placement and openings. Use it by itself or place it inside the Fido Nook, for a more sleek and modern design that complements your interior. Whichever option you choose, Omlet can help make crate training your dog an easy and enjoyable experience.
This entry was posted in Dogs
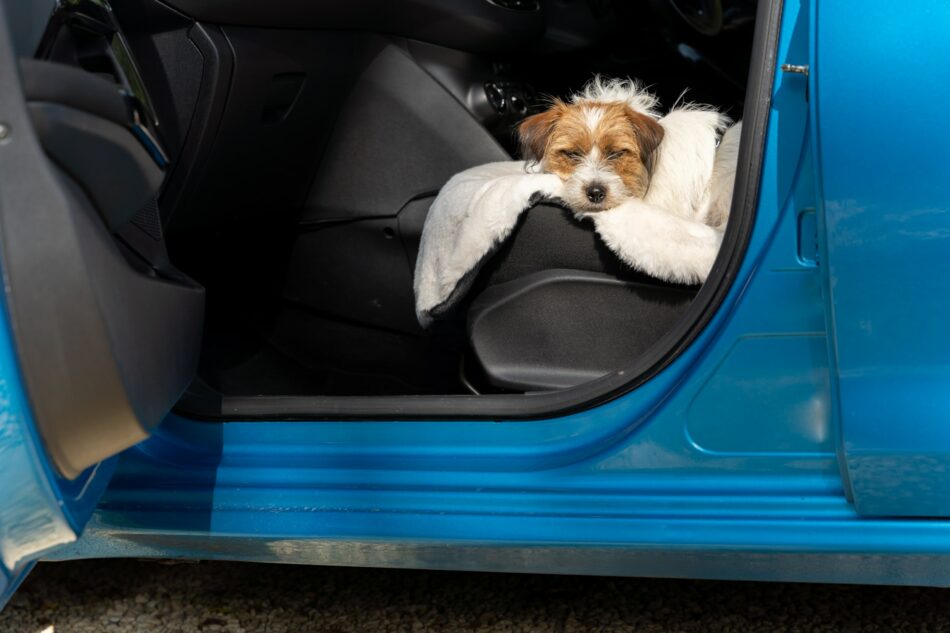
Heading out on a road trip with your dog? It’s great fun having a four-legged companion by your side for a long drive. Barking and singing along to your favourite playlist with the summer breeze blowing in your hair sounds blissful but, before you start your engine, buckle up for our doggy road trips dos and dont’s.
Safety first
Preparation is key to making sure your dog’s safety stays the number one priority on your adventure. In the UK, dogs must be microchipped by law. Once this is ensured, you should also check your pup is up to date with their vaccinations and in good health before heading out.
If you’re planning on a long road trip, slowly ease your dog into spending more time travelling in the car. Just like us, some dogs suffer from motion sickness when in the car, so it’s important to assess how they cope on shorter trips first. If car sickness is something that they experience, contact your vet to see if they can prescribe medication.
Seatbelts on?
So, you’ve taken your dog to the vet and know they’re a good traveller – now what? It’s time to consider how you plan on restraining your dog on the journey. Using a dog seatbelt, dog crate or a dog guard are 3 ways you can keep Fido secure whilst in the car. And, depending on what state you live in, using a dog restraint whilst travelling is mandated by law.
If a crate is your dog’s desired method of transport, the Fido Classic is the ideal choice. Available in 3 sizes, the crate can fit dog breeds as small as a Yorkshire Terrier to those as large as 70 lbs. The crate can easily be folded too, making it perfect for packing away once you reach your destination.
Crate training your dog is an invaluable tool and will make travelling a lot easier for both you and your furry friend. Rather than seeing it as somewhere restrictive, a crate is a safe space for your dog to retreat to, anywhere they go. It will also make the journey and trip away a lot less stressful for everyone involved. Follow our dog crate training guide and see how simple it is for your dog to settle when they’re away from home.
Reminders of home
Road-tripping is great, but pangs of homesickness can set in at some point. Dogs can experience this too, so it’s a good idea to pack a few of their favourite things to remind them of home. Dog toys are essential for going away with your pup, just as they are back at home. Keeping your dog stimulated is super important once you arrive at your destination, so take along a long-lasting toy such as a Kong that will keep them entertained for hours, even in a new environment.
Or how about taking along their cosy dog blanket or super soft dog bed for them to rest on when you stop? Omlet’s Cushion dog bed is the go-anywhere bed, perfect for taking from place to place whilst promising a pillowy soft sleep.
What’s more, you can even match your dog’s bed to their collar and leash with Omlet’s Dog Walk Collection. Shop from a range of designer dog collars and leashes in 8 signature prints, inspired by the beauty of the humble dog walk. Plus, don’t forget about a dog poop holder, also available in matching prints to add a little flair to not so fun part of pet parenthood.
Pit-stops pending
Your and your dog’s bags are packed and you’re ready to go! But just before you hit the road, make note of any breaks you’ll need to take. It goes without saying you should never leave a dog alone in the car. Regardless of the time of year, the temperature your car can reach unattended can be fatal for dogs, albeit dangerously hot or too cold. Cracking open a window is not enough to keep your dog safe from the elements when trapped in a car, so you’ll need to choose suitable pit-stop locations that are dog friendly. A quick search will bring up a number of locations where your pup will be able to stretch their legs, use the toilet and have a drink. Whilst your dog might not need to go potty as frequently, depending on their age, it’s wise to stop off somewhere every couple of hours for a break.
Omlet and your dog’s adventure
Whether you’re heading out on a big adventure or staying at home, Omlet has the products your dog needs to continue thriving. From ultra-soft dog beds to easy-to-travel dog crates and cosy dog blankets, we expertly engineer everything you need as a pet parent to ensure your four-legged friend lives their life to the fullest.
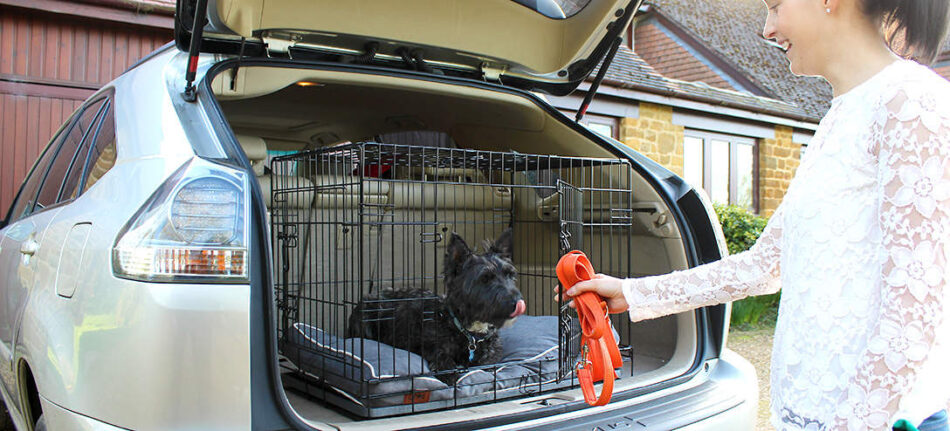

This entry was posted in Dogs