While most people check the weather forecast to help them plan their week activities or outfits, chicken keepers can also be using it to predict what accessories their coop needs to ensure their girls are as comfortable as possible.
From sun to snow, wind to wet, the breakfast time weather reports and the handy app on your phone are all giving you helpful hints that you might be ignoring.
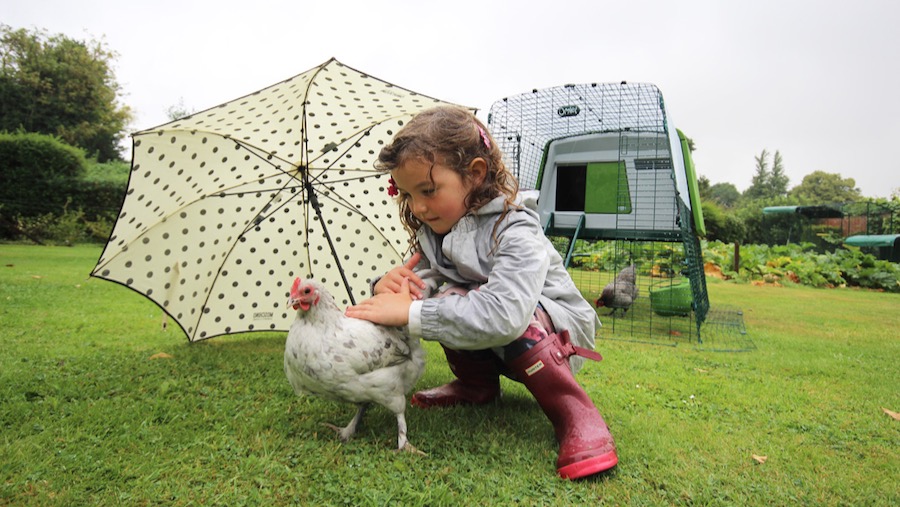
? TEMPERATURE ?
Firstly, the most obvious indicator: the predicted temperature for the coming 10 days. Depending on what time of year we are in, this can be super helpful or utterly confusing if it is varying drastically. But let’s think about what we can act upon.
In winter, if the predicted temperature is at below 0 degrees celsius for more than 5 days in a row or the temperature is near freezing and you have very few chickens in your coop, you may want to consider attaching the Extreme Temperature Blanket to your Eglu to give your chickens some extra help with keeping warm, without limiting the coop ventilation.
During hot summer months, when temperatures can be above and beyond 30 degrees celsius daily in some countries, it is wise to move your chicken coop into an area that is in the shade for as much of the day as possible. For your chickens, daily health checks are essential to ensure they are not suffering with the high temperatures. If your coop is attached to or inside a secure run, you can leave your coop door open to increase airflow at nighttime without your girls being exposed to predators.
☀️ SUN ☀️
When the sun is shining, it is tempting to cover your chickens’ run with shades so that it is completely protected from the sun inside. However, this can have the opposite effect on what you intended. Instead of shading and cooling the area, lots of shades create a tunnel which traps the heat, like a greenhouse.
It is best to keep them in a shaded area, and protect one side of the run from the sun. If your chickens are out free ranging most of the day, make sure that they have access to shady patches in the garden, and that their food and water is also in shade.
❄️ SNOW ❄️
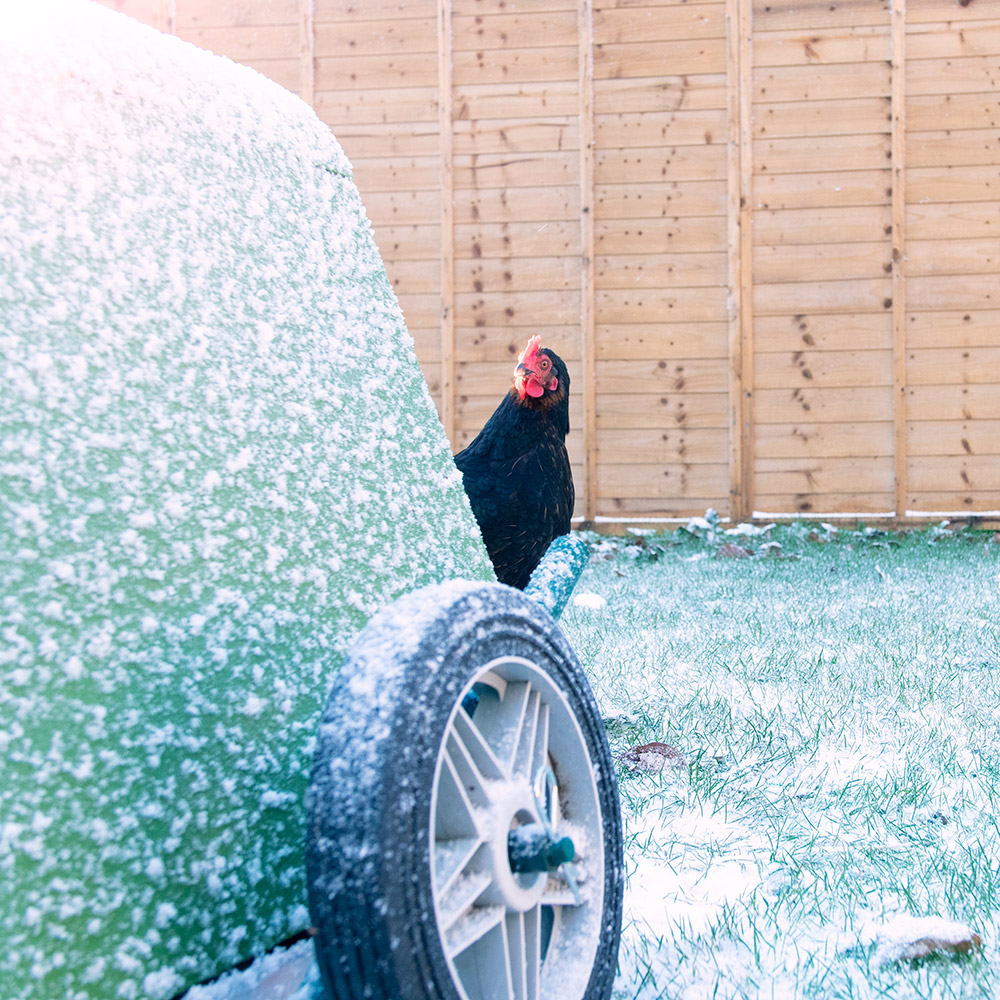
Exciting for some, but for others a weather warning for snow can be very disappointing. You may want to consider sheltering your coop’s run with clear covers to prevent as much snow getting on the ground inside the run as possible. If snow is predicted for the foreseeable future, you may want to prepare for long term icy conditions and bring your coop closer to the house so it is easier to check on your chickens, and they can benefit from some of the shelter your house might provide. During the snow, be sure to dry off damp feathers and remove any chunks of ice from claws. Increase the amount of bedding and food you are giving your chickens too as this will help them stay warm.
If you have time, it might be wise to consider how effective your chicken coop will be against the bitter cold. If you have a wooden coop, check if it is water-tight and well insulated. If you are not confident in your wooden coop, consider upgrading to a sturdy plastic alternative, like the Eglu Cube. It’s twin-wall insulation works in the same way as double glazing to keep the cold out of the coop, and the heat in during winter. The plastic material is waterproof and super easy to clean out quickly (especially important on chilly winter days).
☁️ CLOUD ☁️
The most boring of all weather forecasts, but often a rest bite from other more extreme conditions. During winter, a few cloudy days should raise the temperature slightly and give you a good opportunity to clean out your coop and thoroughly check on your chickens and make any changes needed for whatever the forecast predicts for the coming days.
? RAIN ?
Some weather reports are more helpful than others when it comes to the exact timing and chance of there being rain. But if you’re looking at days of 90% chance of heavy showers, it would be wise to act fast and get some protective clear covers over the run. If the ground under your chickens’ coop and run is already extremely muddy and wet, you might want to consider moving them to a new patch of grass, and maybe even laying down a base material, like wood shavings, to prevent it developing into a swamp!
? WIND ?
How you react to a windy forecast completely depends on the wind speeds predicted. Light winds, less than 25 mph, shouldn’t cause much of a problem. You might want to add some windbreaks around the base of your Eglu and a large clear cover down the most exposed side. However, in extreme high winds, the worst thing you can do is completely conceal your run, particularly a larger Walk in Run, with covers from top to bottom. In a large run, the mesh holes allow the wind to flow through without causing any issues to the structure, and a clear cover round one bottom corner of the run will provide chickens enough shelter. If you cover the run completely, the wind will be hammering against it and is more likely to cause the structure to lift or move.
If your chickens are in a smaller run attached to their coop, we recommend moving it to a position where it will be most protected from the wind and any falling debris, for example, against a sturdy building wall. The Eglu’s wheels allow you to easily move the coops around your garden to suit the conditions. If you are keeping your chickens in their Eglu coop and run, and not free ranging during dangerous weather conditions, consider adding some entertaining toys and treat dispenser for them to prevent boredom, such as the Peck Toy or Perch.

This entry was posted in Chickens
Hens spend their entire lives outdoors. This means they have to cope with everything the year throws at them — from summer heat waves and winter chills, to year-round downpours. Being hardy birds, they take much of this in stride, but they benefit from a helping hand from their humans. Here are ways to help your flock and prepare for the chicken-keeping challenges in the year ahead.
Winter
Depending on your location, winter can be one of the most challenging seasons for all outdoor animals. No matter where you live, there’s a lot working against both humans and chickens when cold weather sets in – but thankfully chickens are naturally equipped to endure lower temperatures. Because of this, chicken-keeping in the winter isn’t much different from the rest of the year, but a few preparations can go a long way in helping your hens thrive in the cold.
Cold-weather chicken considerations
- Although chickens cope well with the cold, they’ll need some help when it’s both cold and wet. Keeping hens in an insulated Eglu Chicken Coop is a good place to start, with the option to add extra chicken coop weather protection to both the run and the coop. This is especially helpful if you live in an area that receives heavy snowfall.
- Perches in the run enable chickens to cuddle up when it’s cold – which is essential in the winter months. The Omlet Chicken Perch, being composed of eucalyptus, a strong, untreated wood, prevents chickens’ feet from becoming too cold. Offering perches above the frozen ground of the run gives your hens’ toes a break from the chill.
- In sustained sub-zero temperatures, rubbing Vaseline on your hens’ combs and wattles will help prevent them from becoming frostbitten.
- Keep your hens’ feet dry in wet weather by lining the run with wood chippings, straw, or hay.
Winter daylight hours
- Chickens usually return to the coop to roost at dusk. But in the winter, you may find your birds trying to get more time outside on the short days. If your hens are prone to wandering around in the dark, a high visibility hen coat will help you locate them – and also ensure they’re visible to anyone else, should they stray from your garden.
- Installing an automatic chicken coop door with a coop light will help your hens adhere to bedtime. The door can open and close automatically based on the amount of daylight, a specified time, or manually. The coop light will help beckon wandering birds to bed when darkness falls, as chickens will naturally gravitate toward a light source.
Your chickens’ health during colder months
Keep an eye out for coughing, sneezing, lethargy, or other signs of chicken illness. Older or weaker chickens can become more vulnerable to illness when the cold weather sets in.
- Egg production will decrease – but this doesn’t mean no eggs for breakfast. While your hens may not lay as frequently, and some may stop altogether throughout the colder months, a flock of 4 or more chickens should still provide an adequate supply of eggs for your family during the winter.
- Make sure your hens’ diet consists of high-quality feed and scratch, and consider adding some extra chicken vitamins and minerals to boost their immune systems. Offer hay or greens in a chicken treat holder to provide a nutritional activity on cold days.
- Their water will freeze, so be prepared to break the ice, and have some spare water dispensers ready in case the waterers freeze solid. Pour hot water over any icy water sources throughout the day to help keep things thawed. Consider placing submersible bird bath heaters in your chickens’ waterers to keep them thawed.
- On the upside, winter might kill off any lingering flies, mites, and other pests your chickens encounter during the warmer months.
Spring
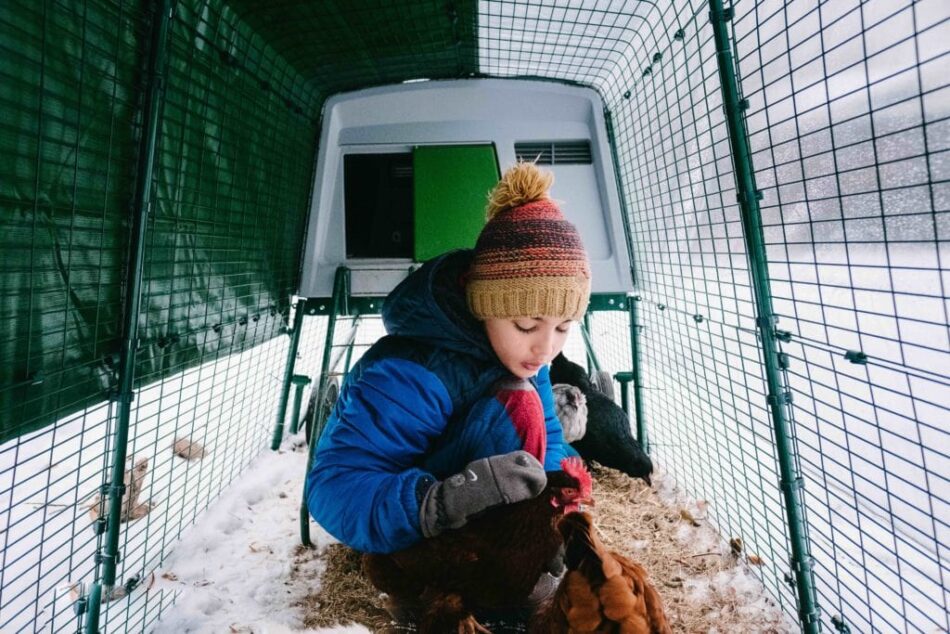
As the days lengthen, your hens will start laying more eggs. Vegetation comes back to life, and chickens find insects, plants, and other findings worth scratching around for. Your chickens will likely be wanting to spend more time outside in the warmer temperatures and longer days, but predators also spend more waking hours roaming in the spring.
Protect your chickens from awakening predators
Predatory animals such as foxes, wolves, and badgers will also be on the prowl after a lean winter. Keeping your chickens in a secure, covered run is vitally important during early spring when nature’s predators are also taking advantage of the changing seasons. Automatic chicken coop doors will ensure the hens are in and out at the right times, and will prevent predators from gaining access after-hours. The door will also let your chickens out in the morning, so that you can enjoy weekend mornings in bed as the days get longer.
Take proactive steps to reduce chicken coop pests
It’s also important to note that mites and parasites make their debut in the spring, so if you don’t have an easy-to-clean plastic chicken coop, be sure to treat your coops and runs to get ahead of the pests. Mites thrive in wooden surfaces, so housing your hens in a plastic coop is a first line in defence to eliminate pests. Change bedding daily, and clean the interior of your coop frequently to keep your chickens healthy and happy when mites threaten to emerge.
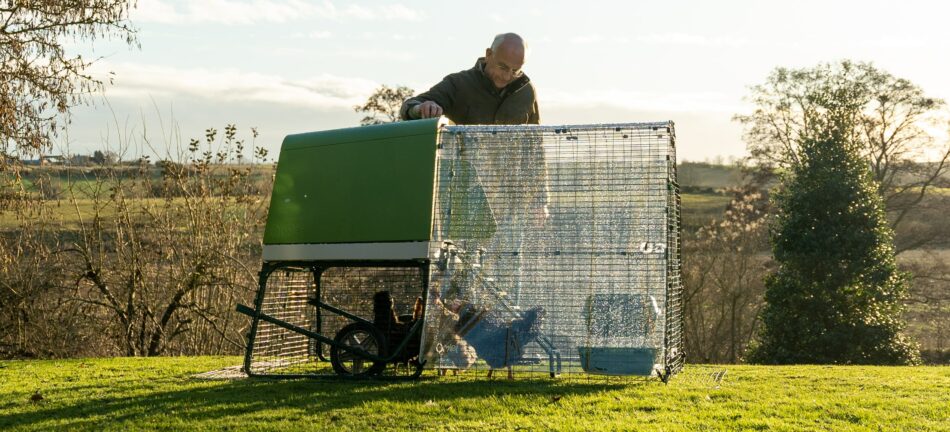
Summer
It’s amazing to see the transformation in your chickens as the seasons change. Gone are the downy, fluffy winter and early spring jackets your hens sported mere months ago. Instead, you may now notice your hens’ feathers slowly becoming more dull, and they are spending more and more time under shaded areas.
For many flock-raisers, summer poses the largest threat to chickens. The main risks that flocks face in the summer months are heat and too much sunlight. Be sure to have plenty of shaded areas where your chickens frequent, and keep fresh, cool water available at all times. A chicken coop that provides shade itself, like the space under the Eglu Cube or the Eglu Go Up, is ideal for the summer months.
The Eglu Cube chicken coop is designed to reduce moisture and increase airflow through its ingenious ventilation design. Twin-wall insulation and vents along the back allow for cool air to circulate while keeping the warm air out. Plastic doesn’t hold onto moisture the way that wood does, so your chickens can find relief from the damp, humid air. The Eglu Cube also offers a shaded area beneath the coop, with the option to add heavy-duty run covers to the sides and top of the run for additional protection from the sun. And, with added handles and wheels, the Eglu Cube can be moved to shadier, cooler spots as summer progresses.
Here are some other methods to alleviate heat-related stress in your flock during the summer months:
- Keep the water supply full, as hens drink more in warm weather. Add ice cubes to waterers if possible throughout the day to keep the water temperature at a refreshing level.
- Provide a dust bath – either a dry area of ground in the garden, or in a container in the chicken run. Cat litter trays, kiddie pools, and even old tires with the rims removed make great basins for dust baths.
- Offer treats like frozen corn or other chicken-safe veggies in a chicken treat dispenser or chicken peck toy.
- Look for any signs of heat stress in your hens. Open-mouth breathing (panting), lethargy, agitation, increased saliva production, or any other concerning symptoms should be reported to your veterinarian. Bring any chicken exhibiting heat stress into an air-conditioned space, but refrain from employing any other cooling measures until hearing from your veterinarian. It can be dangerous for an overheated chicken to have their body temperature brought down too quickly.
Fortunately, the “dog days of summer” usually yield to lower temperatures at night. You may want to offer more space outside of the coop for your chickens to roost overnight in the warmer months, as they will need extra space away from each other’s body heat during this season. A Freestanding Chicken Perch or PoleTree will give your hens aerial space to roost if they need to spread out at night. Just be sure that all of their enclosures are predator-resistant.
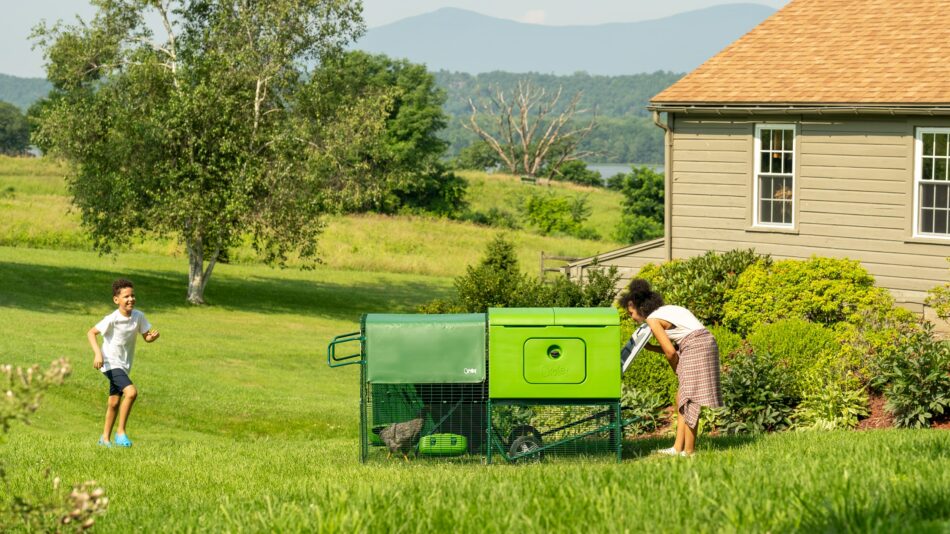
Autumn
Autumn is a favourite season for both flocks and their keepers. Bugs are still abundant, the temperatures are comfortable, and gardens offer hen-friendly snacking opportunities when gardeners rotate crops.
Hens will often moult this time of year in preparation for colder temperatures, so they need a good diet to help them stay healthy and grow new feathers. Extra vitamins and minerals will boost feather growth, and a little apple cider vinegar in their water will help them grow healthy and glossy plumage. Egg production will cease or drastically reduce while hens are moulting, but once they’ve completed their transformation, your hens will resume their laying schedule. The shorter days will prompt chickens to lay less frequently, but good layers will continue to produce eggs during the fall and winter.
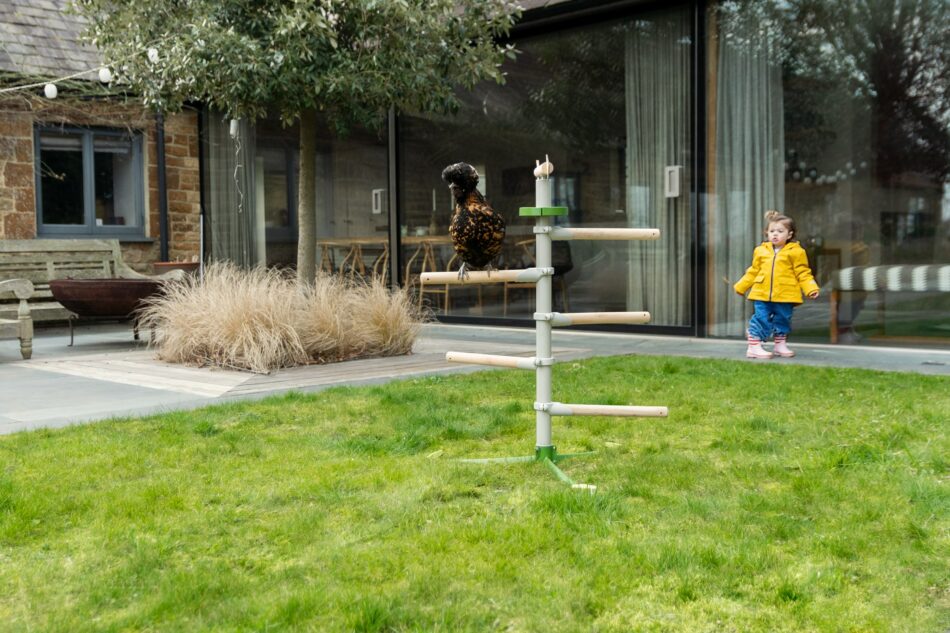
Year-round chicken care with Omlet
At Omlet, we’re here to support chicken keepers all year round. By keeping your hens in an Eglu Chicken Coop and Walk In Chicken Run that are both easy to maintain and clean, you’ll create an environment that is enjoyable for both you and your flock no matter the season. These, along with Walk In Run Covers, make seasonal preparation quick and easy so that the changes in weather, amount of daylight, and looming predators don’t detract from the wondrous connection you’ve created with your chickens. So here’s to another year of chicken-keeping, the Omlet way.
This entry was posted in Chickens
In winter, one of the biggest concerns we see from our customers is: “how well is the Eglu going to keep my chickens warm?”. In this blog, we explain the science behind the Eglu’s carefully designed features, which ensure your chickens are kept nice and toasty in the colder months.
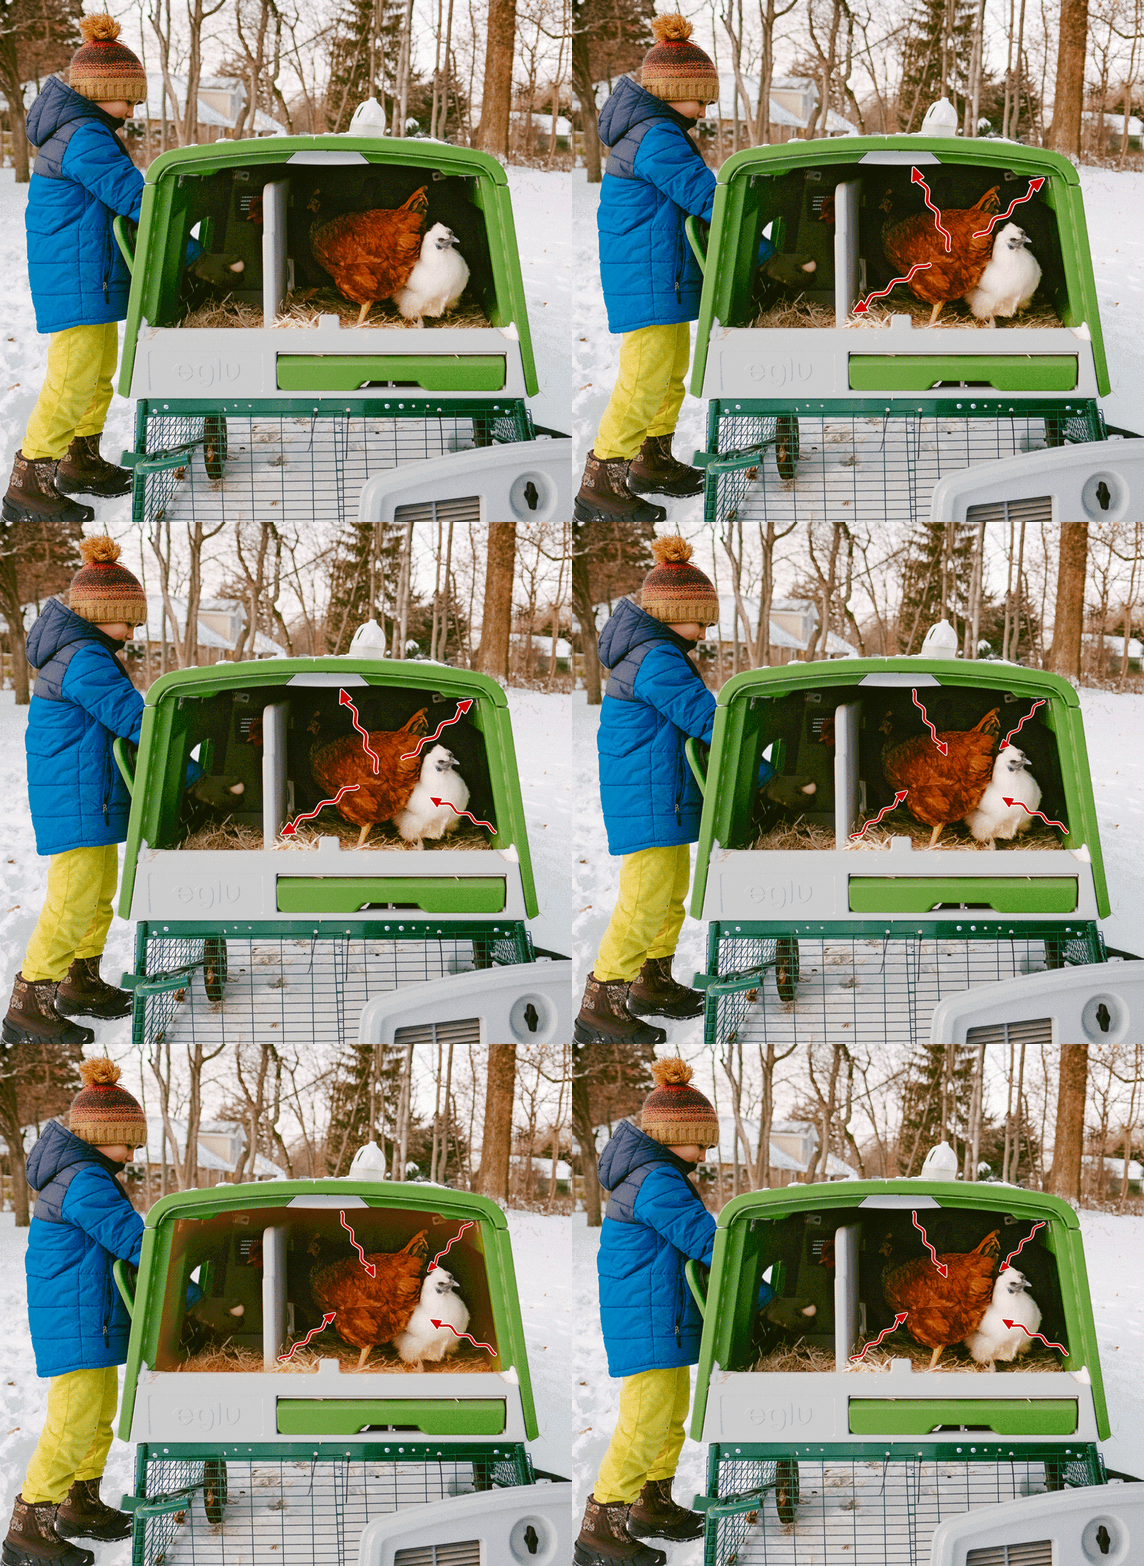 Insulation
Air is an amazing thermal insulator. Heat is conducted between an area of more heat to an area of less heat. The warmer molecules vibrate rapidly and collide with others, passing on energy. If the material the heat (in this case the body heat from the chickens inside the coop) is trying to pass through has few molecules in it then it will be harder for the heat to transfer through it. This is the case with air, and that is why it’s commonly used as an insulator in everything from walls and windows to cooking utensils and drinking flasks – and chicken coops!
The Eglus’ unique twin wall system captures air in a pocket between the inner and outer wall, taking full advantage of air’s great insulating properties. This solution stops the cold air from moving into the coop, and retains the warm air in the coop. The same process also keeps the chickens cool in summer by stopping the warm air from entering the coop and making it too warm.
Ventilation
Perhaps even more important than the coop’s insulating properties, is how well ventilated it is. If the coop doesn’t have good ventilation, you run the risk of either having a nasty draft if the coop has badly positioned vents or large holes and openings, or a build up of moisture if the coop is too tightly insulated. Both will prevent the chickens from staying warm on chilly winter nights, and can cause unpleasant respiratory illnesses.
The Eglu coops are designed to let air flow through the coop, but without creating an uncomfortable draft for the chickens. The vents are positioned in such a way that your pets won’t notice the fresh air flowing through the coop, but the warm air evaporating from the animals and their droppings will move through the vents and prevent any moisture.
How chickens keep themselves warm
Chickens, like many other non-migrating birds, have a layer of downy feathers under their visible plumage that they can fluff up to create air pockets close to their bodies. This will retain the heat, and will keep them warm during winter.
Chickens also have a high metabolic rate that will speed up even more during winter, helping to keep their bodies warm. This is why you might have to feed your chickens a little extra during the winter months.
Chickens are also able to decrease the blood flow to their bare legs to minimise loss of body heat. The overlapping scales on their feet and legs trap some warm air, so walking on snow and ice rarely causes chickens any discomfort. When roosting in the cold, the feet and legs are tucked in under the warm feather blanket, and the chicken might also tuck its head under a wing to get some extra body heat.
This entry was posted in Chickens
…make it this one.

From the latest smartphone to super clever hairdryers, we often hear and read about the top new gadgets that we need in our lives, and more recently we are beginning to see amazing tech products for our pets! But what about chickens? Yep, even our feathered friends are getting a look into the future, and this is not something to be missed.
If you buy one thing for yourself or your chickens this week, make it this.
The Autodoor.
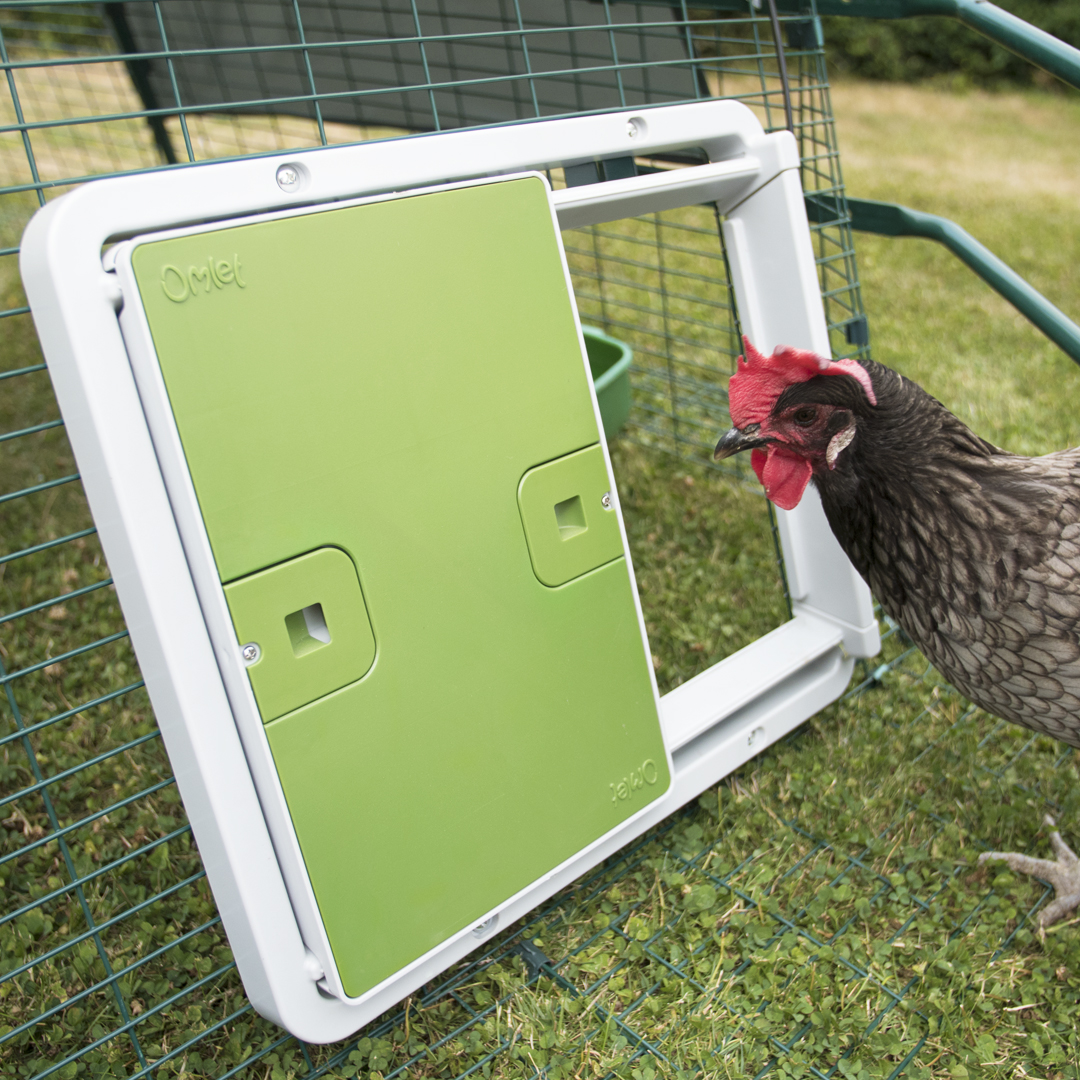
This one simple addition to your chickens’ coop, can make a hugely significant difference to your life as a chicken keeper, and many users swear by it.
Secure the Autodoor to your chickens’ enclosure; this can be the Eglu Cube house, Eglu run, any wooden chicken coop or chicken wire, and use the control panel to set when the door opens and closes, based on a specific time or a percentage of light.
In the morning, the Autodoor will open with no fuss, allowing your chickens out of their coop or run to explore, graze and stretch their wings, especially useful in summer, when your chickens are wanting to get going far earlier than you. There’s no need to get up at 5am when you have an Autodoor.
In the evening, as the sun sets, the Autodoor can be programmed to close at a time when you know all your chickens will have gone into their coop to roost, so they can be secured and safe from predators. In winter, when it can be dark before you get home, you won’t have to worry about having to hurry back in time to shut them in. The Autodoor can do it for you.
Here’s 5 other reasons, you need the Autodoor…
- Battery-powered. No need to keep your coop close to a power source.
- Reliable in all weather conditions. This is a gadget that will take you from winter to summer, and back again.
- Built in safety sensors ensure no chicken is harmed when investigating their new gadget.
- Improves coop security and insulation. The horizontal door is far safer than it’s vertical, guillotine style competitors which can be easily lifted by predators.
- Low maintenance and easy to install. Everything you need to get started is in one box!
This entry was posted in Chickens
Winter brings unique challenges for chicken keeping, and avoiding common pitfalls can help keep your flock healthy and thriving. In this guide, you’ll discover 10 things to avoid as a winter chicken keeper, empowering you to navigate the season with confidence and care in your backyard. From managing coop conditions to understanding your hens’ needs, these insights will ensure you’re well-prepared for the chilly months ahead.

What to avoid this winter
Knowing what to avoid is just as important as knowing the right things to do when caring for your chickens. Preparing your flock for winter is essential, but there are some common mistakes that you might overlook or misunderstand about winter chicken-keeping. Here’s what not to do this season:
Don’t coop your chickens up
Your chickens are built to be outdoors, and they’re naturally resilient against cold temperatures. In fact, a hen’s internal temperature is around 41°C, making it easier for them to handle the cold than the heat. Beneath that shiny plumage, dense downy feathers, courtesy of your flock’s annual moult in the autumn, provide excellent insulation.
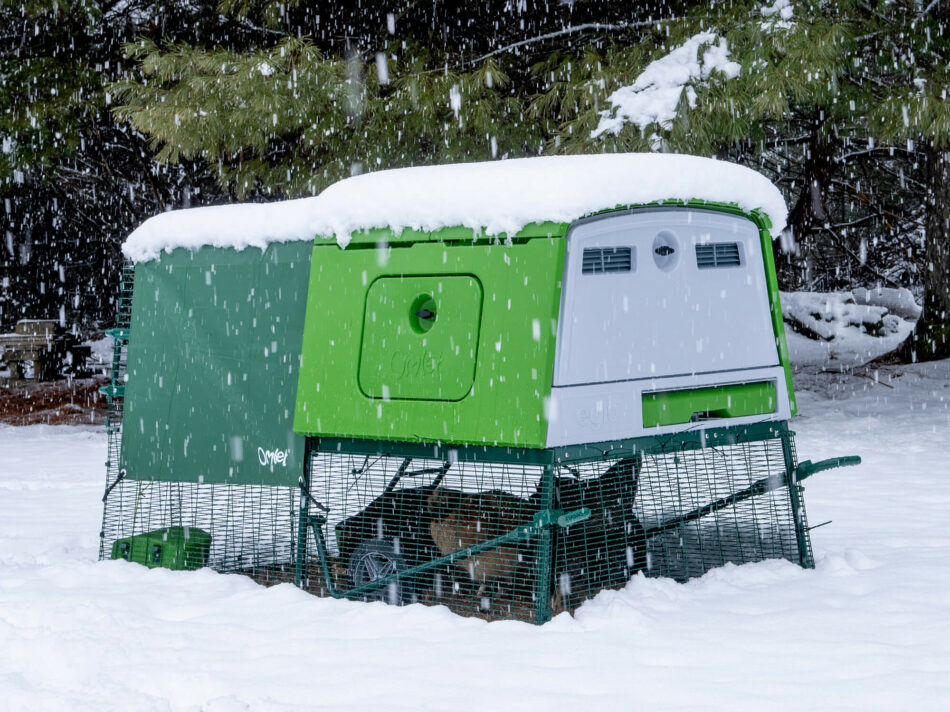
It might be tempting to keep your chickens fully enclosed in their coop, but they can easily become bored and stressed. Instead of locking them up all day, open their coop door once the sun has been up for a few hours to warm up their environment. Or, program your Smart Autodoor to open at a set time. Invest in chicken run covers to prevent snow and ice build-up, and provide plenty of chicken perches to help keep their feet off the frozen ground. With these measures, your flock will thrive even outside of their coop.
Don’t make their coop airtight
One common mistake is trying to seal your chicken coop completely. Your flock needs fresh air circulating to prevent moisture build-up and respiratory issues. Insulated chicken coops are designed to keep harsh elements out while still allowing enough airflow.
While drafts can be a concern in the winter, a well-ventilated coop won’t let in dangerous cold drafts. Even with extreme temperature chicken coop jackets, Omlet’s Eglu Chicken Coops provide just the right amount of fresh air without letting in harmful drafts.
Don’t offer supplemental heat
Your chickens are hardy creatures, and they adapt naturally to falling temperatures. If you heat their coop, they miss out on the process of acclimating to the cold and might be shocked, quite literally, when they step out into freezing weather. This sudden shock can even be fatal to your flock.
Heat sources also present a fire hazard for your chickens, so they should only be used with close supervision. While brooder plates, heat lamps, or heating pads can be helpful for sick birds or young chicks, they should only be used in dire situations for healthy hens. Instead, add extra insulating bedding like straw or hay to nesting boxes and roosting areas to provide warm comfort without the risk of electric heat sources.
Don’t leave eggs in the coop
It’s easy to remember egg collection in the warm days of summer, but when temperatures dip below freezing, you need to gather eggs quickly. Some breeds’ egg production can be affected by the colder weather, but for those that continue to lay, their eggs shouldn’t be left in the coop for more than a couple of hours if it’s freezing outside. A frozen egg might not be spoiled initially, but as the contents expand, they can crack the shell. Once that shell is compromised, bacteria can sneak in, rendering the egg inedible.
Make it a habit to check for and collect eggs each time you visit the coop. This proactive approach works well in any season, but especially when facing the challenges of extreme temperatures.
Don’t forget their water
When winter arrives, keeping your chickens’ water from freezing becomes a daily challenge. Standard chicken drinkers can quickly turn into ice blocks, so it’s important to check and break up any ice several times a day to ensure your flock always has access to fresh water. Pouring warm water over frozen waterers can help thaw them, and using electric bird bath or submersible heaters designed for poultry waterers is another effective option, just make sure to keep cords and components safely out of reach of curious beaks.
You can also try placing a floating object, such as a tennis ball, in the waterer. The gentle movement helps prevent solid ice from forming, though its effectiveness can depend on factors like wind and the size of the object.
For an even easier solution, consider using an insulated drinker like the Omlet Insulated Stay Clean Chicken Drinker. Its double-walled design helps keep water from freezing, reducing the need for constant checks and refills. This can be a real time-saver during those extra chilly days.
Don’t put off cleaning the coop
Before the cold weather truly sets in, give your chicken coop a deep clean. This allows you to use a pressure washer one last time before ice becomes a problem. Refresh the bedding with thick, warm materials like shavings or straw, and double-check that run covers are secure and adjusted.
When it’s too cold to use water, you can maintain cleanliness with a rag or a stiff brush. Be sure to empty droppings trays regularly and brush off any debris from roosting and nesting areas. Keeping the coop clean, ensuring proper ventilation, and monitoring humidity levels promotes good respiratory health for your chickens all winter long.
Don’t limit their fun
Your chickens might wander less far from their coop during the winter, especially as insects and vegetation become scarce, which can affect certain breeds more than others. Snow and ice can sometimes dampen their enthusiasm. To keep boredom at bay, make sure your flock has plenty of engaging activities to enjoy.
Incorporate chicken perches, peck toys, treat holders, or even a Chicken Swing in their run or free-ranging space. These fun additions can transform dreary winter days into delightful moments that cheer both your heart and your hens’.
Don’t go easy on the feed
During the winter months, different chicken breeds may require varying amounts of energy to maintain body heat, so they tend to get hungrier, requiring more chicken feed than usual. With their increased appetite, you’ll likely find yourself refilling their chicken feeders more frequently.
Treat your flock to extra nutrition during these colder times. Consider adding dried mealworms or soldier fly larvae to their scratch grains or offering alfalfa hay to satisfy their cravings and keep them energized.
For added convenience and peace of mind, the Omlet Smart No Waste Chicken Feeder can be a game-changer during winter. This innovative feeder notifies you when your feed is low, helping you keep up with your flock’s increased appetite without you having to constantly check the feeder itself. Its weather-resistant design also ensures feed stays dry and fresh, even in snowy or damp conditions, so your chickens always have access to the nutrition they need.
Don’t forget combs and wattles
Frostbite can affect any chicken breed, but hens with larger combs and wattles are especially vulnerable. Keep an eye out for signs of frostbite such as:
- A pale or white appearance
- Black spots or sections
- Misshapen edges
A little petroleum jelly applied to these areas can help prevent frostbite in chickens. While frostbite isn’t typically deadly, it is uncomfortable, and once areas are discoloured, they might fall off, leaving your hens with misshapen combs or wattles.
Don’t forget chicken self-care
Sunbathing and chicken dust baths are all part of your hens’ daily pleasures during warmer months. They’ll continue to appreciate these activities in winter as well. Dust baths help keep their feathers in good condition, ensuring they stay warm, comfortable, and free from excess water.
Having clear run covers that allow the gentle warmth of the sun to filter through can create cozy spots for your flock, making those winter days feel a little bit brighter.
Omlet and your flock
Prepare your flock for winter with our thoughtfully designed products, created with you and your hens in mind. Our chicken coops, run covers, and smart automatic chicken coop doors make winter chicken-keeping a breeze rather than a freezing ordeal. This winter, work smarter, not harder, by choosing Omlet’s chicken products to support you and your flock throughout the season.

This entry was posted in Chickens
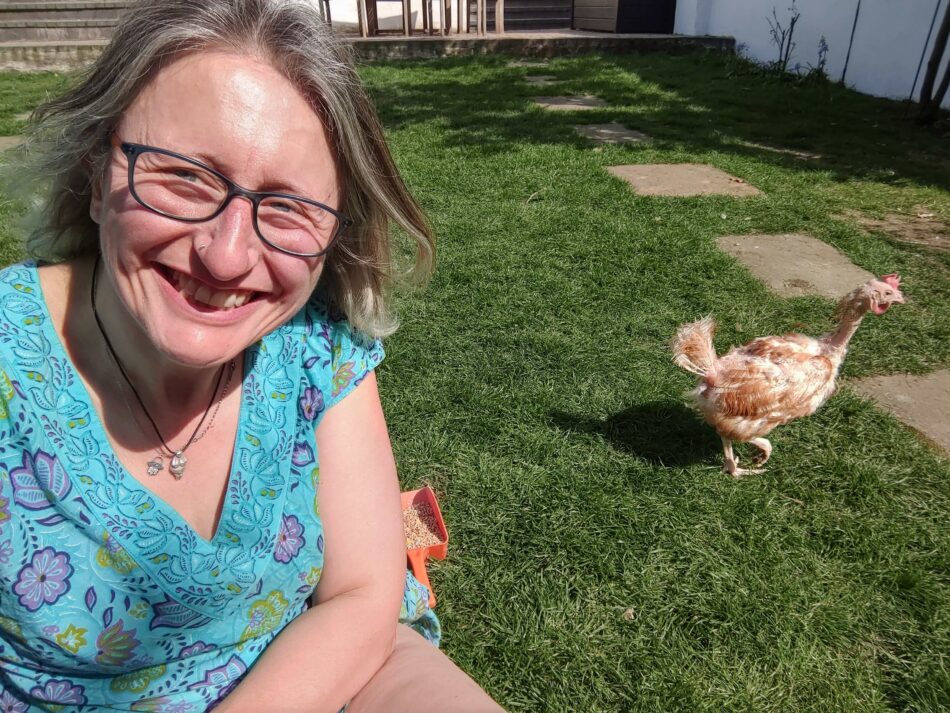
Caramel Quin and her children keep backyard hens in east London. This is their diary of introducing ex-battery hens to their older girl.
We started out with two hens and an Eglu Cube. A friend who had kept chickens for eight years needed her garden back and we’d been thinking about henkeeping, so she kindly passed them on to us. We named them Buffy and Britney (I make no apologies for brainwashing my tween kids to love late nineties pop culture).
That was just over a year ago. Buffy’s still going strong, Britney only lasted a few months. By then, we loved the girls and were already on the waiting list to collect ex-battery rescue hens from the British Hen Welfare Trust. We went as soon as possible: Buffy needed more chickens for company, or at least we did.
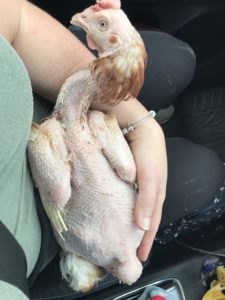
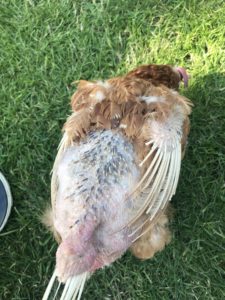
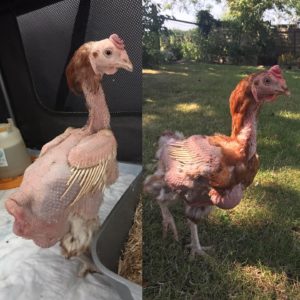
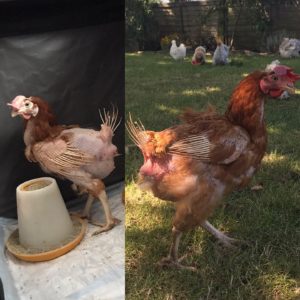
We drove to a nearby rehoming day and collected six birds, bringing them home in a couple of cardboard boxes. They looked sorry for themselves, skeletal, anaemic. Their crests were pale and floppy. The dog, shut inside the house, pressed himself against the glass door and salivated like a cartoon hungry dog, even though they didn’t have much meat on them. The hen with fewest feathers was nicknamed Necky and looked more dinosaur than bird. The boldest was nicknamed Dora the Explorer as she sought out every nook and cranny in the garden.
A garden! It was hard to imagine that these birds had never been outdoors before. Everything was new as they exhibited natural behaviours for the first time, like scratching and pecking at the soil for bugs. We let them explore while Buffy looked on from the chicken run. Then we swapped them and they ate while she was free range. Later we put them together in the run and watched excited as the first made it to the top of the ladder and found the Eglu.
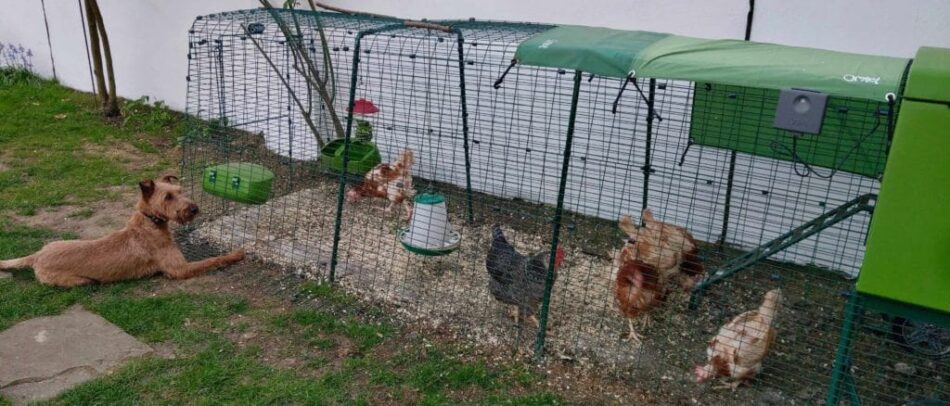
On the first night, they didn’t all find their way upstairs to bed. A couple roosted under the Eglu Cube, so I went into the run and put them in by hand in the night. From then on, they knew where home was and made it into bed before the Autodoor closed to keep them warm and safe.
We gave them plenty of free range time. We also doubled up on feeders and drinkers, so nobody got bullied away from dinner. The hanging feeder proved best because all seven birds could get around it at once. I swapped layers pellets for smaller layers mash for a couple of weeks because the birds were used to smaller food when they were commercially laying.
On their second day we found eggs laid randomly all over the garden, cutest was the one in the hollow of a dust bath. But within a week they had all figured out where the nest box was. Having never had more than two eggs in a day, it was a thrill to get five or six (and on one remarkable day, seven). Ex-battery hens tend to be good layers, they were bred for it after all.
On day two, I remember them freaking out when it rained: they had never experienced these tiny water bullets from the sky. Then there was a brilliant moment when I threw a handful of cherry tomatoes into the run and they dived away as if I’d lobbed a grenade into the trenches.
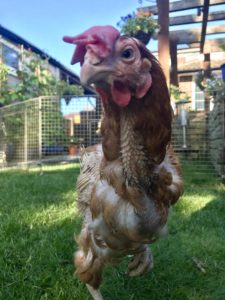
Bullying wasn’t as bad as I’d feared though. Buffy was outnumbered 6:1 by the newly named Willow, Betty, Mercury, Dora, Chirpy da Hen and Mango Buckbeak. (Listed in order of the age of the family member who named them… youngest last, as you can tell.) We added coloured rings on their ankles early, before it was hard to tell them apart as their feathers grew back, though the feathers came in slowly because we adopted them in April. Apparently if you adopt in the winter they get feathers faster because they need them for warmth.
Chirpy and Mango were the least feathered and most picked on, sometimes bullied away from food, but we gave them plenty of free range time so the bigger ones got out in the garden while the smaller ones ate. Gradually the bullying pecks gave way to polite pecks between all the girls, preening each other after a dust bath and freeing new feathers from their protective sheaths.
Seven months on, we still have Buffy and four of the new girls. Willow and Mercury didn’t make it: one died suddenly the other was unwell for a few days first. But we’ve also nursed others back to health: my signature banana porridge is now famous for bringing ill chickens back from death’s door.*
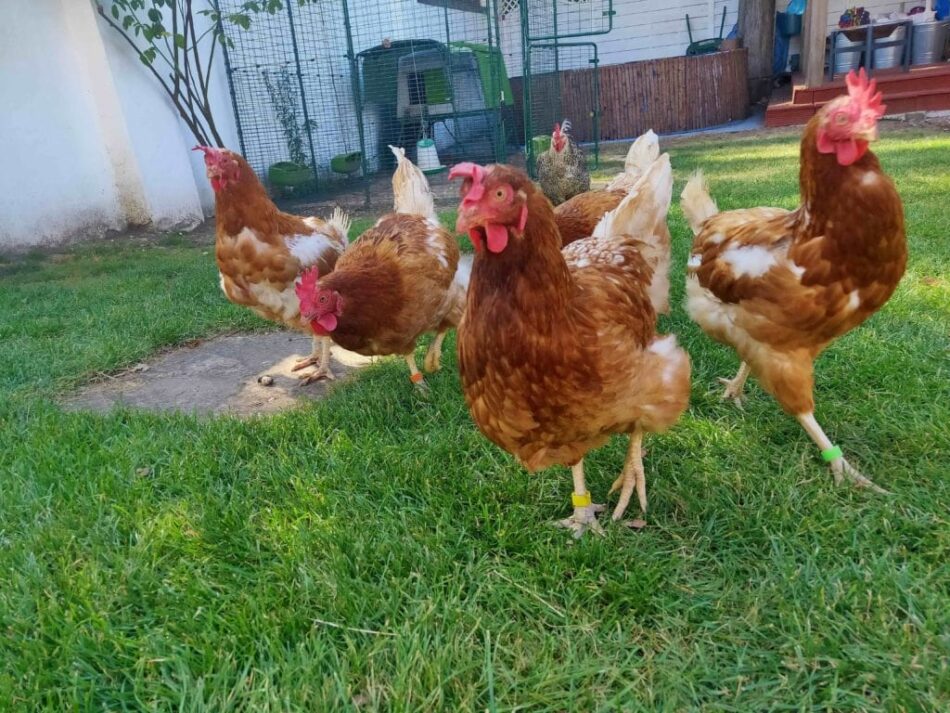
The star of the show is Chirpy da Hen, who I swear will live longest. She might outlive me. She gave us a scare a few months ago with a backside protrusion of epic proportions. We cleaned and examined it and were convinced it was a tumour not just a prolapse. We separated her in a pet crate so her sore bum wouldn’t get pecked by the others. We fed her banana porridge and gave her painkillers. Over a week, her bad butt gradually improved until we could miraculously pop it back in again and reintegrate her with the others. She’s fine now. No, she’s more than fine. She’s badass.
BHWT is careful to manage expectations: the lifespan of ex-batts is hard to predict. Instead they say “your hen has at least experienced kindness outside of the commercial system which is more than she could have ever hoped for”. If you think pets are a good way for children to learn about mortality, try ex-battery hens. They’re fun, their eggs are yummy and it’s easy to feel positive about the good life you give them, no matter how long or short it is.
Ours have a great life with free range time every day. They eat well, even jump up to eat roses and fuchsias from the bushes and I don’t mind. The dog is used to them now and can go out at the same time without him acting like a cartoon hungry dog.
My luxury is upgrading to a Walk-in chicken run with rain cover, which is as much for me as it is for the birds. I got it mostly so I can muck out the run without kneeling down. It also gives the girls plenty of space and lets the children and guests visit them any time.
We’ve gone full circle as Buffy is going through her first hard moult, she’s half bald in cold weather, while the ex-batts are nearly fully feathered. Next year we’ll probably add more ex-batts to our brood. I guess we initially got them thinking of the eggs but now it’s more than that: they’re part of the family… who just happen to lay delicious eggs.
For more information on battery hens and maybe opening up your home to some check out the ‘British Hen Welfare Trust’ for upcoming rehoming dates.
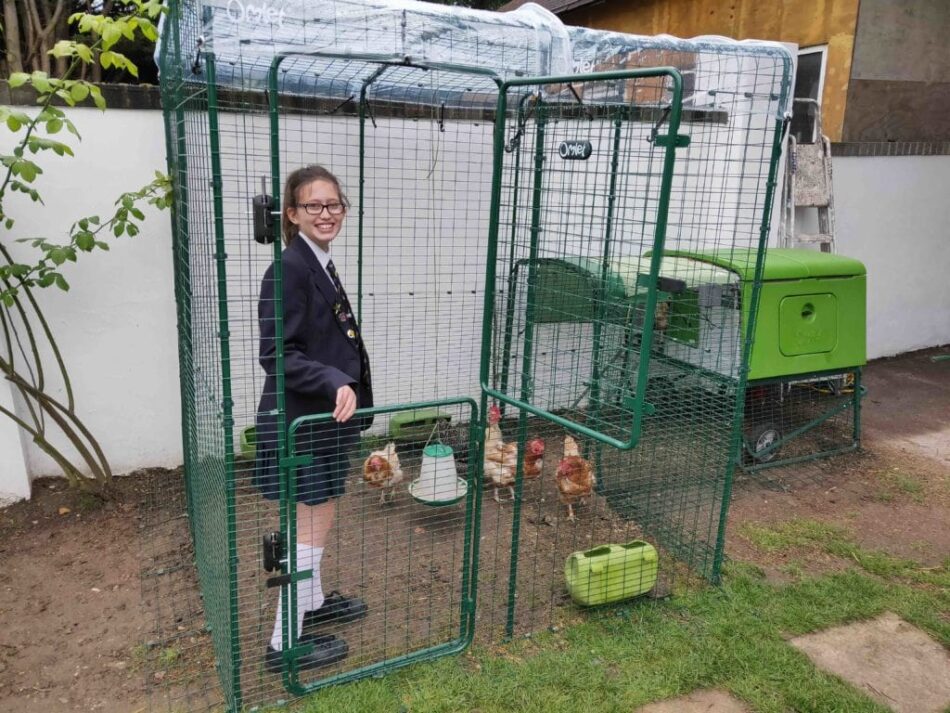
*We recommend only feeding your chickens treats occasionally. Always make their food outside of your kitchen to avoid cross contamination of food.
This entry was posted in Chickens
The Eglu Go which we launched in September 2009 is the new version of the Eglu Classic MK 2 which was launched in 2005.
The Classic and the Eglu Go are made of the same secure weld mesh, are the same size and are both easy to clean.
With the Eglu Go:
Possibility of changing this into the Eglu Go Up;
Lighter Rear Panel which gives access to the inside;
Droppings tray, roosting bars and nest box all slide out.
With the Eglu Classic:
You can open the side eggport door and collect your eggs.
It is the only chicken house in the permanent collection of the Victoria and Albert Museum because of it’s cool design!
This entry was posted in Chickens
It is very difficult in the first instance to tell or diagnose when a chicken reaches maturity if it is going to have any internal issues a sometimes can be somewhat of a surprise to new chicken keepers when chickens fall ill, but judging from your conversation it seems that something is protruding from the vent area, which as you suspect is likely to be a prolapse, this is where the oviduct or egg laying tube has been pushed out of the body in an effort to lay an egg. It is vitally important to separate her from any other hens you might have as they will be attracted to the redness and peck at it causing your hen distress and serious injury.
To treat the prolapse, first wash the prolapsed area with warm water with some antiseptic in it. Dettol or Savlon will be perfect. You may see that there is an egg in the prolapse and you’ll need to carefully try to remove this without breaking it. If you do happen to break it, make sure that you remove any pieces of shell as they may lead to an abdominal infection. Once the prolapse is clean, tuck the hen under your arm with her head covered to keep her calm and gently push the prolapse back into the vent cavity with clean hands or wear clean rubber gloves or even use a clean wet cloth to help you push it back. Keep the hen in a darkened room or box to recover and allow the prolapse to settle back into her body. Many people recommend smearing honey onto the prolapse as this has antiseptic and healing properties. Applying haemorrhoid cream to the vent afterwards can also help. You will need to stop her laying for a while to stop the prolapse from just popping back out again so keep her off her layers meal for a couple of days and only give a very bland diet such as wheat (weetabix mixed with water or Growers Pellets) and if she’s kept in a darkened room for a few days, this will also stop her body from being stimulated into laying. She may need veterinary treatment if it keeps happening and if it does, I’m afraid that the prognosis isn’t good.
Making sure that she has a good intake of calcium may help as this strengthens the muscles in the oviduct and will help her to pass the egg. Limestone Flour mixed with her layers meal will help boost her calcium levels and you can get this from animal feed suppliers in the equestrian section, you add a heaped teaspoon of this to a feeder of pellets or mash a couple of times a week.
Also giving lots of leafy green vegetables can help with the absorption of calcium into the body so would be a good treat for her, cod liver oil given in moderation can also help with the absorption of calcium. If you give a a tablespoon of cod liver oil over a week, this may also help. Don’t overfeed your hen with other treats though as prolapses are more common in overweight hens.
Also have a look at this topic on our forum with advice from the BHWT – https://club.omlet.co.uk/forum/viewtopic.php?f=41&t=62511
This entry was posted in Chickens
How do I get my chickens to use The Chicken Swing?
Chickens being birds are a bit quirky. Nonetheless, they are extremely habitual and love a routine. It seems the older they get, the slower they are to take on new habits. They are pretty low on the food chain which makes it nice for us because their production rate is high – lots of eggs! However, this makes them cautious and wary of new things. It also makes them group or flock up. They prefer another bird to try new things first. They also remember things surprisingly well. Do you know they will always remember and bond with their hatch mates? They also remember things that scare them and things that reward them with food or pleasure. There are also basic instincts I call “Chicken Things”. One of them is roosting up high in trees. If they perch on moving narrow branches a lot of predators are unable to get them. A moving perch is natural to them.
So, with all that being said, how do we get chickens to get on The Chicken Swing?
Place the swing above the heads of the other fowl in your coop, if you can. You don’t want the swing spooking or hitting other birds (the light – weight design and smooth edges will not injure them.) They are quite able to jump up to four feet or more. A good starting point for full grown/ teenage chickens is twenty inches, or about your knee – height. If you have a small coop and cannot raise the swing that much, don’t worry. Swinging birds will not be able to get the big swing gliding motion or as hard of a kick off as with a full – height set up. But, they will still enjoy the gentler swinging movement of a smaller backyard coop set up. Other fowl will learn to stay clear. They tend to naturally stay out of the way of its movement.
Place The Chicken Swing™ free of obstructions as it swings. For a full swing installation, try to keep it about 18 – 24” away from walls or objects in the swing plane. Smaller coop set – ups have less swing so you can get away with having closer objects. Once they trust the swing, chickens grow more tolerant of kickoffs banging against the coop. (I think that is the goal for some of my hens.) If you have more than one Swing, be sure they can’t collide.
If you have a trusting hen, you can try placing her up on the swing and immediately rewarding her with meal worm treats. Once she is used to that, gently give the swing a pull to get it swinging. Give her a treat eachtime it swings toward you. Soon she will jump up on the swing and start swinging when she hears the bag shake. However, if you try to force her, this method can backfire on you. If the hen gets scared or feels forced, she will relate this to the swing and the other hens might follow her lead of fear. This will set you back. I recommend you do not try this with all your flock, but choose only a few, be very gentle, remain calm, and have rewards ready. Of my 30 hens, only 4 or 5 were taught using treats. Generally, if you get one swinging others will give it a try. I note that in my flock, hens that use the swing most often are not necessarily those trained using treats. Chickens tend to choose their own time. Some are very habitual while others are whimsical. Some are morning swingers. Some swing after their daily egg. Some hop on at odd times. Chickens are chickens, I guess.
One other thing you can use is youth. Young chickens have a lot more free time and are more willing to take risks. Introduce the Swing soon after bringing them home, or at least before they start laying. Not only is it an irresistible adventure for them, it is just too dang cute to watch them carry on and practice moves. I have had older chickens take up swinging. But results are quicker with younger fowl.
Start your chicks out swinging
Whether your chicks are bought from a hatchery or hatched in your coop, chicks will take naturally to The Chicken Swing™ in most cases. The design of our swing allows for chicks just days old to hop up and start trying it out. Its design is lightweight and will not injure them if they are bumped when a hatch mate or fowl of similar size is using it. You may set it up right in your brooder by using the “small coop installation” procedure. Hang the swing from the cross-member using some extra S-Hooks, or by re threading the rope. You can also use a broom stick or shower rod on top of your brooder box and install it similar to full swing method. Just lower the Cross-Member support knot (or untie it) and let the Cross-Member rest on the Side Tie Knot.
For the first few days, set the swing height about two inches above the floor. You may gently place the chick on the swing perch. If they jump off right away, that is just fine. Don’t try to force a chicken to swing. They will get on by themselves after your initial placement if you have been gentle. (No treat is needed with very young chicks.)
After they all seem to have gotten comfortable jumping up on it in this low stage, begin raising it bit by bit as they grow. It is amazing how high those little fluffs can jump! If you have different – sized chicks, you may set a stump or something similar under one side of the swing to help the smaller ones get on. Be prepared to spend way too much time watching them play!
A final point: my flock gets excited when they hear me coming. They stop doing whatever they were doing anticipating garden scraps or treats. This makes it hard to get photos of them swinging. I see them swinging the most when I look out the window out of sight. I had to stop fussing over them every time I went out there so they would just keep swinging when I wanted to take a picture or show them off to a friend. And remember peafowl and turkeys also enjoy The Chicken Swing™!
Fowl Play Products® hopes this information helps to get your backyard flock swinging. If you have older fowl, it might be tricky and take some time to get it going. The saying “Can’t teach an old dog new tricks” is sometimes true. In the end it is up to individual chickens. Not all fowl like to Swing, but we found a whole lot of them do. If you are unable to get your older Chickens to take up swinging, you may want to get a few chicks and introduce The Chicken Swing™ to them. Their example might set the mood for other fowl in your coop.
This entry was posted in Chickens
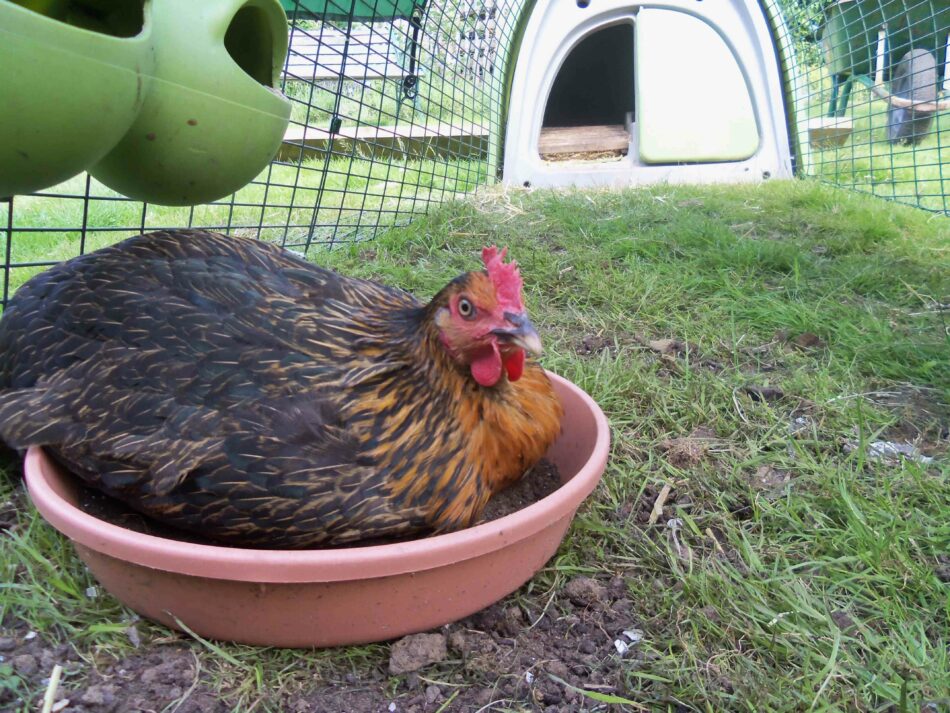
Wondering how to make a dust bath for your chickens? Most hens are perfectly content to dig up their own patch of earth to roll around and fluff their feathers in – but by making your own dust bath from chicken-safe ingredients, you’ll elevate your hens’ bathing from a metaphorical bucket of cold water, to a luxurious bubble (well, dust) bath.
Why do chickens need dust baths?
Dust baths are an important part of overall chicken health. Like humans, chickens bathe to get impurities off of themselves and to feel better in general. It may seem counterintuitive to roll in the dirt to get clean, but the right dust bathing spot can absorb moisture and oils on the skin, and can rid birds of mites and lice. Hens aren’t the only birds that enjoy a good roll in the dirt – many wild avian species can be observed taking dust baths.
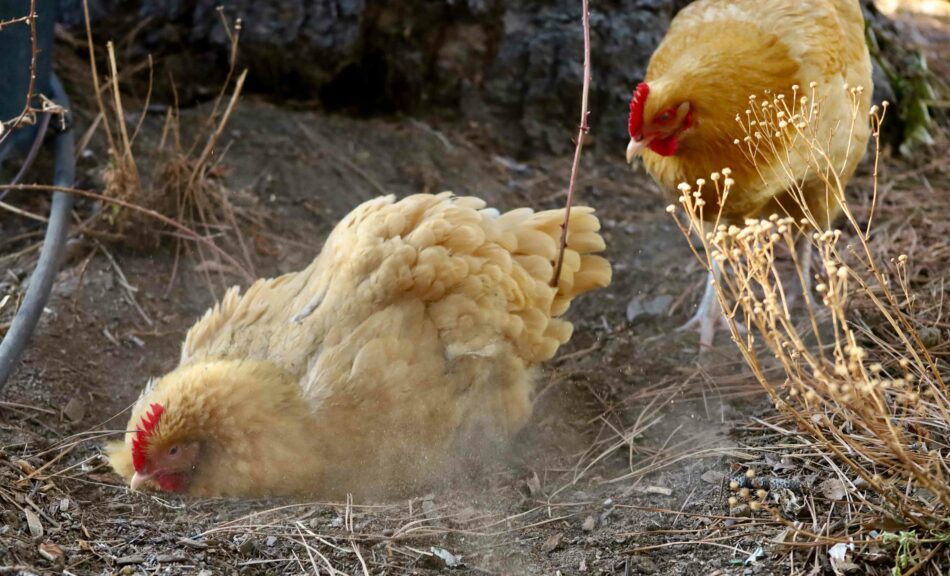
Chickens will find a soft, dusty or sandy spot and scratch around in order to create a shallow well to plop down into. Once they’ve laid down, hens will wiggle back and forth while flapping their wings in a shoulder-shrugging motion. They will lay on each side and repeat the process until they are sufficiently coated in dust or sand. When they’re done, they’ll hop up and shake vigorously – just like a dog after a bath. After a quick feather preening they’ll be done and dusted (literally).
Bathing this way benefits chickens mentally as well as physically. Just like we may take a warm bath to unwind at the end of the day, dust bathing helps hens relax and feel better. Hens may also hit the dust when they feel like socializing – much like humans in a sauna or hot tub. You may notice hens taking a dust bath with 2 or 3 of their closest flock friends.
Making a dust bathing area for your chickens
Giving your hens a designated dust bathing spot will deter them from creating their own – potentially in your favorite flower bed or another less-than-desirable location. You can use cat litter pans, the tray from a small animal cage or the bottom part of an enclosed dog kennel. But, if you have larger hens or a large flock, they may need more space than these shallow basins have to offer.
Use your imagination to create a dust bathing spot for your hens. Here are some ideas for inspiration:
- An old tire
- Flexible storage tote
- Livestock feeding pans
- Plastic toddler pools
You can also create a permanent dust bathing area by digging out a shape in the ground and edging it with pavers or stones.
Dust bathing areas or containers should have an edge at least 12 inches above the “dust fill line” to avoid hens tossing all of the contents out during their vigorous cleaning sessions. Make sure that the edge is high enough to contain the dust, but also low enough to accommodate your smallest flock members.
Place your flock’s bathing area in a sunny spot. Chickens will seek out sunny areas to bathe in – especially during the winter months. Be sure to keep their bath in an area where it can stay dry. Wet dust bath contents will dry eventually if they get rained on – but depending on the amount it could take several days. Chickens will bathe daily, so try to keep it as dry as possible. A large, elevated chicken coop can provide the perfect spot underneath with just enough sunlight and protection from the rain.
5 things to add to a chicken dust bath
You can make your flock a nutrient-packing dust bath from simple ingredients – many of which you may already have at home.
1. Wood ash
One of the most beneficial ingredients to a good chicken dust bath is something you can find in your own home or backyard. Wood ash from fireplaces or outdoor fire pits are great additions to your hens’ bath. Ash contains vitamin K, calcium, and magnesium, and helps absorb toxins from the skin of chickens. You may see your hens eat some ash, which can also benefit them.
It’s important to only use wood ash if you’re sure of its source. Do not use any ash from treated wood or lumber, as it contains toxic chemicals that can harm your hens.
2. Food-grade Diatomaceous Earth (DE)
This all-natural, silica-rich powder is a powerful anti-parasitic both on your hens and around their coop. DE destroys the exoskeletons of parasites like red mites, lice, fleas, and ticks. In fact, DE can also be added to your hens’ diet for additional parasite prevention. In addition to your flock’s bath, sprinkle some DE around the edge of your chickens’ run and coop to keep pests at bay.
3. Sand
Sand makes a great base for dust baths, but be sure to get the right kind. There are many types of sand available, but steer clear of children’s play sand, as it’s usually treated with chemicals. Aim for a coarse variety like contractor’s or multipurpose sand. Don’t use fine sand on its own – if ingested, fine sand can lead to crop impaction in hens.
The main purpose of sand is to ensure that the rest of your chicken dust bath ingredients don’t clump together, and to add weight to the mixture. If you’re using fine sand, make sure to mix it thoroughly with soil.
4. Top soil or peat moss
If you don’t want to dig up your own dirt, a bag of top soil or peat moss can be used instead. Widely available and inexpensive, bags of top soil and peat moss offer the benefits of natural soil without the hassle of digging it up.
5. Dried herbs
If you’re a chicken keeper that also gardens, you’ll likely have herbs available to add to your hens’ dust bath. Herbs help attract hens to bathing spots in addition to being beneficial for their skin and immune systems. Some herbs to add to your flock’s dust bath include:
- Lavender
- Rosemary
- Thyme
- Mint
- Oregano
- Sage
- Parsley
Don’t forget to save some herbs for your hens’ feed as well as their bath. All of these herbs help to support a healthy hen diet and lifestyle – both inside and out.
Maintaining your chickens’ dust bath
For dust-bath maintenance, simply clean out any droppings that find their way in and refill the contents of the bath when needed. Some hens may bathe multiple times a day, while others may bathe every other day. Depending on how heavy the dust bath usage is, you may want to keep an air-tight container of pre-mixed chicken dust bath for easy refills.
While chicken perches are flock favorites, be sure not to place your hens’ dust bathing area directly below their perching areas to avoid accumulation of droppings. If you have a walk in chicken run, cover the portion of the run that has the bathing area with clear weather protection covers both on the top and sides to prevent the contents from getting wet. This will allow for sunshine to warm their dust bath without the risk of it turning into mud.
Omlet and your hens’ health
Keeping chickens healthy and happy doesn’t have to be a chore. With thoughtfully designed chicken products like the Eglu Cube Chicken Coop, Walk In Chicken Run, and Weather Protection Covers, taking care of your chickens has never been easier. A homemade chicken dust bath is the perfect addition to these purposefully crafted products.
This entry was posted in Chickens
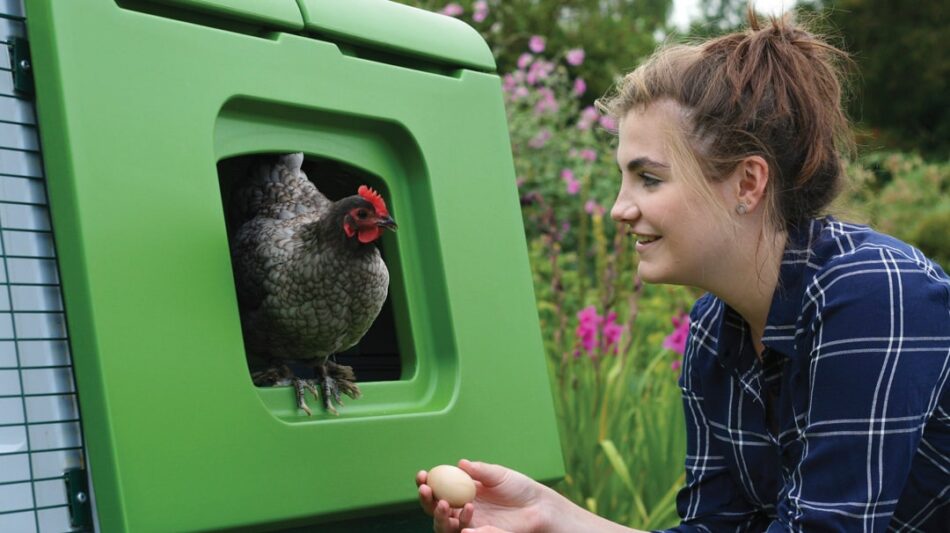
Finding eggs in the nest box is one of the joys of being a chicken keeper!
Most people decide to keep chickens because of the prospect of being supplied with fresh and delicious eggs! So when your hens don’t deliver the goods or stop laying completely, it can be worrying, baffling, and frustrating. There are several reasons to explain this behaviour, and fortunately, in many circumstances, this is no cause for concern. Here are the most common reasons as to why your chickens have stopped laying eggs:
The Age of Your Hens
When raising chickens, you’ll notice that they have a laying cycle, or how their age affects their egg production. Backyard hens typically live to around six to eight years old, but will only lay eggs for a certain number of these.
Many hens will not produce eggs until they are six months old and thereabouts, but the exact timing depends on the breed. Some breeds, such as Australorps, Golden Comets, and Leghorns, begin laying early, in fact as early as between 16 and 18 weeks. Some larger breeds such as Orpingtons, Plymouth Rocks, and Wyandottes, however, could have you waiting up to eight months for their first egg to appear!
Whilst egg production will gradually decrease every year, your hens will eventually stop laying eggs approximately around the six-year mark. Again, this is dependent on the breed and some hens can stop a lot earlier or later than this.
If you’re unsure of how old your chickens are, have a read of our previous blog: How to Tell the Age of a Chicken.
Time of the Year
Another complicating factor as to why your chickens have stopped or are not laying eggs anymore, is the time of year, which is the most common answer to the “why are my hens not laying?” question.
For most breeds, hens tend to stop producing eggs, or drastically reduce their output, in the colder months. This is due to the reduced daylight hours during the winter. When summer ends, there is of course less daylight, which triggers a hormonal response in hens. For egg production, hens typically need between 12-14 hours of daylight each day and 16 for optimum egg laying, which is why they can struggle over winter. Furthermore, hens that reach egg-laying maturity in the autumn or winter may not lay again until spring.
Moulting
Moulting is an annual (or sometimes biannual) occurrence, whereby chickens shed their old feathers and grow new ones. The process usually lasts between 1 and 2 months and whilst it can happen at any time of the year, in the UK, this is usually in late summer or the beginning of autumn.
When chickens moult, most hens will take ‘time off’ from laying eggs with their physical efforts now concentrated on growing new feathers. During this time, you should continue to provide your chickens with a healthy diet, along with adding a bit of extra protein to their diet and ensuring they have plenty of vitamins and minerals. You can also add some apple cider vinegar to their water to help with a healthy, glossy, new plumage.
Poor Nutrition
This underlines another important point – a nutritious diet is vital all year round. Whilst it’s a great idea to help get your chickens some extra nutrients whilst they’re moulting, it’s also important to provide them with what they need to keep healthy and laying eggs whatever time of year it is!
Put simply, if hens are malnourished, egg production will drop, with hens either laying fewer eggs or none at all. Whilst chickens naturally forage for food, to keep producing eggs, hens need a balanced diet of enough protein and carbohydrates. A steady supply of a good quality feed and access to grit will ensure that your chickens get everything they need.
You’ve Got a Broody Hen
Sometimes a chicken will decide to sit tight and wait for her egg to hatch. This is known as a broody hen, and while she’s broody, she’ll stop producing eggs. This is handy if you want to hatch chicks, as the hen will happily sit there for the three weeks it takes to hatch an egg. It’s less handy if you want her to produce more eggs, though!
A hen can either be left for three weeks, after which she will resume normal service. Alternatively, you can gently discourage her, should your hen be nesting in an unsuitable environment (or if you find yourself in dire need of eggs!). Breaking a broody hen can be difficult, but placing a bag of ice cubes or frozen peas underneath her can do the trick. Some chicken keepers also recommend placing the hen in a wire cage or dog crate with food and water for a few days. This can be a little uncomfortable but will usually break the brooding habit.
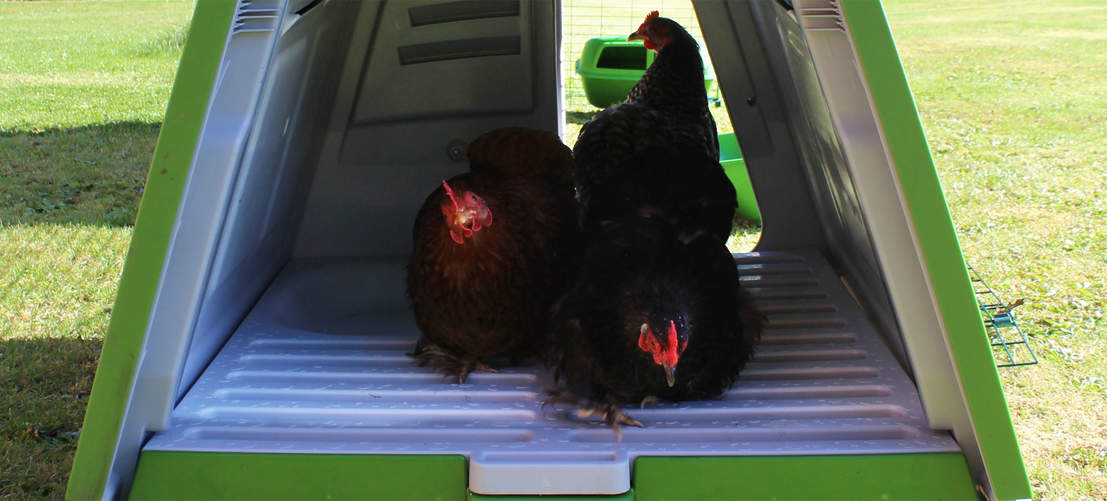
Chickens need plenty of room to roost in their coop
Sick Chickens Stop Laying Eggs
If your chicken stops laying eggs and you have ruled out that your hen is neither too young nor too old, not moulting, not brooding, and not hunkering down for a cold winter, then the reason for the drop in eggs could be illness. In particular, parasites such as lice, mites, fleas, and internal worms can be causing bodily stress, which has a significant impact on laying. For a bit more information on illness in chickens, check out our pages on chicken health for advice on diagnosing and – where possible – treating problems.
As well as illness being a cause of stress, it can also be brought on by other factors such as bullying, too much handling, injury, noisy children and pets in the garden, or a poor environment. Making sure the hens have a space where they can stay happy and healthy is vital. A setup such as the Eglu chicken coop and run, along with suitable perches, feeders and other essential accessories can help with this.
Something Else to Consider…
It’s also very possible that your hens are in fact laying eggs, but they’re going missing before you even have the chance to collect them! However, rest assured, the mystery behind ‘vanishing eggs’ can usually be explained with two main reasons.
The first of which is that free-ranging chickens often ‘go native’ and begin laying eggs in a spot in the undergrowth, rather than in the coop. You should check under shrubs, in long grass, and any secluded corner of your plot of land. If the AWOL laying has been going on for a long time, there may be a few eggs out there in the wilderness. Check their freshness by placing them in a bowl of water. If the eggs lie on their sides, they are fresh. If they are more upright (between 45 and 90 degrees), but still resting on the bottom of the bowl, they are not fresh, but still usable. Any that float have passed their sell-by date!
Eggs may also disappear if a hen acquires a taste for them. Egg-eating amongst chickens can be a sign of overcrowding or poor diet. Once she has acquired the taste, it can be difficult to stop a hen from eating eggs, and she may need isolating to stop her pecking at her neighbours’ eggs. The isolation may also induce slight stress, just enough to interrupt her own laying, which may, in turn, break the habit.
Normal Egg Service Resumed
Don’t worry – unless a hen is very old or very ill, her egg-laying should soon resume. Owners can aid the process by making sure they’re giving the birds everything they need. The key to a good egg supply is good food, a good space – and patience!
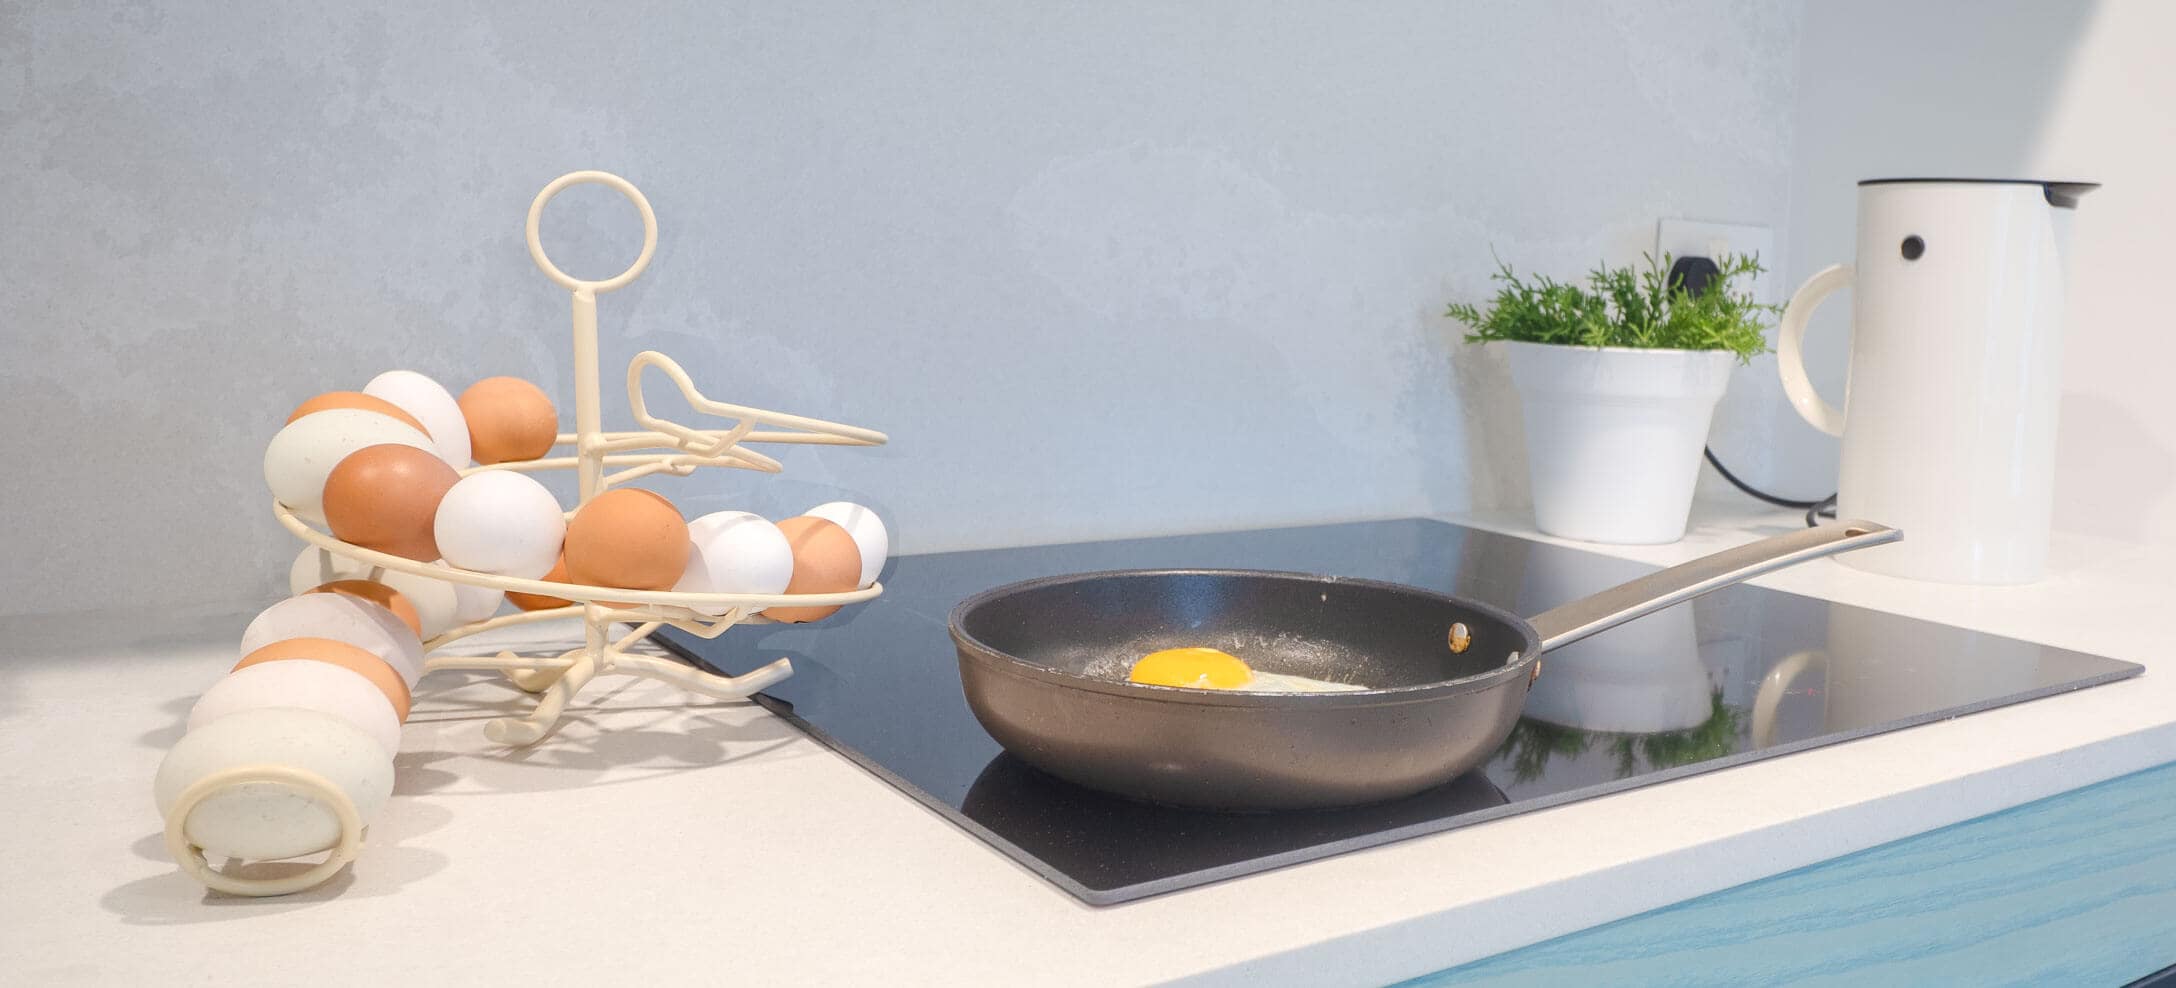
Backyard chickens produce tasty eggs!
This entry was posted in Chickens
We can learn a lot from chickens. They go to bed early, and know how to snuggle up together to get warm on a cold winter’s night, ready to seize the next day when the sun comes up. But, once winter sets in, it’s hard for humans to rise and shine when it means having to trudge out to the coop in the cold. Discover how the Smart Autodoor makes winter easier for you and your chickens when you employ this chicken-life changing piece of technology to be your personal coop concierge.

A Smart Autodoor for any coop
The Smart Autodoor is the perfect and reliable solution for all chicken keepers. It attaches to any chicken coop or run, and can be controlled via the control panel or through a mobile app. When connected to Wi-Fi, the Smart Autodoor can be customised, opened, closed, and updated anytime, from anywhere in the world, when in notification and control mode.
Like many ingenious inventions—think wind-up radios, compasses, or steam engines—Omlet’s Smart Autodoor is simple, but effective, enhancing efficiency in managing your chicken coop. This hands-free, automatic device has several customisable settings, including Wi-Fi connectivity, making it perfect for any schedule, be it human or chicken.
The Smart Autodoor’s open and close schedules can be based on the sun or the clock. The daylight setting adheres to a schedule based on how much daylight is available, keeping your flock in their routine even when the time changes in preparation for winter. If you prefer to have more control over your coop, the time setting can be programmed to open and close the coop door at the times of your choosing. The manual setting enables you to open and close the door at the push of a button on the app or control panel, or by speaking a request to your Alexa or Google Home device.
Attaching the Smart Autodoor
The Smart Autodoor was made to be the perfect companion to our larger chicken coops. If your flock already lives in an Eglu Cube or Eglu Pro, installation is quick and simple for your convenience. But, fitting the Smart Autodoor to traditional chicken wire, Omlet’s chicken run wire, or wooden chicken coops is also simple thanks to the corresponding attachment kits.
Once installed, the control panel is powered with batteries or through the direct wire connection, facilitating seamless automation of the door’s operations. The integrated light sensors of the control panel are intuitive, ensuring that passing headlights or sudden cloud coverage doesn’t trigger the Smart Autodoor to open or close when using the daylight setting. Positioning your control panel on the side of the coop with a mounting bracket will allow constant access to ambient lighting.
The optional coop light helps your hens head to bed on time. By installing the light around the roosting area of your coop, your flock will have a night light to beckon them to bed. The coop light will come on five minutes before the Smart Autodoor closes by default, but this time can be adjusted through the app to accommodate hens that may tend to stay out past their roost-time.
Why is the Smart Autodoor better in the winter?
Aside from the warmer mornings in bed, or sparing yourself a chilly trek to the coop with a few taps on your mobile device, the Smart Autodoor offers practical benefits for your flock in the winter. The seal of the Smart Autodoor further insulates our chicken coops by maintaining a draft-free environment around the door. And, the control panel and Smart Autodoor mechanism has been tested and proven to perform in temperatures below -20 degrees Celsius.
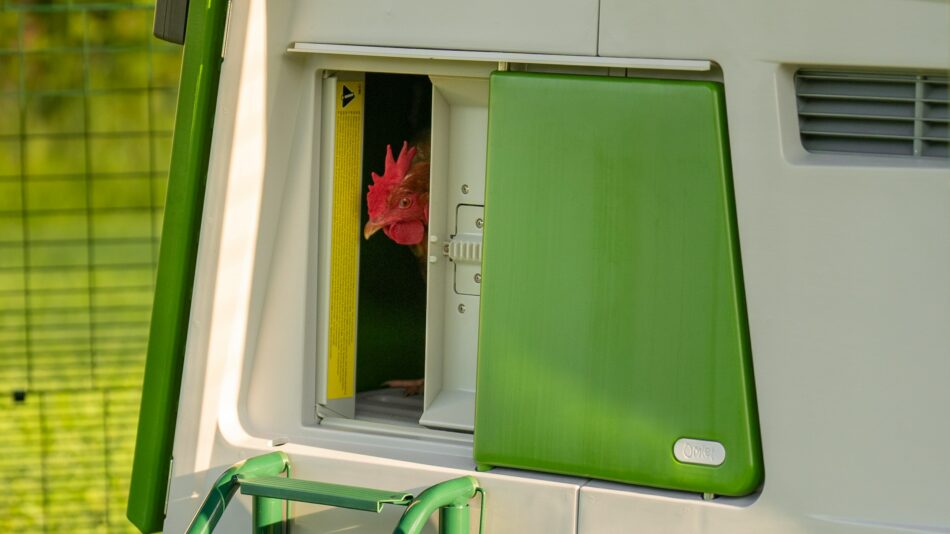
The horizontally-opening mechanism of the Smart Autodoor is strong, designed to reliably perform in all weather conditions and to enhance security by protecting against predators. Instead of a typical string and pulley system, the components of the Smart Autodoor are nearly impossible for predators to pry open. But even with its strength, our automatic coop door has a delicate door sensor that ensures that no part of a hen is closed in the door. If the sensors detect an obstruction, the door will stop and reverse its path, and will try again after a few minutes.
Between holiday travels and the fluctuating daylight hours, receiving notifications through Wi-Fi helps in keeping your flock safe and on schedule. Like a true coop concierge, the Smart Autodoor eliminates the need for you to brave the cold outside of your cosy bed to let your flock out of their coop, or venture out in the freezing temperatures to close your hens in their house for the night.
Omlet and your flock
We’re here to make winter a more enjoyable experience for you and your flock. From our Smart Autodoor to our insulated chicken coops and chicken drinker, we have everything you need to keep your chickens safe, warm, and covered throughout the entire season. Enjoy the warmer hours of the day with your flock, while our ingenious products take care of them during the cold.

This entry was posted in Chickens
Save 31% on Omlet Chicken Perches this Halloween!

Calling all wicked Witches! We know October has been a very busy month for you all, which is why we are offering 31% off when you upgrade your witch’s broomstick this Halloween, to the Omlet Chicken Perch. This spooktacular offer will fly past, so don’t miss out!
Use discount code WITCHES until midnight on the 31st of October!
Give your chickens a brilliant new way to play in their chicken run with Omlet’s Chicken Perch, available in 2 lengths to suit your flock. The naturally weather resistant perch not only features an innovative bracket design – allowing it to be placed anywhere on any chicken run – but is also suitable for use by all breeds of chicken, making it the new must-have DIY chicken coop accessory!
Upgrade your chicken’s playtime with this fun accessory, and use code WITCHES to save 31% until midnight tomorrow.
Terms and conditions
This promotion is only valid from 30/10/19 – midnight on 31/10/19. Use code WITCHES to claim 31% off Chicken Perches. This offer is available on the Omlet Chicken Perch 1 metre and 2 metre only. Subject to availability. Omlet ltd. reserves the right to withdraw the offer at any point. Offer cannot be used on delivery, existing discounts or in conjunction with any other offer.
This entry was posted in Chickens
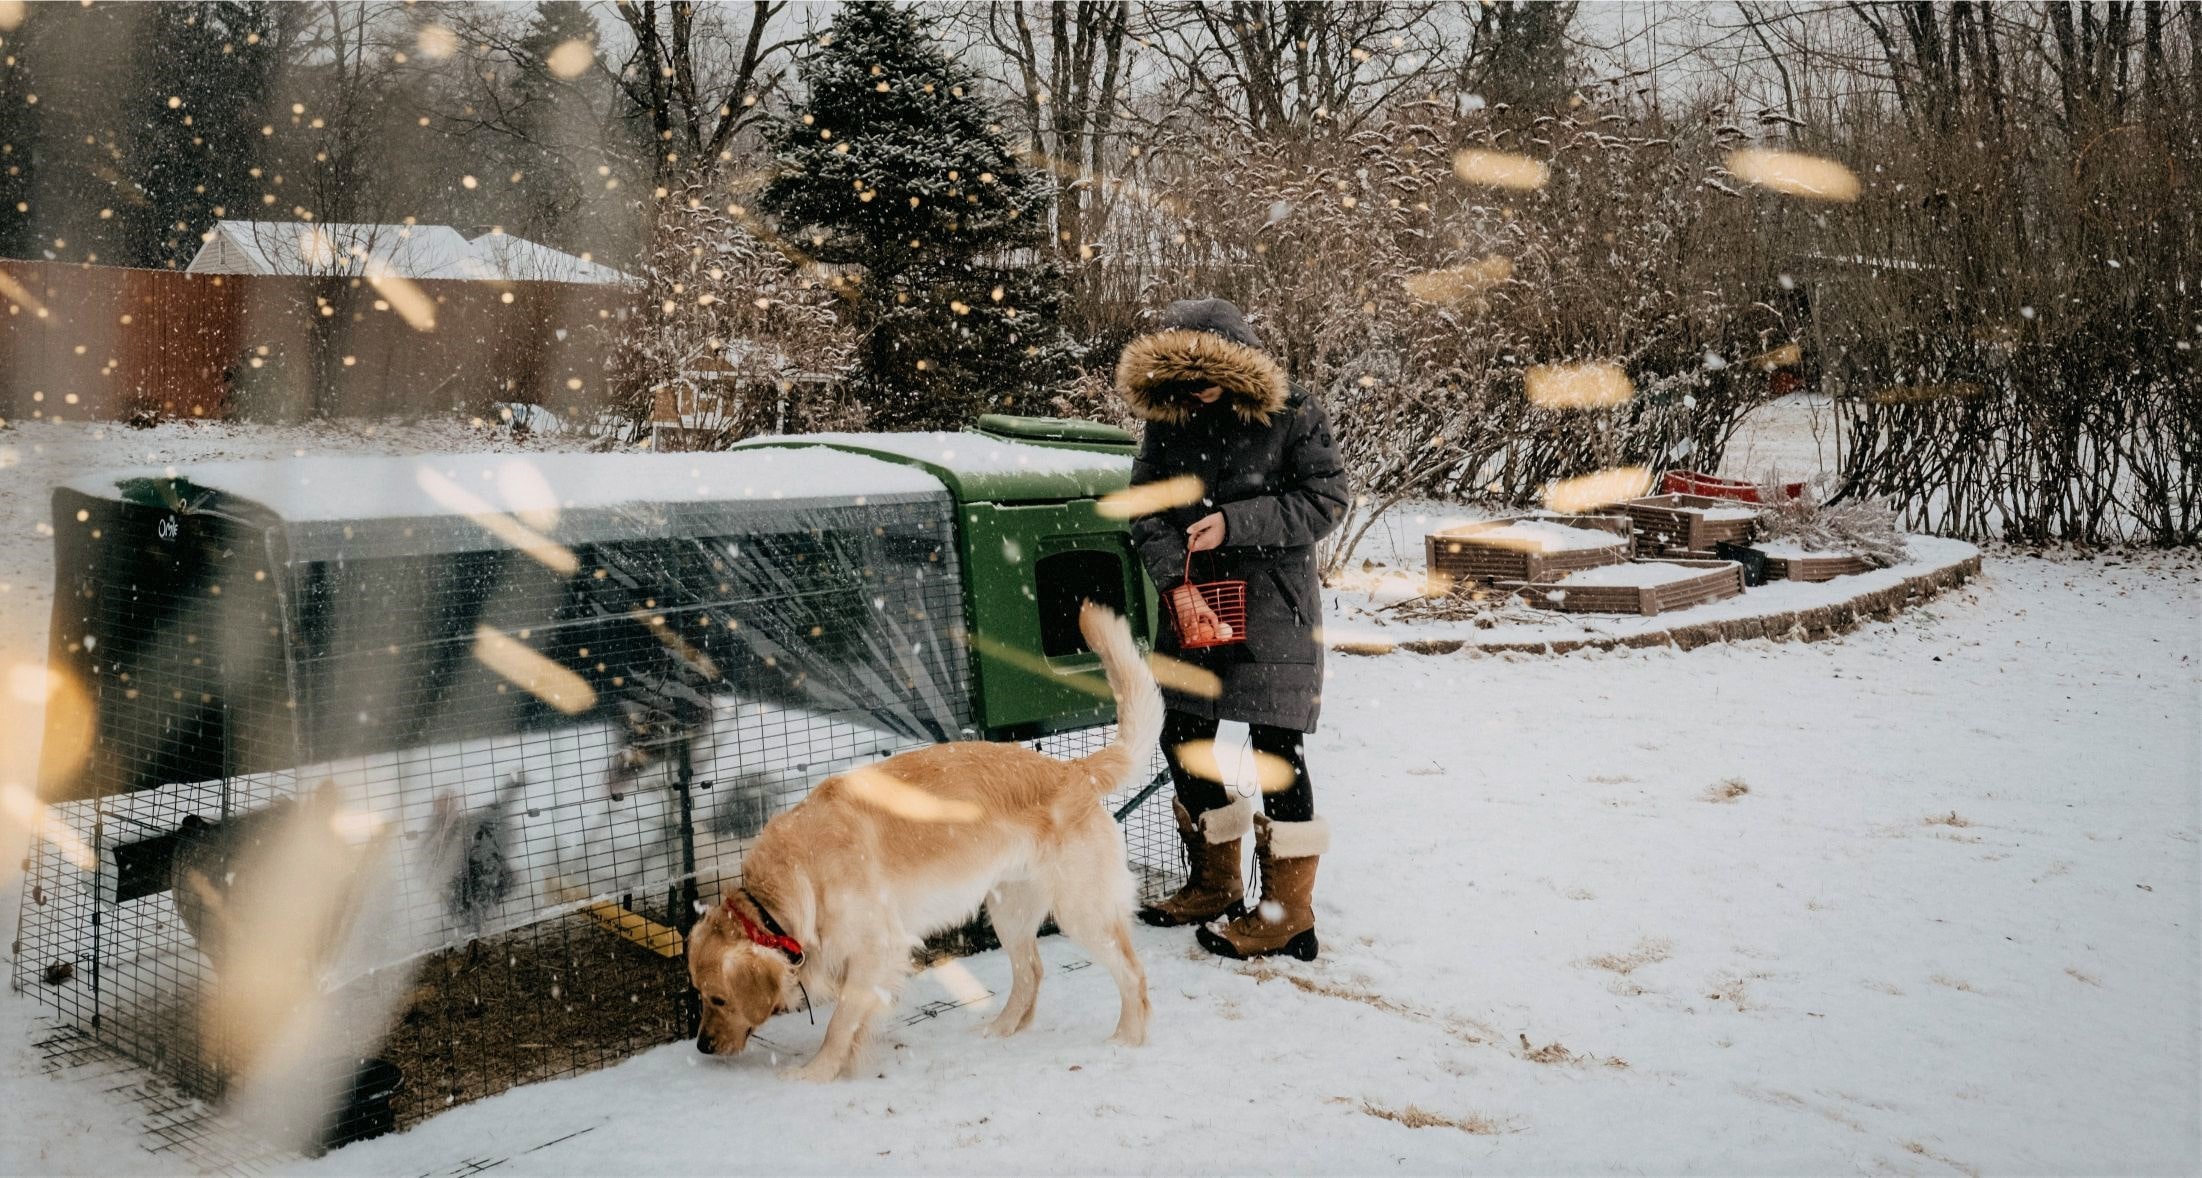
Cold weather can be a worry for chicken keepers but there are ways to prepare your chicken coop for winter. Preparations such as:
- Moving you coop closer to your house
- Upgrading to a plastic coop
- Installing an automatic chicken coop door
- Adding a chicken run cover
- Adding an extreme temperature jacket
Get your chickens’ coop ready for the colder months and you will be able to and rest easy knowing that your girls are warm and healthy throughout winter. Take a look at some of our top tips for getting your chicken coop winter-ready.
Move Your Coop Closer to the House
Moving your chicken coop closer to the house is a simple step for making it easier for you to look after your girls and give them their daily health checks, which are even more important in the colder months. Choose a lightweight coop with wheels, like the Eglu, to make it even easier to move it around your garden.
Upgrade Your Wooden Coop to a plastic chicken coop
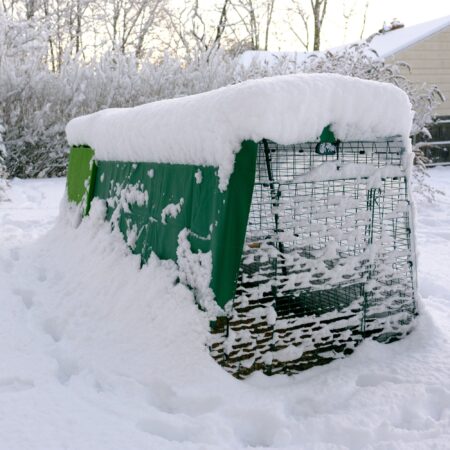
Upgrading your wooden chicken coop to a plastic coop has many benefits. The main benefit of a plastic Eglu Cube Chicken Coop for chicken keepers in winter is the twin wall insulation found in the design of the plastic house. This works in a similar way to double glazing, by creating a barrier between the cold air outside the coop, and the air in side. The air between the two walls conducts poorly, which means inside the house stays at a consistent and warm temperature throughout winter, whatever the weather is doing outside. Chickens are very efficient at keeping themselves warm, all you will need to do is make sure the coop door is shut at night time.
Install an automatic chicken coop door
Installing an Automatic Chicken Coop Door is a convenient solution for plastic or wooden chicken coops allowing you to shut your chicken coop’s door at dusk even if you are not yet home.
You can set the Autodoor to close at a specific time or light percentage to suit when all your girls have gone up to bed and the sun has set. The Autodoor runs off batteries and has been tested to work down to -10 degrees celcius so there is no worry, however cold it gets outside!
The other benefit to the Autodoor is that it will open again at dawn so you can head off to work early before the sun rises and your girls need to be let out, or you can stay in bed for even longer at the weekends without going out in the freezing cold to let your chickens out of their coop!
The NEW Coop Light also makes it easier for you to check on your girls and carry out daily chicken keeping duties if you don’t get home until after dark. This plugs directly into your Autodoor control panel, and can even be programmed to automatically turn on 5 minutes before your Autodoor closes to encourage your chickens up to the coop.
“The nights are drawing in and I couldn’t be happier knowing that my girls are safely tucked up in bed with their Omlet Autodoor closed behind them. The Autodoor has given me peace of mind, flexibility and a well needed lie in! Couldn’t recommend it enough!” – Hayley’s Lottie Haven
Add a chicken run cover
Chickens are very good at coping in cold temperatures, but don’t like getting wet, adding a run cover allows them to be protected from the elements when outside in their run. Covers are available in a variety of sizes to suit your run length, the clear run covers protect your girls from wind and rain so they can continue to play whatever the weather, whilst still allowing light into the run.
Add an extreme temperature jacket

When the temperature drops below freezing for multiple days in a row during the very depths of winter, it might be wise to give your chickens extra warmth with an extreme temperature jacket. Filled with a heat trapping recycled material that is breathable, the jackets keep your pets warm and protected from the worst that the weather can throw at them. Preparing your chicken coop for the winter will definitely benefit poorly or older chickens.
Provide Hentertainment
Prevent chickens getting bored when rain stops play with a variety of fun and interactive toys that can keep them entertained in all weathers. The Chicken Perch provides an easy outdoor perch which can be installed in their run (and protected by the run covers) for when your chickens can’t perch in their usual spots around your garden. The Chicken Swing provides hours of fun and again, can be easily installed in any run. While the Peck Toys and Caddi Treat Holder offer enriching entertainment as well as a rewarding flow of treats.
Water Heaters & Chicken Treats
Prevent your chickens’ water from freezing with a water heater to ensure they have access to flowing water at all times. It is also recommended to provide extra layers pellets and treats during winter, as chickens will need more energy to keep themselves warm and lay their eggs in the colder months.
This entry was posted in Chickens
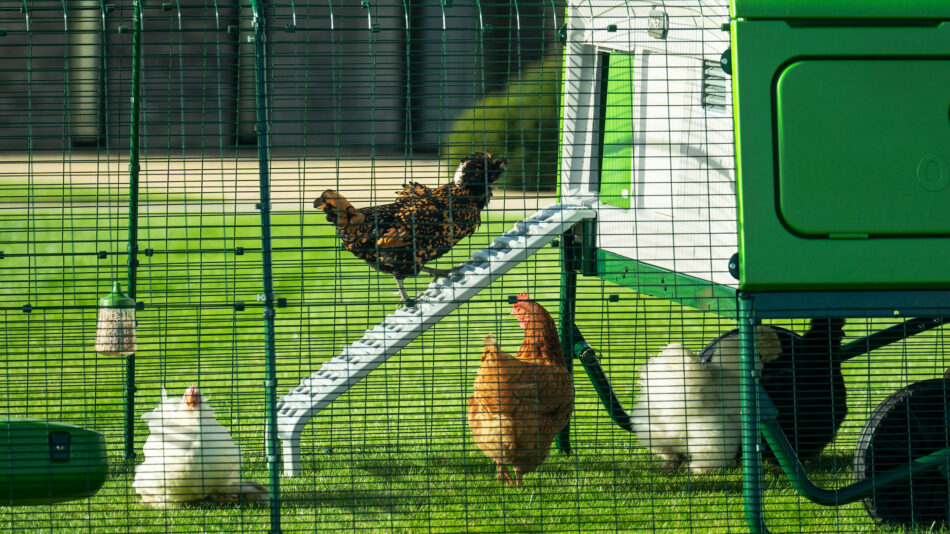
No one wants rats hanging around — much less around areas that you frequent. One of the most common questions we receive from people who are thinking about getting chickens is: will keeping chickens attract rats? The short answer is most likely, yes. But thankfully there are several things you can do to prevent unwanted visitors in the form of rodents – here’s our best tips on how to keep rats away from your chickens.
Risks that rats pose
You don’t have to have musophobia (the fear of mice and rats) to want to avoid seeing them. Wild rats aren’t a fun surprise to happen upon anywhere, but especially not when they can wreak havoc on your flock and their belongings. In addition to being generally unappealing and startling for both you and your flock, rats can:
- Carry diseases
- Gnaw their way through wood and plastic
- Raid nesting boxes for eggs
Rats will even go after young chicks for an easy meal. But, it’s important to note that rats aren’t attracted to your chickens — it’s their feed they’re really after. With this is in mind, here’s how to prevent attracting the attention of these ravenous rodents.
Store and dispense feed properly
Keeping your flock’s feed in airtight containers is the first step in preventing rats. Rats are clever and have an excellent sense of smell, so it’s vital that any feed containers have a good seal and made from thick material. They’re also patient and can learn routines quickly, so if you have rats that monitor your daily activity with your flock, they may learn where the feed is stored. Metal containers prevent rats from gnawing through to the feed they may have observed being stored there.
When you feed your chickens, make sure that your chicken feeders are elevated and deep enough that your hens don’t make a mess when they eat. Feeders with leftover food should be removed from the run each night to prevent opportunistic midnight snackers. Sweep or scoop up any dropped feed from the run floor, and store feeders in airtight containers.
Take care with treats
When you treat your chickens with scratch or other offerings, only toss what you’re confident they will eat by sundown. To avoid waste, feed scratch grains in chicken peck toys, and kitchen scraps in a Caddi Chicken Treat Holder. These can be removed easily at the end of the day, and help keep food from being scratched into the ground. Plus, eating treats this way provides an interesting and engaging angle for snack time that your hens will appreciate.
Collect eggs daily
Eggs are a tempting meal for rats, and if they aren’t collected regularly, they can draw rodents in. To prevent piquing rats’ interest, you’ll need to collect eggs every day. This is a good practice to maintain for several reasons, but if you’re worried about rats it’s a necessity. If for some reason you can’t collect eggs for the day, outfit your chicken coop with an automatic chicken coop door that will close at night when rats are the most active.
Employ deterrents
There are a few other things you can do to keep rats away from your chickens. Along with collecting their feed and eggs daily, you can take external measures to deter rodents. From other animals to 90s nostalgia, here are some recommendations for keeping rats at bay:
- Keep an outdoor cat around your chickens’ set up
- Hang reflective tape or CDs from strings around the run to catch the light and deter rats and other predators
- Wrap ¼ inch hardware cloth around the bottom of your chickens’ run, and bury it a couple of inches below the ground
- Set motion lights at ground level to be triggered by overnight rat raids
What not to do
When trying to avoid rats in the chicken run, there are a few things to avoid. Some of these measures can pose a risk to your flock, so be sure to never use these around your hens:
- Rat poison
- Sprays meant to deter rodents
- Mouse or rat traps (even humane traps)
Electric fencing can be placed around the perimeter of your chickens’ area to deter rats and other predators, but extreme caution should be exercised so that your chickens, other pets, or children don’t come into contact with it.
Omlet and your flock
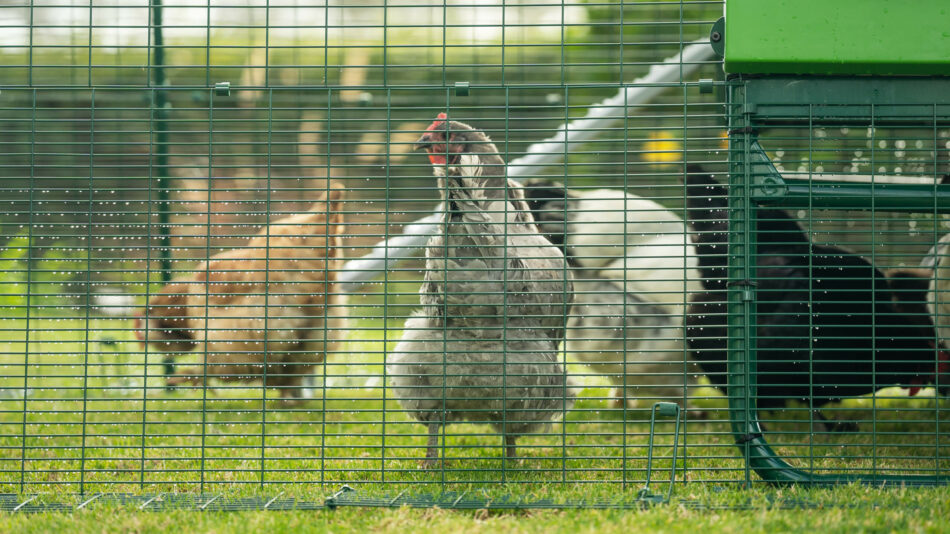
Keeping chickens doesn’t have to come along with the potential for rodents. By keeping your flock in a strong hen house with an Autodoor, you’ll prevent rats from being tempted to infiltrate their coop. And, by serving treats in elevated chicken treat holders, you’ll reduce waste in the run for rats to feast on later. With these measures in place, you can enjoy tending to your flock without fear of rodents laying in wait.

This entry was posted in Chickens
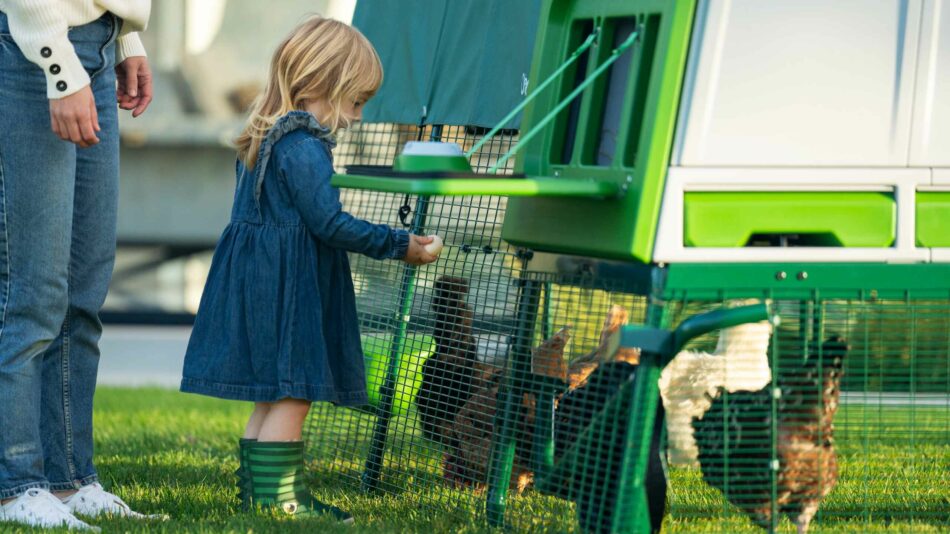
So, you’ve decided keeping chickens is a good fit for your lifestyle, but have you decided on what kind of chickens to keep? Chickens come in a variety of sizes and colours, with different breeds offering unique traits. Dive into the world of chickens, and discover how to choose the right chickens for you.
Which chickens are best for me?
Different breeds of chickens offer different advantages, so choosing the right chickens for you depends largely on your family and lifestyle, along with your climate and amount of space available. There’s not a one-size-fits-all option, but many types of chickens can be kept by anyone just about anywhere. And, no matter which type of chickens you choose, remember that all flocks need a weather-proof chicken coop and a space to call their own – whether it be in a chicken run, chicken fencing, or safe area to free-range.
Best breeds for children
Some breeds of chickens are known for their sweet and docile dispositions, which make them a favourite among children. Each chicken’s personality isn’t guaranteed no matter their breed, but some are known to be easier to tame and handle than others. Here are the most common chicken breeds for children:
Best breeds for small spaces
Size may be of concern for some people, but some chickens are found in miniature form. The breeds listed are “true bantams”, meaning they don’t have a full-size counterpart, but some full-size breeds have bantam versions. These compact breeds are perfect for smaller spaces, but still have big personalities to share with their keepers:
Best breeds for free-ranging
Some chickens are more voracious foragers than others. These breeds can do well in a large chicken run, but they need plenty of space to satisfy their wanderlust. They’re also large and nimble enough to evade several chicken predators, making these a good choice for open spaces:
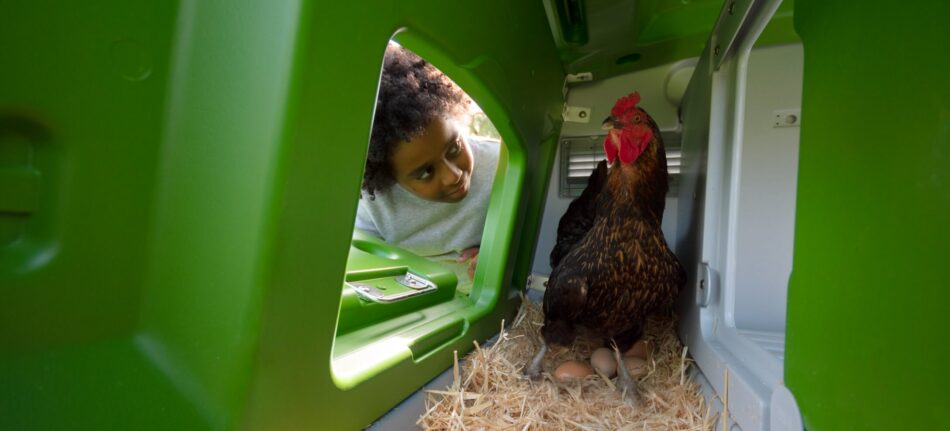
Best breeds for egg production
Good egg laying breeds can produce upwards of 250 eggs per year. These breeds are known to produce eggs year round, and well into their older years. If you’re looking to supply your family with fresh eggs, look no further than these egg-laying superstars:
Best breeds for egg colour
All hens lay eggs, but some can diversify your egg basket in beautiful ways. White and brown eggs are still beautiful, but if you’re looking for pops of colour, you may be interested in adding a breed that lays pigmented eggs. From blue and green, to shades of cream and pink, here are the breeds that lay colourful eggs.
Blue eggs:
Green eggs:
- Easter Egger
- Favaucana
- Swedish Isbar
- Olive Egger (Maran/Ameraucana crosses)
- Whiting True Green
Cream or pink eggs
Brown eggs:
White eggs:
Best breeds for warm climates
Not all chickens can withstand the heat. In fact, most breeds fare better in the cold than in the heat, but some have natural traits that help them cope with scorching summers better than others. Large combs and light body weights are characteristics that help hens in the hot weather, which are standard features in these breeds:
Best breeds for cold climates
Most chickens fare just fine in the cold, but just as some breeds are better equipped to handle the heat, some are more cold-hardy. Small combs aren’t as subject to frostbite, heavier builds add insulation, and feathered legs offer extra protection from the cold air. These are some breeds that are built for the cold:
Chickens that require a little extra care
Generally speaking, chickens are easy to take care of. They won’t overeat, so their feed can be left out at all times, and as long as they have access to fresh water, they’ll slake their thirst when the need arises. But some breeds may require a little extra attention than others.
Ornamental chickens have feathers that can get muddy or caked in debris. These breeds include:
The feathering of these breeds can also make them more susceptible to extreme temperatures, which is especially true for Frizzles and Silkies. This is because their fluffy feathers don’t help them regulate their body temperature as well as their sleek-feathered friends. If you live in a climate that experiences extreme temperatures, or if your property has a tendency to get extremely muddy, you might want to consider other breeds.
Omlet and your chickens
No matter which chickens you choose, they’ll be fortunate to have an owner that puts in the research to give them the best possible home. By housing your hens in safe chicken coops, spacious chicken runs, and providing them with one-of-a-kind chicken toys and accessories, you’ll be your flock’s favourite person. By providing for their basic needs, and then some, you’ll build a bond with your birds that will span a lifetime.

This entry was posted in Chickens
Ever heard the expression ‘cooped up’? It means being stuck indoors with nothing to do, resulting in frustration and boredom. We tend to lock hens in a chicken coop, and that’s where the saying comes from.
A hen kept in a shed with nothing to do will soon start to show all the signs of boredom, just like a human. She may start pecking at her neighbours, or plucking out her own feathers. If blood is drawn, the other hens will often join in the beak-attack, and hens can actually be killed in a frustrated frenzy of pecking.
With nothing better to peck and scratch at, chickens may also start to eat their own and other hens’ eggs. Once a chicken becomes an egg-eater, it’s very hard to make her kick the habit.
Bored birds will also tend to sit in the egg box all day, and may become weak through lack of exercise. Boredom also causes stress, and stress can bring egg production to a temporary halt.
Bidding Bye-Bye to Bantam Boredom
As usual, prevention is the best cure, and there are many ways of stopping boredom from becoming a problem in the chicken run. The general rule is simple enough – don’t keep hens cooped up!
- Room to Roam – Give your chickens as much outdoor space as possible. If they have a garden or meadow to peck and scratch in, that’s ideal. You don’t have to worry about rounding the birds up in the evening – as soon as the sun dips in the west, hens instinctively head for the safety and security of the coop. All you have to do is close the door behind them.
- Weather the Storm – A day spent indoors is a day of boredom for a chicken. They should only be confined to the coop if the weather is particularly bad. A bit of rain, snow and wind will not harm them, no matter how unpleasantly muddy the run may look to you.
- Fowl Play – Chickens need stimulation, like most animals. Provide plenty of perches for roosting and resting, along with ladders, and a few pots, tree stumps or ornaments of different heights for them to clamber on and off. Many hens enjoy a chicken swing, too, as if they were parrots in a previous life.
- Treats to Eat – Concealing a few tasty treats in the undergrowth or on ledges is a great way to keep hens entertained. Pack tasty titbits into a wicker ball, place it on the ground, and watch your hens enjoy a game of football as they eat. Alternatively, hang greens or a veg-filled Caddi just out of reach, so that the birds have to jump to get a beakful. Shop-bought or homemade suet-and-seed pecking blocks keep them coming back for more, too. The treats should not be overdone, though, as healthy diet is an essential part of good chicken care.
- Making Hay – A pile of hay, straw, leaves or garden compost will give your hens something to scratch and rummage through, and they will find probably a few tasty worms and beetles to eat during the fun. Piles of vegetation will be levelled in no time at all – chickens remove piles, you could say!
- Novelty Value – Chickens will be fascinated by anything new in their runs, even something as simple as a box or tray of straw, or an old brush. They are also fascinated by their own reflections, so an old mirror can be a good distraction. An old alarm clock or large watch with a reflective glass surface and a loud tick will intrigue them, too.
- Dust to Dust – A dust bath goes down a treat at any time of year, not just in the hot summer months. If the weather is wet, you could provide a dry earth bath in a sheltered part of the run or coop.
- Quality Time – Don’t underestimate the importance of interaction with your hens. Once they come to trust you they will relish your company, like any other friendly pet. Admittedly this can sometimes get a little out of hand, when hens start to flap onto the garden table to see what you’re eating, drinking or reading!
Boredom really doesn’t have to be a problem in the chicken run. As long as your hens can satisfy their strong scratching and perching instincts, and have a little fun along the way, they will remain healthy and happy.
This entry was posted in Chickens
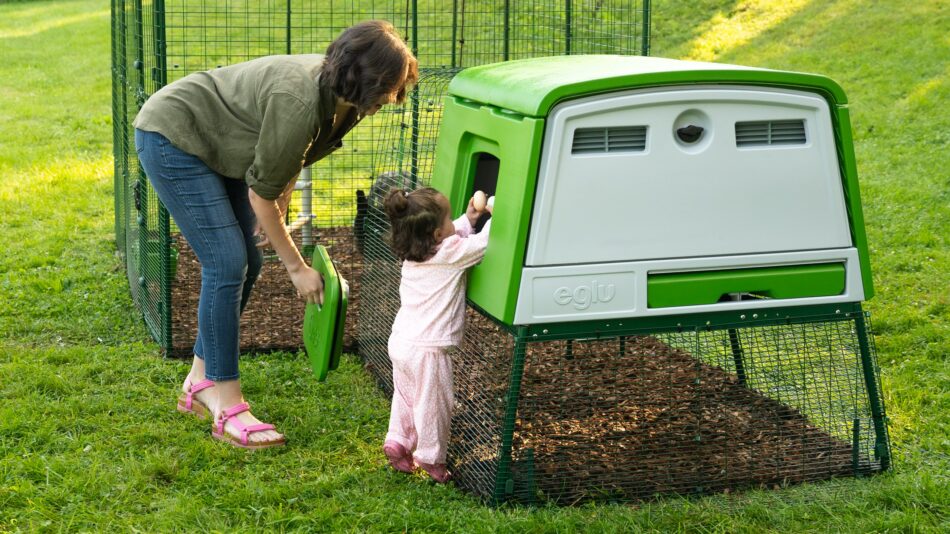
Most flocks of chickens have a routine that their keepers can expect each day. Morning rise and shine, maybe a quick breakfast and romp around the yard, and back to the coop to lay eggs in the nesting box. But what happens when you suddenly don’t find eggs in the nesting box around or after their usual time? Or worse – several days go by with fewer eggs where they should be? There are many reasons why chickens hide their eggs, but we’ll show you how to stop them from doing it.
Why do chickens hide their eggs?
There may be an obvious reason your hens are hiding their eggs, or it may be a combination of external factors. Usually, it’s a problem with the chickens’ nesting box. If conditions are not favourable, hens will seek out alternative locations that may make them feel more comfortable – leading you on an egg hunt each day. Here are the most common qualms hens have about their nesting areas that may cause your chickens to hide their eggs.
Short on space
Each flock is different, but the safest nesting box-to-hen ratio is 1:4. Some hens may be happy to share the same nesting space as 6 or 7 other chickens though, so keep an eye on your numbers. If you notice your hens avoiding the nesting area shortly after adding new flockmates to the mix, it’s probably time for an additional nesting box.
Feeling vulnerable
Nesting areas should be quiet, secluded, and comfortable. If there’s too much commotion around the coop, your hens are more likely to go off in search of a more private area to deposit their eggs. Elevated coops with secluded nesting areas are ideal for making hens feel safe and at ease.
Unfavorable bedding
Bedding that hens can manipulate into a nest shape is a favourite among flocks. Thin straw, shavings, or wood fibre make great nesting box bedding. Hens will shift the bedding around to make a doughnut shape to keep a clutch of eggs safely contained. Stiff substrates like rubber pads, thick straw with little to give to it, or artificial turf are not ideal for creating a welcoming nesting area.
Broody hens
If you have a broody hen in the coop, it’s likely to affect all of your layers. A broody hen will fiercely protect their nesting area and the eggs they’re sitting on, which will deter any other chickens from laying there. And, if a broody hen is occupying the sole nesting box for the flock, other hens will be forced to seek alternative options. Breaking a broody hen is essential to getting the entire flock back into their regular routine.
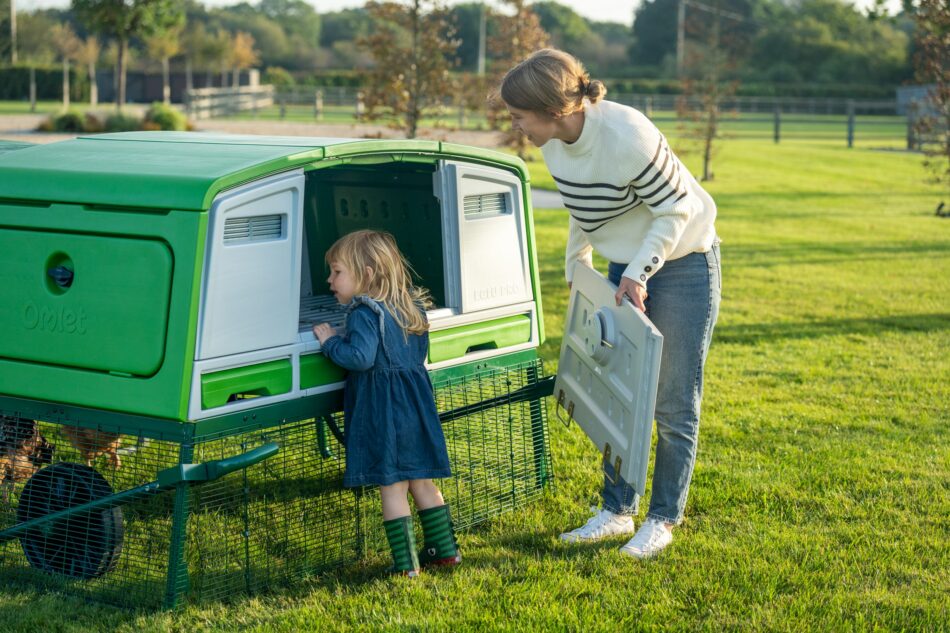
New layers
Pullets (young hens under a year old) that are new to laying might not catch on right away that the nesting box is where they should lay their eggs. It’s not uncommon for young hens to lay their first few eggs in random locations – in fact, the urge to lay an egg might sneak up on a pullet so quickly that they’ll simply lay an egg wherever they are and continue on with whatever they were doing.
Mites
They may not be visible to the naked eye, but if all of the other conditions are right and your hens are still avoiding the nesting box, it may be due to mites. Mites irritate chickens that come into contact with them, causing intense itching and discomfort. Make sure that your nesting boxes are made of materials that are not favourable to mites and can be cleaned thoroughly. Plastic chicken coops and nesting boxes are the easiest to thoroughly clean, and do a great job of preventing mites in the first place.
Ways to get your hens laying in their nest box
Once you’ve identified and corrected any issues with the nesting box, it’s time to redirect your hens back to their designated laying area. You’ll need to seek out where they’ve been laying their eggs in the meantime. Under the chicken coop, in or under other structures like barns or sheds, between hay bales, and in areas with thick grass or bushes are common places hens will use as alternative nesting spots. If your flock free ranges, you’ll want to keep them inside of their run for a few days to reacquaint them with their new and recently improved nesting box.
Clean the nesting area out at least once a week
Keeping the nesting area clean will help encourage hens to continue laying eggs there. If you have an Omlet chicken coop, simply slide out the droppings tray and pressure wash or wipe it clean, and refresh the bedding for a clean coop in seconds. However, it’s not normal to find droppings in the nesting area itself unless hens are roosting there overnight. If you find droppings in the nesting box regularly, it’s time to add more roosting space.
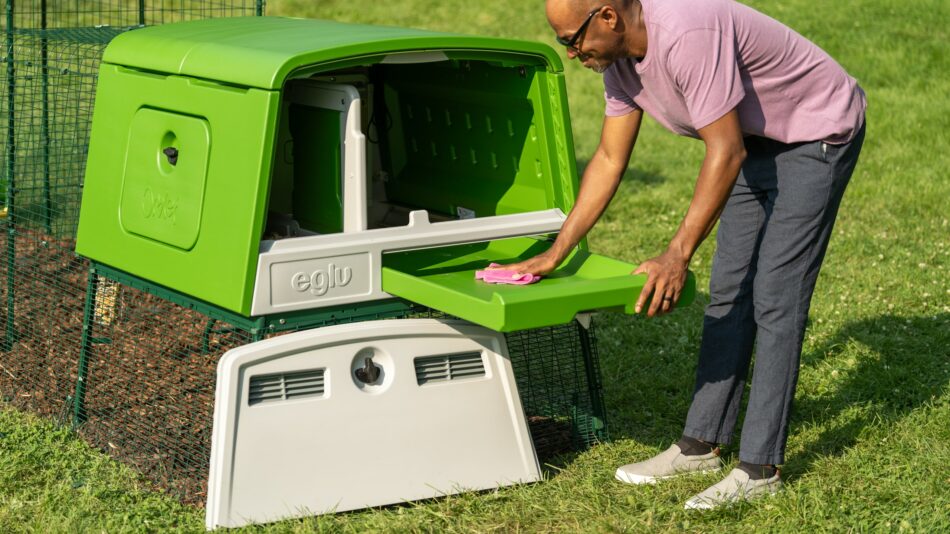
Decoy eggs
Wooden or rubber eggs can be placed in the nesting box for pullets to get an idea of where to lay their eggs. It can also serve as a reminder to more seasoned hens that the nesting box is where eggs should be laid. You can also place a fresh egg that your flock previously laid in the nesting box to serve as a decoy. Be sure to only use one decoy egg, as a full nest can serve as a deterrent to hens rather than motivation.
Collect eggs regularly
While fresh eggs can be left in the coop for several days and still be edible, it’s good practice to collect eggs every day or two, depending on your flock’s laying frequency. Too many eggs lead to a crowded nesting area, which can deter hens from laying there. Gathering eggs regularly helps reduce the chance of them getting stepped on and broken by other chickens, decreases interest from predators, and ensures optimum freshness.
Your hens and Omlet
Keeping your hens on task with their nesting routine doesn’t have to be difficult. With our large, innovative Eglu Cube Chicken Coop, your flock will have plenty of room to roost without encroaching on the nesting area, an elevated station to feel more protected, and privacy while laying thanks to a dividing partition. Our chicken products foster the natural urges and patterns that drive hens to lay their eggs – taking all the guesswork out of keeping your flock healthy and happy.
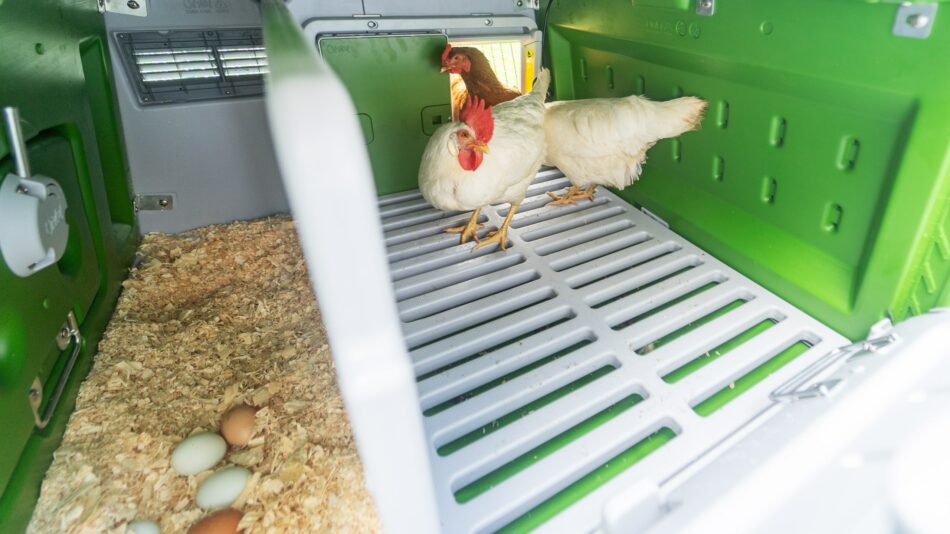
This entry was posted in Chickens
Read this account from a British Hen Welfare Trust volunteer and Omlet customer who recently rescued two ex battery hens. If you want to volunteer or rehome hens, please visit the BHWT website.
As I watched my flock potter about in my garden leading the blissful life and giving me so much in return, from their glorious eggs to laughter at their non-stop antics, I knew I wanted to give back something to these wonderful creatures.
That evening I registered my interest at the British Hen Welfare Trust to become a volunteer. I’d heard stories and seen posts online about ex-battery hens but I don’t think I really had any idea what I was going to face, and the life I was about to see thousands of beautiful ladies live day in and day out.
Picking up my new hens
Volunteer day saw an early rise at 6:30am to get to the farm. The first sight I had was a row of massive windowless barns and I could hear the faint whisper of thousands of voices inside.
I rallied off with the other volunteers who were already carrying out bewildered little faces and loading them into the crates that would be taking them onto their forever homes, where they would finally be loved and get a name.
Upon entering the reality was far worse than I could’ve imagined. So many cramped bald fragile bodies lined in cages five high, as far as the eye could see. Dust and ammonia filled the air, andall I wanted was to get them all out from the dark, away from the bare wires cages as quickly as I could.
Working with other like-minded volunteers was an inspiration, everyone worked so hard. I knew I had to be strong so that I could get some of the girls out of there; that day we got two thousand out of their prisons, all who’d seen nothing but that life for 18 months. At this young age their bodies are nutritional depleted causing them to no long produce eggs to the standard or frequency the industry wants, therefore they are not deemed commercially viable. The harsh reality is that they are then sent for slaughter. Yes, the sad truth is we had to leave some girls behind and really we only make a small drop in the ocean but for those few that do go on to a loving family its means the world.
I personally carried out my two hens, and they happened to be two of the baldest of the lot. One girl, who I called Tess, only had a few feathers on her entire body. I cuddled her in my arms as we drove home, where she shut her little eyes after such a long day realising she could now finally rest.
First few days at home
Once I got Tess and Gloria (named after the song ‘I will survive’) home I let them settle in the cat carrier until the evening with some food and water. They were terrified of me as the only human touch they’d ever previously had was never filled with love.
Even though I have a large walk in run for my flock I knew the girls needed to adjust to every day life at their own pace. They’d never even seen daylight before, instead having 20 hours of artificial light and four hours of darkness to get them to lay as many eggs as possible.
I treated them to their own luxury apartment with a view – a lovely new Eglu Go UP with a 2 meter run and wheels so I could easily move it around the garden and they could snack on as much fresh grass as they wanted. The Eglu is so easy to clean, and another main factor was to keep the dreaded red mite at bay as I did not want anything hindering my precious girls recovery whilst so weak. Looks trendy in the garden too.
Later that evening I gently placed them into the Eglu coop with the door closed so that they could get used to it and get a good night’s sleep. It’s important to allow them time to imprint on their sleeping area, as this will encourage them to go to bed at night on their own.
In the morning I let them out and even though not the most gracious of the descents both came out to explore and dive straight into the Glug and Grub containers. And so began my bonding, greatly helped by their appetite for yummy grapes.
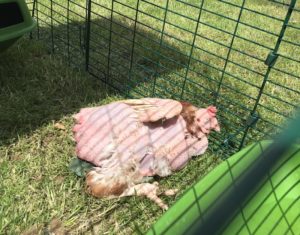
I think my favourite sight in the first few days was them laying in the sun completely at ease and finally acting out natural behaviours like having a dust bath.
They both adapted better each day and I marvel at their ability to take on new situations. It took a little while to understand the concept of a ladder, more so due to the fact they had to build up the strength in their fragile legs, but now that they understand night and day they run up and I find them both snuggled in the coop before lock up when I say sleep tight.
Getting better
Now six weeks on in their freedom journey they are flourishing. They have massive personalities which continue to shine each day: Tess is bold and Gloria is cheeky. Both are growing lots of feathers each day and they fill my heart with such love that I know they feel back.
As I write this both are running around enjoying summer with my other girls in the garden, casually going back to their Eglu run for a bite to eat and a drink before stepping out and having more adventures, because they know thats their forever home.
I want to thank Omlet for giving my girls such an amazing coop to grow old in and enjoy retirement – they love it!
For more information on battery hens and maybe opening up your home to some check out the ‘British Hen Welfare Trust’ for upcoming rehoming dates.
This entry was posted in Chickens
Red mites are a sure way to put a damper on your flock’s coop life. Learning how to protect your chickens from red mites is essential for their overall health and happiness. While pesky and persistent, red mites can be prevented and treated – especially when you have the right setup.
What are red mites?
Red mites, or Dermanyssus gallinae, are small, red parasites that lie in wait in your chickens’ coop, ready to strike during the nighttime hours. Often known as one of a chicken keeper’s worst foes, these tricky little bugs can prove challenging to locate and eradicate. Being nocturnal, they hide in the nooks and crannies of wooden chicken coops and roosting bars, and sneak their meals of chicken blood while your flock sleeps.
How do I know if it’s red mites?
Red mites are most active in the warmer spring and summer months. The first symptoms of red mites infiltrating your flock will be distressed or lethargic behaviour. Bites from red mites are itchy and uncomfortable, and since they prefer to feed through midnight snacks, your hens won’t be getting their required beauty rest. Your flock may appear sleepy, or display scratching or excessive preening behaviors.
As the infestation progresses, your hens can become anemic through losing too much blood to the parasites. Their combs and wattles may appear pale rather than red. You may also notice a reluctance to go to roost at night, as they will have come to associate roost-time with painful bites.
How to remove red mites from your coop
If you’ve come to the conclusion that your flock’s coop is under attack from red mites, you’ll need to take quick, aggressive action against them. Clean the coop thoroughly, removing all bedding, nesting material, and all detachable components like roosts or racks. Scrub the coop thoroughly with warm water, and clean any feeders or waterers. If possible, use a pressure washer to clean the coop and its components.
Once the coop is cleaned, leave it to air out in a well ventilated, sunny area. If you see mites making their escape, wait 10-15 minutes before pressure washing again. After any repeated washings, allow the coop to dry fully, and then treat it with a red mite product that is safe for chickens. There are powders or concentrates to mix with water and spray onto affected areas, so choose which you’re most comfortable working with. Diatomaceous Earth (DE) is also an excellent choice for preventing and treating red mite infestations, and it’s perfectly safe for your flock. You can add this ingredient to your chickens’ dust baths, or sprinkle it directly into their feathers.
How to treat chickens for red mites
If your flock has been infested with red mites, you’ll need to treat any affected chickens along with their coop. DE will kill the existing red mites, but your chickens’ skin will likely be raw and sore from the bites. There are other homemade remedies like garlic or other herbal sprays that will kill mites, just be sure that all of the ingredients are safe for chickens. Apple cider vinegar and electrolytes in your flock’s water will help boost their energy and healing, as well as promote healthy feather growth. If your flock appears to be anemic, ask your veterinarian for advice on any other supplements that might be beneficial. Treat bare areas where feathers have been preened out with anti-peck and healing topicals for chickens.
Preventing red mites
It’s far easier to prevent red mites than it is to treat them. Choosing a plastic chicken coop eliminates the fine cracks and crevices that wood allows for red mites to hide in, and they can be pressure washed and cleaned in mere minutes with little dry-time afterward. Wooden chicken coops have far too many opportune hiding spots for red mites, making them hotspots for the offending parasites.
In addition to having a plastic chicken coop instead of a wooden chicken coop, you can treat the inside of the coop and the ground around the coop with DE to act as a natural deterrent for red mites. Regular cleanings will help keep parasites of all varieties at bay, and will ensure that your flock stays comfortable during peak-pest season. And, unlike wooden coops, plastic chicken coops don’t need to be treated with sprayed insecticides to prevent red mites.
Omlet and your flock
The smooth surfaces of Omlet’s plastic chicken coops prevents red mites from setting up shop, and will keep your flock comfortable all summer long. Worried about outside of the coop? Our chicken toys and perches are all made from mite-resistant materials to ensure that your flock can have their fun without the threat of parasites. Combined with a walk in chicken run for plenty of outdoor space, your chickens’ setup will be perfect and parasite-free for the summer, laying the groundwork for those leisurely days together.


This entry was posted in Chickens


 Insulation


