
Caramel Quin and her children keep backyard hens in east London. This is their diary of introducing ex-battery hens to their older girl.
We started out with two hens and an Eglu Cube. A friend who had kept chickens for eight years needed her garden back and we’d been thinking about henkeeping, so she kindly passed them on to us. We named them Buffy and Britney (I make no apologies for brainwashing my tween kids to love late nineties pop culture).
That was just over a year ago. Buffy’s still going strong, Britney only lasted a few months. By then, we loved the girls and were already on the waiting list to collect ex-battery rescue hens from the British Hen Welfare Trust. We went as soon as possible: Buffy needed more chickens for company, or at least we did.
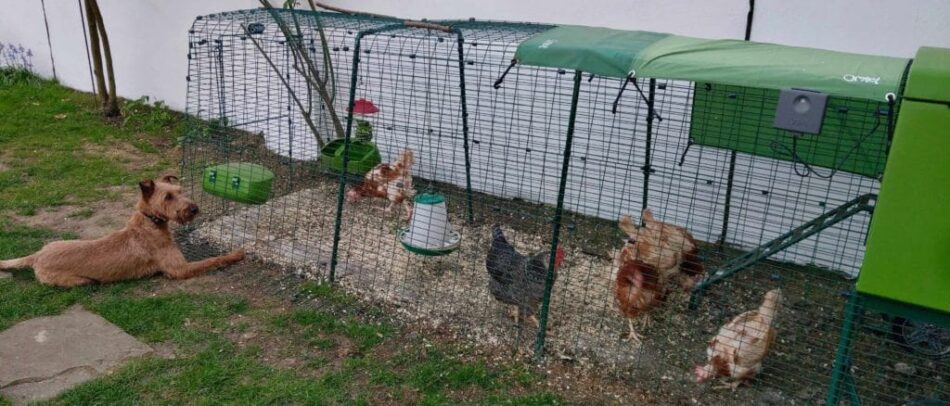
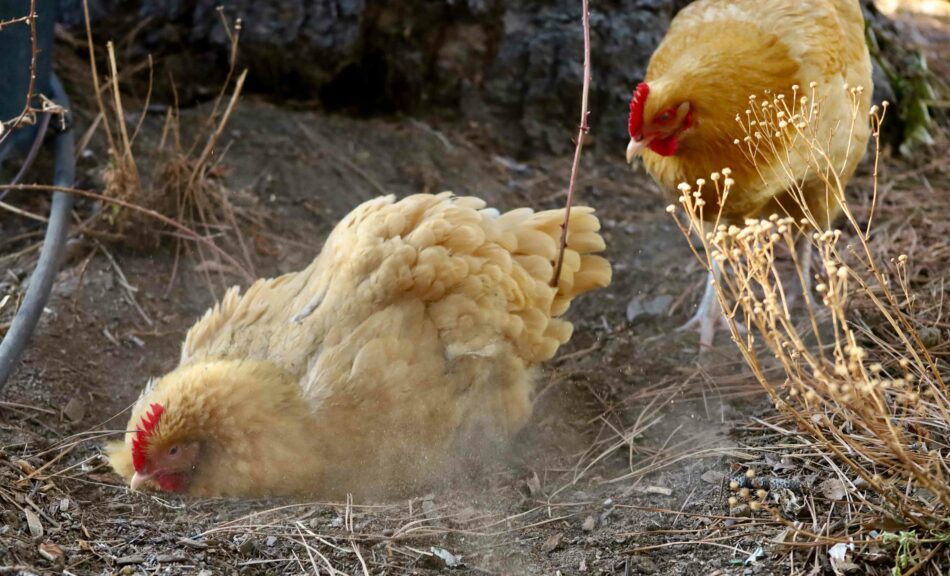
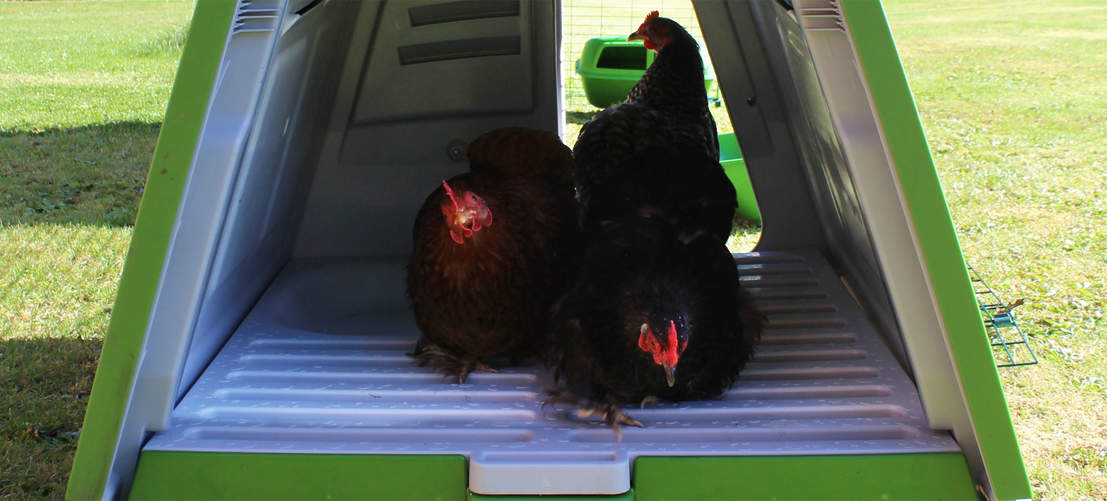
We drove to a nearby rehoming day and collected six birds, bringing them home in a couple of cardboard boxes. They looked sorry for themselves, skeletal, anaemic. Their crests were pale and floppy. The dog, shut inside the house, pressed himself against the glass door and salivated like a cartoon hungry dog, even though they didn’t have much meat on them. The hen with fewest feathers was nicknamed Necky and looked more dinosaur than bird. The boldest was nicknamed Dora the Explorer as she sought out every nook and cranny in the garden.
A garden! It was hard to imagine that these birds had never been outdoors before. Everything was new as they exhibited natural behaviours for the first time, like scratching and pecking at the soil for bugs. We let them explore while Buffy looked on from the chicken run. Then we swapped them and they ate while she was free range. Later we put them together in the run and watched excited as the first made it to the top of the ladder and found the Eglu.
On the first night, they didn’t all find their way upstairs to bed. A couple roosted under the Eglu Cube, so I went into the run and put them in by hand in the night. From then on, they knew where home was and made it into bed before the Autodoor closed to keep them warm and safe.
We gave them plenty of free range time. We also doubled up on feeders and drinkers, so nobody got bullied away from dinner. The hanging feeder proved best because all seven birds could get around it at once. I swapped layers pellets for smaller layers mash for a couple of weeks because the birds were used to smaller food when they were commercially laying.
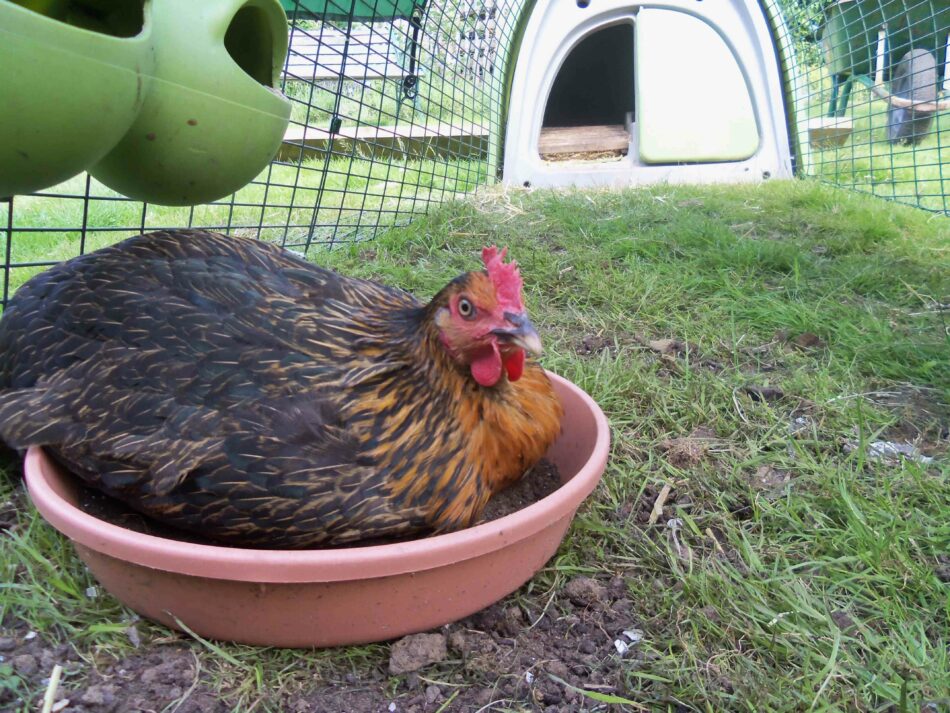
On their second day we found eggs laid randomly all over the garden, cutest was the one in the hollow of a dust bath. But within a week they had all figured out where the nest box was. Having never had more than two eggs in a day, it was a thrill to get five or six (and on one remarkable day, seven). Ex-battery hens tend to be good layers, they were bred for it after all.
On day two, I remember them freaking out when it rained: they had never experienced these tiny water bullets from the sky. Then there was a brilliant moment when I threw a handful of cherry tomatoes into the run and they dived away as if I’d lobbed a grenade into the trenches.
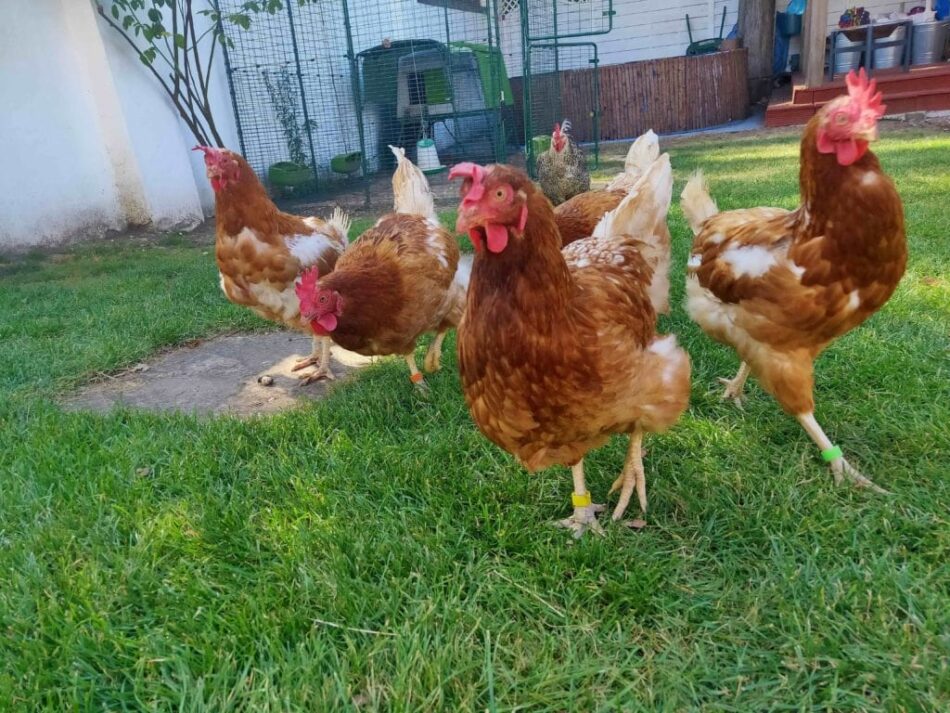
Bullying wasn’t as bad as I’d feared though. Buffy was outnumbered 6:1 by the newly named Willow, Betty, Mercury, Dora, Chirpy da Hen and Mango Buckbeak. (Listed in order of the age of the family member who named them… youngest last, as you can tell.) We added coloured rings on their ankles early, before it was hard to tell them apart as their feathers grew back, though the feathers came in slowly because we adopted them in April. Apparently if you adopt in the winter they get feathers faster because they need them for warmth.
Chirpy and Mango were the least feathered and most picked on, sometimes bullied away from food, but we gave them plenty of free range time so the bigger ones got out in the garden while the smaller ones ate. Gradually the bullying pecks gave way to polite pecks between all the girls, preening each other after a dust bath and freeing new feathers from their protective sheaths.
Seven months on, we still have Buffy and four of the new girls. Willow and Mercury didn’t make it: one died suddenly the other was unwell for a few days first. But we’ve also nursed others back to health: my signature banana porridge is now famous for bringing ill chickens back from death’s door.*
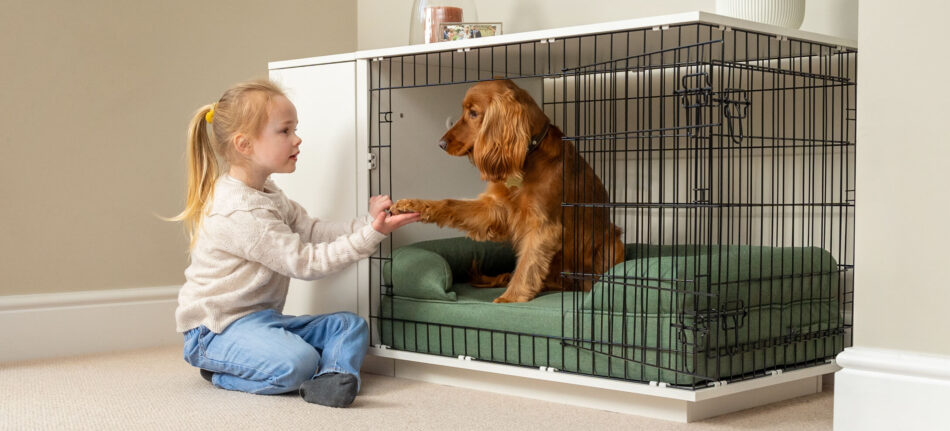
The star of the show is Chirpy da Hen, who I swear will live longest. She might outlive me. She gave us a scare a few months ago with a backside protrusion of epic proportions. We cleaned and examined it and were convinced it was a tumour not just a prolapse. We separated her in a pet crate so her sore bum wouldn’t get pecked by the others. We fed her banana porridge and gave her painkillers. Over a week, her bad butt gradually improved until we could miraculously pop it back in again and reintegrate her with the others. She’s fine now. No, she’s more than fine. She’s badass.
BHWT is careful to manage expectations: the lifespan of ex-batts is hard to predict. Instead they say “your hen has at least experienced kindness outside of the commercial system which is more than she could have ever hoped for”. If you think pets are a good way for children to learn about mortality, try ex-battery hens. They’re fun, their eggs are yummy and it’s easy to feel positive about the good life you give them, no matter how long or short it is.
Ours have a great life with free range time every day. They eat well, even jump up to eat roses and fuchsias from the bushes and I don’t mind. The dog is used to them now and can go out at the same time without him acting like a cartoon hungry dog.
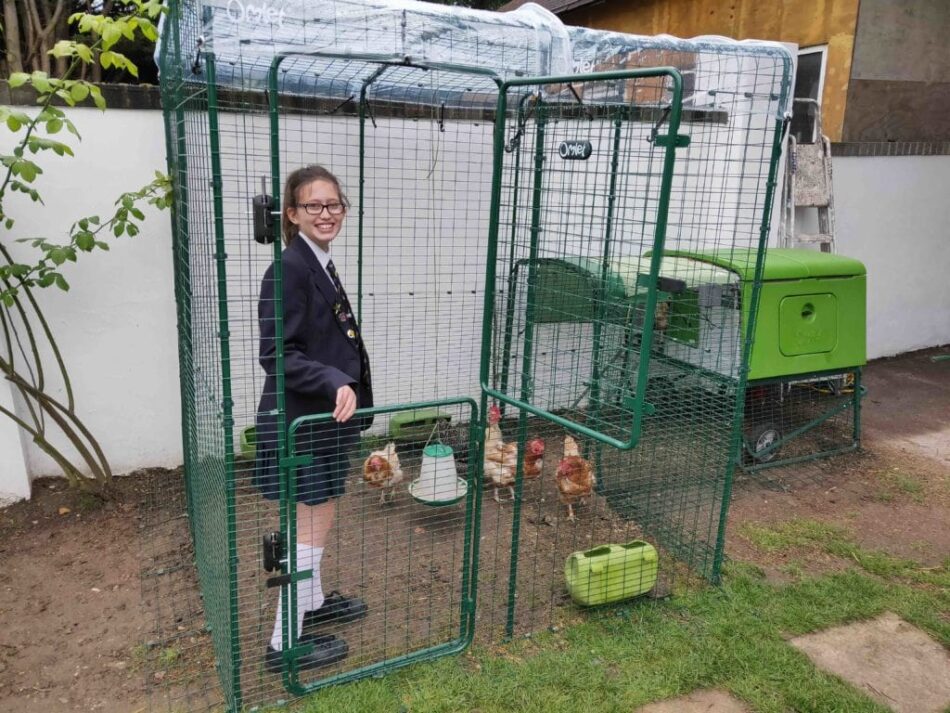
My luxury is upgrading to a Walk-in chicken run with rain cover, which is as much for me as it is for the birds. I got it mostly so I can muck out the run without kneeling down. It also gives the girls plenty of space and lets the children and guests visit them any time.
We’ve gone full circle as Buffy is going through her first hard moult, she’s half bald in cold weather, while the ex-batts are nearly fully feathered. Next year we’ll probably add more ex-batts to our brood. I guess we initially got them thinking of the eggs but now it’s more than that: they’re part of the family… who just happen to lay delicious eggs.
For more information on battery hens and maybe opening up your home to some check out the ‘British Hen Welfare Trust’ for upcoming rehoming dates.
*We recommend only feeding your chickens treats occasionally. Always make their food outside of your kitchen to avoid cross contamination of food.
This entry was posted in Chickens on November 27th, 2019 by linnearask
The Eglu Go which we launched in September 2009 is the new version of the Eglu Classic MK 2 which was launched in 2005.
The Classic and the Eglu Go are made of the same secure weld mesh, are the same size and are both easy to clean.
With the Eglu Go:
Possibility of changing this into the Eglu Go Up;
Lighter Rear Panel which gives access to the inside;
Droppings tray, roosting bars and nest box all slide out.
With the Eglu Classic:
You can open the side eggport door and collect your eggs.
It is the only chicken house in the permanent collection of the Victoria and Albert Museum because of it’s cool design!
This entry was posted in Chickens on November 24th, 2019 by mathieugrassi
There are several causes of feather loss. Hens usually go through a moult in the Autumn, usually around October or November. The first year tends to be a small moult affecting the head and neck area but the second year is a little more drastic. Hybrids moult more than pure breeds and often look ready plucked. The whole process takes around 3-4 weeks to be completed and starts at the neck, moves along the back, breast and ends at the tail. It happens annually to replace old worn out feathers. Sometimes dramatic total body moults occur where nearly all the feathers fall out overnight but they do grow back. You should start to see and feel little quills poking through the flesh which grow and open out into lovely new feathers which will keep her warm and dry throughout the winter. Make sure you provide a good quality layers meal for them because the moult takes a lot out of your hens. Don’t give too many treats as these don’t really provide enough nutritional value but wheat is very good as a scatter feed in the afternoons or you could perhaps give a wheatgerm porridge made with warm water to keep their little bodies warm overnight. Adding Poultry Spice to their layers meal or a Chicken Tonic to their water will help correct any mineral imbalance caused by losing and growing new feathers as they contain lots of minerals and will help the hens over the moulting process. Adding protein to the diet can also help so things like hard boiled eggs, tuna canned in spring water rather than brine which is too salty or live mealworms are good, protein rich foods. Egg production often takes a break during the moult as so much energy is put into growing the new feathers but once they are fully feathered again, the eggs should return.
Another cause of feather loss is feather pulling by another hen. The neck and back area tends to be a prime target, as is the vent area. You can get sprays to use on the bullied bird which make her feathers taste unpleasant to the other birds and this usually deters pecking. If the skin is red, sore or broken, separate the injured hen straight away and you can use Veterinary Wound Powder on her to help stem the bleeding and promote healing. Hens are morbidly attracted to the colour red and will peck at wounds until they are in a dreadful state if nothing is done so Gentian or Purple Spray is very effective as it stains the skin purple and this makes it a much less obvious target for the bully. You can also use Stockholm Tar which acts like a sticky black plaster, deterring further pecking whilst allowing the wound to heal underneath. With my own hens, I’ve found that some of these sprays cause the feathers to clump together though and this can make them more of a target for a bully so a puff of Veterinary Wound Powder or even household cornflour in an emergency disguises the sore area effectively and helps stop bleeding. If any hen develops a wound of any kind, remove them and allow it to heal for a few days before reintroducing them to prevent the wound being pecked.
A broody hen will pluck the feathers from her breast and abdomen to line the nest to help protect her eggs so if she’s displaying any odd behaviour or is clamped to the nest all day, this may be the cause. However, there is also a slight possibility that she might be allergic to any nesting material you are using. Some hens seem to have skin problems when they are in contact with shredded paper or some of the hemp based bedding. If you are using any of these, it might be worth taking them out and replacing them with something like wood shavings which are sold as rabbit/guinea pig bedding as these tend to be non-allergic. Sudocrem sold for nappy rash in babies is very soothing for sore skin in hens too so it might be an idea to try gently rubbing some onto the bald, red areas to see if this helps soothe any irritation.
There could also be another reason for baldness and that is skin parasites. Dirty vent feathers, lots of scratching and dustbathing, hunched or withdrawn hens and soft shelled eggs are often indications that your hen has an infestation too. Mites can’t be seen easily with the naked eye but they leave the skin looking sore, red and featherless. Lice can be spotted quite easily. The hot spots where lice tend to hide are around the vent, under the wings, round the abdomen and chest and the neck area. Ruffle the feathers against the direction of growth and look for little scuttling creatures or tiny cream eggs stuck to the feather shafts. If you come across any, you can get louse/mite powders from various sources including poultry feed suppliers/farm suppliers and some large petshops. Apply it to all your hens and repeat the treatment after a week to catch any eggs which might have hatched out. Depluming mites don’t respond to some of the mite powders on the market so if there’s no improvement, try one which has Pyrethrum or Permethrin in as these are very effective against this particular mite.
Red Mite don’t live on the hens but live inside the hen house and move onto the hens during the night so if you check in all the corners, pull out roosting bars if you can, check around the roof for signs of infestation. They aren’t particularly easy to spot as they are only about 1mm long and are grey before feeding and red after due to the blood that they suck from the hens and this blood sucking can lead to anaemia and lethargy. If you have a red mite infestation in your chicken coop, you may see tiny blood spots on the hens eggs and there may also be a greyish powder which can be seen around the ends of the perches. If you wipe the undersides of the perches with a clean white paper towel and find red streaks on it, this will show that there are red mite in the coop. Spreading Vaseline or nappy cream on the ends of the roosting bars and in the ledges where these bars sit can trap red mite too as they head for dark crevices during the day and any which do become stuck in the sticky cream can be wiped or washed off. To treat an infestation, you will need to remove everything from the coop which can be taken out and spray with a proprietary red mite treatment. Steam cleaners are also very effective for eradicating lice and mites from coops.
This entry was posted in Uncategorised on November 24th, 2019 by mathieugrassi
It is very difficult in the first instance to tell or diagnose when a chicken reaches maturity if it is going to have any internal issues a sometimes can be somewhat of a surprise to new chicken keepers when chickens fall ill, but judging from your conversation it seems that something is protruding from the vent area, which as you suspect is likely to be a prolapse, this is where the oviduct or egg laying tube has been pushed out of the body in an effort to lay an egg. It is vitally important to separate her from any other hens you might have as they will be attracted to the redness and peck at it causing your hen distress and serious injury.
To treat the prolapse, first wash the prolapsed area with warm water with some antiseptic in it. Dettol or Savlon will be perfect. You may see that there is an egg in the prolapse and you’ll need to carefully try to remove this without breaking it. If you do happen to break it, make sure that you remove any pieces of shell as they may lead to an abdominal infection. Once the prolapse is clean, tuck the hen under your arm with her head covered to keep her calm and gently push the prolapse back into the vent cavity with clean hands or wear clean rubber gloves or even use a clean wet cloth to help you push it back. Keep the hen in a darkened room or box to recover and allow the prolapse to settle back into her body. Many people recommend smearing honey onto the prolapse as this has antiseptic and healing properties. Applying haemorrhoid cream to the vent afterwards can also help. You will need to stop her laying for a while to stop the prolapse from just popping back out again so keep her off her layers meal for a couple of days and only give a very bland diet such as wheat (weetabix mixed with water or Growers Pellets) and if she’s kept in a darkened room for a few days, this will also stop her body from being stimulated into laying. She may need veterinary treatment if it keeps happening and if it does, I’m afraid that the prognosis isn’t good.
Making sure that she has a good intake of calcium may help as this strengthens the muscles in the oviduct and will help her to pass the egg. Limestone Flour mixed with her layers meal will help boost her calcium levels and you can get this from animal feed suppliers in the equestrian section, you add a heaped teaspoon of this to a feeder of pellets or mash a couple of times a week.
Also giving lots of leafy green vegetables can help with the absorption of calcium into the body so would be a good treat for her, cod liver oil given in moderation can also help with the absorption of calcium. If you give a a tablespoon of cod liver oil over a week, this may also help. Don’t overfeed your hen with other treats though as prolapses are more common in overweight hens.
Also have a look at this topic on our forum with advice from the BHWT – https://club.omlet.co.uk/forum/viewtopic.php?f=41&t=62511
This entry was posted in Chickens on November 24th, 2019 by mathieugrassi
You can usually tell if a hen is broody or not fairly easily. If she goes into the nest and doesn’t come back out again and starts making a very strange noise whilst puffing herself up like a football she could be broody. The noise they make is obviously different from the usual range of sounds and can vary from something like a very deep cluck-cluck-cluck rather like horses walking on cobbles to an ear splitting screech! Another sign of broodiness is feather pulling and you may notice that your hen starts plucking them from her breast to line the nest ready for the eggs resulting in an embarrassing bald patch on her belly. You may also spot a strange habit of picking up leaves, twigs, feathers and bits of grass and throwing them over her shoulders in an attempt to make her nest! A normally placid hen can turn aggressive and will peck you if you try to move her and the opposite can happen to a very flighty bird who will suddenly let you cuddle her till the cows come home as soon as she turns broody!
If you act quickly, you can get her to resume egg laying much sooner so try to restrict her access to the nest if possible, although this is usually very difficult if you have other hens who are trying to lay. If she sleeps in the nest, you need to encourage her to sleep on the roosting bars to allow lots of nice fresh air to circulate around her to keep her cool as she’ll get wonderfully warm and cosy overnight and that will just prolong the broodiness. If you put a brick, upturned plant pot, football or even a garden ornament into the nest, this will stop her from roosting in it but remember to remove it during the day so that your other hens can lay eggs. Keep her out of the nest if you can during the daytime. If you spot her in the garden sitting on a nest she’s made from leaves, twigs and feathers, make sure this is quickly removed and move her on or tempt her away with a treat or two.
The urge to go broody is usually caused by a rise in internal body temperature so a quick cold bath usually brings her back to normal and should stop the urge. Dunk the hen’s rear end and abdomen in a bucket of cold water until feathers are soaked. You can do this several times a day. Continue soaking until she stops being broody which should only take a couple of days depending on how long she’s been broody for. It sounds horribly cruel but they actually seem to find it soothing as they are so hot, bothered and cross that a cool bath makes them feel a lot more comfortable. Some people use an old towel to wrap an ice block or fill a plastic bag with ice cubes and put that under the hen in the nest and the coldness soon drives them from the nest. If your hens are in a run and she is determined to sit on the eggs at every possible opportunity, a trick we have used on our own hens might work for her too. We sectioned off the end of the run for our broody hen and put food and water in it. We popped her in there as soon as they woke up in the morning and kept her there until our other hens had laid. As soon as they all had, we removed the barrier, closed the coop door and let her socialise with the others. It took about a week of isolating her out of the way of the nest to break the broodiness but it worked and she’s been fine since. If your hens are free ranging, it’s even easier. You can make a separate run for her using some fruit cage netting or chicken fencing and leave her in there with food and water until the others have laid then you can let her out to join them.
You can let her sit it out if you like as it won’t do her any harm but you won’t get any eggs until she stops being broody and if she’s been sitting for a long time, this could mean no eggs for weeks afterwards. If she does stay put in the nest, try to encourage her to get up once a day to eat, drink and go to the toilet. Broody hens can lose a lot of body weight while they are sitting. It’s important that you check her regularly for lice and mites as they tend to infest broody hens because they aren’t dustbathing and preening as regularly as they normally would. A bad infestation of red mite can kill a broody so it’s also vital to check the coop carefully too as these mites live in crevices and corners of the coop rather than on the bird itself. If you happen to find anything on her, a dusting with a suitable powder or spray, repeated a week later, should remove any stowaways and there are various red mite treatments available for treating the coop. Once she’s lost the urge to sit, she’ll come off the nest and start socialising again and hopefully the eggs should start to arrive again.
A sick hen may also give a false impression that they are broody so be aware that she may not be feeling hormonal at all. A sick chicken will look completely miserable – head tucked into its neck, eyes closed, hunched up shoulders and a droopy tail. They withdraw themselves from the other hens and look unhappy and listless. A hen in lay or even a broody hen should have a bright red comb while a sick hen’s is yellowish and droopy. If you are concerned that she may be ill, it might be a good idea to take her to see a vet to get her checked over properly.
This entry was posted in Uncategorised on November 24th, 2019 by mathieugrassi
Both the Eglu Go and Eglu Classic houses sleep up to 4 medium to large chickens, however the standard 2 metre run that come with them, are really only suitable for up to 2 chickens, as it is best to try and give each chicken about a metre of run each.
You can extend both the runs, 1 metre at a time, to make them longer which in turn allows you to keep up to 4 chickens… (If you want three chickens, purchase the standard Eglu with a 1 meter run extension, the chickens will be quite happy in a run this size)
The Eglu Go UP can sleep up to 4 medium to large chickens, but again the standard 2 metre run for the Eglu Go UP would only be suitable for 2 chickens. You can also extend the Eglu Go UP run by adding 1metre extensions.
With regards to the Eglu Cube, the house itself will sleep up to 10 small chickens, but with the standard 2 metre run, we would suggest between 4 and 6 chickens, 4 chickens if you were NOT going to let them free range and 6 chickens if you were. The Eglu Cube run extension can also be extended 1 metre at a time, and you can have as many 1 metre extensions as you require.
If you were to have an extension on the Eglu Cube run making it 3 metres long, we suggest the number of chickens be between 6 and 10 chickens, 6 chickens if you were NOT going to let them free range and 10 if you were.
This entry was posted in Uncategorised on November 24th, 2019 by mathieugrassi
How do I get my chickens to use The Chicken Swing?
Chickens being birds are a bit quirky. Nonetheless, they are extremely habitual and love a routine. It seems the older they get, the slower they are to take on new habits. They are pretty low on the food chain which makes it nice for us because their production rate is high – lots of eggs! However, this makes them cautious and wary of new things. It also makes them group or flock up. They prefer another bird to try new things first. They also remember things surprisingly well. Do you know they will always remember and bond with their hatch mates? They also remember things that scare them and things that reward them with food or pleasure. There are also basic instincts I call “Chicken Things”. One of them is roosting up high in trees. If they perch on moving narrow branches a lot of predators are unable to get them. A moving perch is natural to them.
So, with all that being said, how do we get chickens to get on The Chicken Swing?
Place the swing above the heads of the other fowl in your coop, if you can. You don’t want the swing spooking or hitting other birds (the light – weight design and smooth edges will not injure them.) They are quite able to jump up to four feet or more. A good starting point for full grown/ teenage chickens is twenty inches, or about your knee – height. If you have a small coop and cannot raise the swing that much, don’t worry. Swinging birds will not be able to get the big swing gliding motion or as hard of a kick off as with a full – height set up. But, they will still enjoy the gentler swinging movement of a smaller backyard coop set up. Other fowl will learn to stay clear. They tend to naturally stay out of the way of its movement.
Place The Chicken Swing™ free of obstructions as it swings. For a full swing installation, try to keep it about 18 – 24” away from walls or objects in the swing plane. Smaller coop set – ups have less swing so you can get away with having closer objects. Once they trust the swing, chickens grow more tolerant of kickoffs banging against the coop. (I think that is the goal for some of my hens.) If you have more than one Swing, be sure they can’t collide.
If you have a trusting hen, you can try placing her up on the swing and immediately rewarding her with meal worm treats. Once she is used to that, gently give the swing a pull to get it swinging. Give her a treat eachtime it swings toward you. Soon she will jump up on the swing and start swinging when she hears the bag shake. However, if you try to force her, this method can backfire on you. If the hen gets scared or feels forced, she will relate this to the swing and the other hens might follow her lead of fear. This will set you back. I recommend you do not try this with all your flock, but choose only a few, be very gentle, remain calm, and have rewards ready. Of my 30 hens, only 4 or 5 were taught using treats. Generally, if you get one swinging others will give it a try. I note that in my flock, hens that use the swing most often are not necessarily those trained using treats. Chickens tend to choose their own time. Some are very habitual while others are whimsical. Some are morning swingers. Some swing after their daily egg. Some hop on at odd times. Chickens are chickens, I guess.
One other thing you can use is youth. Young chickens have a lot more free time and are more willing to take risks. Introduce the Swing soon after bringing them home, or at least before they start laying. Not only is it an irresistible adventure for them, it is just too dang cute to watch them carry on and practice moves. I have had older chickens take up swinging. But results are quicker with younger fowl.
Start your chicks out swinging
Whether your chicks are bought from a hatchery or hatched in your coop, chicks will take naturally to The Chicken Swing™ in most cases. The design of our swing allows for chicks just days old to hop up and start trying it out. Its design is lightweight and will not injure them if they are bumped when a hatch mate or fowl of similar size is using it. You may set it up right in your brooder by using the “small coop installation” procedure. Hang the swing from the cross-member using some extra S-Hooks, or by re threading the rope. You can also use a broom stick or shower rod on top of your brooder box and install it similar to full swing method. Just lower the Cross-Member support knot (or untie it) and let the Cross-Member rest on the Side Tie Knot.
For the first few days, set the swing height about two inches above the floor. You may gently place the chick on the swing perch. If they jump off right away, that is just fine. Don’t try to force a chicken to swing. They will get on by themselves after your initial placement if you have been gentle. (No treat is needed with very young chicks.)
After they all seem to have gotten comfortable jumping up on it in this low stage, begin raising it bit by bit as they grow. It is amazing how high those little fluffs can jump! If you have different – sized chicks, you may set a stump or something similar under one side of the swing to help the smaller ones get on. Be prepared to spend way too much time watching them play!
A final point: my flock gets excited when they hear me coming. They stop doing whatever they were doing anticipating garden scraps or treats. This makes it hard to get photos of them swinging. I see them swinging the most when I look out the window out of sight. I had to stop fussing over them every time I went out there so they would just keep swinging when I wanted to take a picture or show them off to a friend. And remember peafowl and turkeys also enjoy The Chicken Swing™!
Fowl Play Products® hopes this information helps to get your backyard flock swinging. If you have older fowl, it might be tricky and take some time to get it going. The saying “Can’t teach an old dog new tricks” is sometimes true. In the end it is up to individual chickens. Not all fowl like to Swing, but we found a whole lot of them do. If you are unable to get your older Chickens to take up swinging, you may want to get a few chicks and introduce The Chicken Swing™ to them. Their example might set the mood for other fowl in your coop.
This entry was posted in Chickens on November 24th, 2019 by mathieugrassi
You can easily return an unwanted item to Omlet Ltd.
Please use the link below to the Royal Mail website, where you can easily create a free returns label. This can be attached to your returning parcel, taken to the post office who will return it to Omlet for free.
If you have any questions about our returns policy, then please don’t hesitate to call our customer services team on 001295 750094, Monday-Friday between 9:00am and 5:30pm.
Also if it is a large product you would like to return, then please contact customer services, who can arrange a free courier collection service for your items.
https://www.royalmail.com/track-my-return/create/110
This entry was posted in Uncategorised on November 24th, 2019 by mathieugrassi
Wondering how to make a dust bath for your chickens? Most hens are perfectly content to dig up their own patch of earth to roll around and fluff their feathers in – but by making your own dust bath from chicken-safe ingredients, you’ll elevate your hens’ bathing from a metaphorical bucket of cold water, to a luxurious bubble (well, dust) bath.
Why do chickens need dust baths?
Dust baths are an important part of overall chicken health. Like humans, chickens bathe to get impurities off of themselves and to feel better in general. It may seem counterintuitive to roll in the dirt to get clean, but the right dust bathing spot can absorb moisture and oils on the skin, and can rid birds of mites and lice. Hens aren’t the only birds that enjoy a good roll in the dirt – many wild avian species can be observed taking dust baths.
Chickens will find a soft, dusty or sandy spot and scratch around in order to create a shallow well to plop down into. Once they’ve laid down, hens will wiggle back and forth while flapping their wings in a shoulder-shrugging motion. They will lay on each side and repeat the process until they are sufficiently coated in dust or sand. When they’re done, they’ll hop up and shake vigorously – just like a dog after a bath. After a quick feather preening they’ll be done and dusted (literally).
Bathing this way benefits chickens mentally as well as physically. Just like we may take a warm bath to unwind at the end of the day, dust bathing helps hens relax and feel better. Hens may also hit the dust when they feel like socializing – much like humans in a sauna or hot tub. You may notice hens taking a dust bath with 2 or 3 of their closest flock friends.
Making a dust bathing area for your chickens
Giving your hens a designated dust bathing spot will deter them from creating their own – potentially in your favorite flower bed or another less-than-desirable location. You can use cat litter pans, the tray from a small animal cage or the bottom part of an enclosed dog kennel. But, if you have larger hens or a large flock, they may need more space than these shallow basins have to offer.
Use your imagination to create a dust bathing spot for your hens. Here are some ideas for inspiration:
- An old tire
- Flexible storage tote
- Livestock feeding pans
- Plastic toddler pools
You can also create a permanent dust bathing area by digging out a shape in the ground and edging it with pavers or stones.
Dust bathing areas or containers should have an edge at least 12 inches above the “dust fill line” to avoid hens tossing all of the contents out during their vigorous cleaning sessions. Make sure that the edge is high enough to contain the dust, but also low enough to accommodate your smallest flock members.
Place your flock’s bathing area in a sunny spot. Chickens will seek out sunny areas to bathe in – especially during the winter months. Be sure to keep their bath in an area where it can stay dry. Wet dust bath contents will dry eventually if they get rained on – but depending on the amount it could take several days. Chickens will bathe daily, so try to keep it as dry as possible. A large, elevated chicken coop can provide the perfect spot underneath with just enough sunlight and protection from the rain.
5 things to add to a chicken dust bath
You can make your flock a nutrient-packing dust bath from simple ingredients – many of which you may already have at home.
1. Wood ash
One of the most beneficial ingredients to a good chicken dust bath is something you can find in your own home or backyard. Wood ash from fireplaces or outdoor fire pits are great additions to your hens’ bath. Ash contains vitamin K, calcium, and magnesium, and helps absorb toxins from the skin of chickens. You may see your hens eat some ash, which can also benefit them.
It’s important to only use wood ash if you’re sure of its source. Do not use any ash from treated wood or lumber, as it contains toxic chemicals that can harm your hens.
2. Food-grade Diatomaceous Earth (DE)
This all-natural, silica-rich powder is a powerful anti-parasitic both on your hens and around their coop. DE destroys the exoskeletons of parasites like red mites, lice, fleas, and ticks. In fact, DE can also be added to your hens’ diet for additional parasite prevention. In addition to your flock’s bath, sprinkle some DE around the edge of your chickens’ run and coop to keep pests at bay.
3. Sand
Sand makes a great base for dust baths, but be sure to get the right kind. There are many types of sand available, but steer clear of children’s play sand, as it’s usually treated with chemicals. Aim for a coarse variety like contractor’s or multipurpose sand. Don’t use fine sand on its own – if ingested, fine sand can lead to crop impaction in hens.
The main purpose of sand is to ensure that the rest of your chicken dust bath ingredients don’t clump together, and to add weight to the mixture. If you’re using fine sand, make sure to mix it thoroughly with soil.
4. Top soil or peat moss
If you don’t want to dig up your own dirt, a bag of top soil or peat moss can be used instead. Widely available and inexpensive, bags of top soil and peat moss offer the benefits of natural soil without the hassle of digging it up.
5. Dried herbs
If you’re a chicken keeper that also gardens, you’ll likely have herbs available to add to your hens’ dust bath. Herbs help attract hens to bathing spots in addition to being beneficial for their skin and immune systems. Some herbs to add to your flock’s dust bath include:
- Lavender
- Rosemary
- Thyme
- Mint
- Oregano
- Sage
- Parsley
Don’t forget to save some herbs for your hens’ feed as well as their bath. All of these herbs help to support a healthy hen diet and lifestyle – both inside and out.
Maintaining your chickens’ dust bath
For dust-bath maintenance, simply clean out any droppings that find their way in and refill the contents of the bath when needed. Some hens may bathe multiple times a day, while others may bathe every other day. Depending on how heavy the dust bath usage is, you may want to keep an air-tight container of pre-mixed chicken dust bath for easy refills.
While chicken perches are flock favorites, be sure not to place your hens’ dust bathing area directly below their perching areas to avoid accumulation of droppings. If you have a walk in chicken run, cover the portion of the run that has the bathing area with clear weather protection covers both on the top and sides to prevent the contents from getting wet. This will allow for sunshine to warm their dust bath without the risk of it turning into mud.
Omlet and your hens’ health
Keeping chickens healthy and happy doesn’t have to be a chore. With thoughtfully designed chicken products like the Eglu Cube Chicken Coop, Walk In Chicken Run, and Weather Protection Covers, taking care of your chickens has never been easier. A homemade chicken dust bath is the perfect addition to these purposefully crafted products.
This entry was posted in Chickens on November 24th, 2019 by linnearask
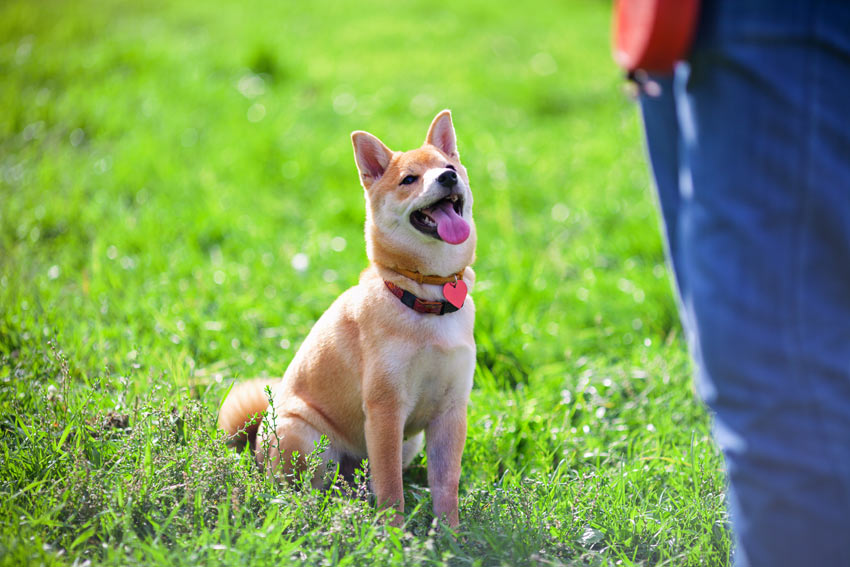
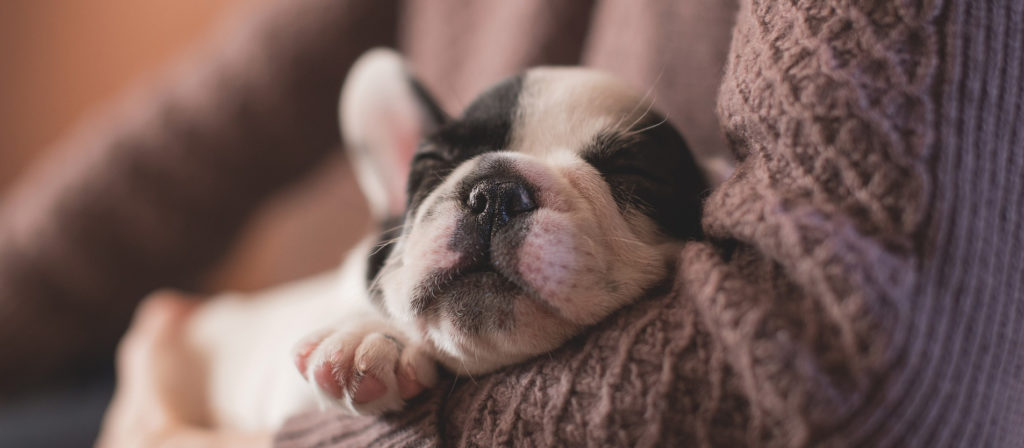
It’s a fantastic achievement to transform that over-excited, jumping, weak-bladdered puppy into a trained and trusted friend and companion. The transformation isn’t automatic, but comes about through persistence, organisation, and a few simple dog training tools.
You can find several training tips on our Omlet Dog Guide. Here, we’ll highlight a few things that can slow down the training process.
1 – The training sessions are too long
This is definitely rule number one. Training takes a lot of canine concentration, and if you overdo it, your dog will become bored and/or impatient. And frankly, so will you. A training session should be between five and ten minutes. After that, it’s time out. You can resume the training with another 10-minute session an hour or so later.
2 – You’re getting impatient
You might think your dog is the cleverest pet you’ve ever met. But he’s still a dog, and not a human, so you shouldn’t expect miracles. A dog has to concentrate to learn new commands, especially ones that go against his natural instincts to run, bark, eat, and jump up to greet people. Many owners lose patience when, for the umpteenth time, the dog fails to respond to a command, lies down instead of sitting, forgets to wait when you tell them, and so on.
As soon as you lose your temper, your dog will sense the hostility and begin associating training with human anger. Understandably, he’ll not be too keen on taking part in future sessions.
3 – You’re on auto-repeat
If your dog fails to get the hang of a new command or trick on the third attempt, let it go. The mystified mutt will have made three incorrect guesses, and getting it right after ten attempts will not make the training stick. Revisit these ‘fails’ in later training sessions. Review your approach – was it too vague, too similar to another command, or have you fallen into the traps mentioned in points 1 and 2 above?
Similarly, if your dog fails to lie down when you say “lie down”, don’t repeat the command endlessly. It will tell the dog he doesn’t need to respond immediately, or it might make them think that the command for ‘lie down’ is actually “Lie down! Lie down! Lie down! Lie down! Lie down!…etc.”
4 – Everyone’s moody
If a dog is tired, grumpy, hungry, or expecting his regular walk, a training session isn’t going to go down well. The same applies to the human trainer – if you’re not in the best of moods, the dog will know, and neither of you will be in the best frame of mind for a training session.
5 – The default approach is punishment
There are two ways of training a dog – the old-fashioned correction-based method, and the much better ‘positive reinforcement’ method. The old way involved punishing a dog for getting things wrong, while the modern way is to reward them when he gets it right. Some owners mix and match the two methods, which can be confusing. The poor dog doesn’t know what’s coming next – a tasty treat or an angry gesture.
You should never shout your dog’s name in anger or as part of verbal punishment either, or he will come to associate his name with negative things.
6 – The training is inconsistent
Always use the same command words for each action, and make sure the dog performs the required action once he’s learned it. If you give the command and then let it slide if the dog doesn’t bother responding, you’re undermining the process. When training a dog you’re establishing sets of rules, and consistency is the only thing that’s going to make them stick.
If using a dog clicker, make sure the clock is reinforced with a treat. And don’t click loads of times for a single training action or behaviour, or the click will lose its meaning for the dog.
7 – The training is tailing off
If a dog learns new tricks and performs well in early training sessions, it doesn’t mean the behaviours will stick in his head forever. They need reinforcing every day over the dog’s early months, otherwise he will get rusty (a bit like you trying to recall those school French lessons 20 years later). Some owners make the mistake of thinking a paid-for training session can replace a year of regular and patient training. It can’t.
8 – Bad behaviour is being rewarded
If a dog is misbehaving, it can be tempting to shout their name angrily, and then reward them with a treat or attention when they decide to come. To a dog this means bad behaviour = reward. Ignore the bad behaviour as much as you can and draw a line by distracting the dog by asking them to sit or lie down (without using his name). You can then reward the good behaviour.
9 – You’re overdoing the treats
If dog treats are given too frequently or the portions are too large, your dog may decide, later, that he will only listen if there is food involved. There are also health issues involved with overdoing the snacks too. Praise, play and affection are just as important as food treats when training.
10 – A bull terrier can’t be a sheepdog!
There’s no single ‘best way’ to train a dog. It depends on breed and temperament. So, don’t rely on previous experience or the advice of another dog owner, if the dogs in question were completely different characters.
No dog is born pre-trained. But by avoiding these 10 common mistakes you’ll make the training much more effective, ensuring that everyone involved – human and dog – has a great time during the process.
This entry was posted in Dogs on November 22nd, 2019 by linnearask

Contact neighbours to check sheds and garages
Before you go for a full search party, try contacting your neighbours and ask them to check their garages and sheds to see if your cat has accidentally got locked in. As you’re walking around the neighbourhood, call the cat’s name and listen out if you can hear a cry from any garages.
Make sure someone is home
If you don’t have a cat flap, make sure someone is at home while you’re out searching just in case your cat decides to come back. Some cats do just like to go for a walkabout for a few days. If the weather takes a turn and it starts to rain, it can be heartbreaking to think of your pet out in the cold weather, but actually bad weather can help as it will drive your cat home as it seeks shelter.
Go out searching
If you know your cat, you will know where their favourite hang out is. Make sure you head along to their most frequented spots and take a box of treats with you to loudly shake and call their name.
Put up posters
Make sure you put up posters locally, including lampposts, notice boards in shops and post through peoples doors to spread the word and make them more aware.
Make sure they are collared and chipped
If your cat is chipped, then if they’re taken to a vets the vet can call you and reunite you asap. If they are not, make sure you call all of the local vets and check your cat hasn’t been brought in.
Social media
Put up a post on your social media similar to your physical poster and ask friends and family to share it. Also message your local community Facebook groups to get them to post about the missing cat.
Let your other cat help
If you have another cat, it can be tempting to keep them locked in whilst the other one is missing due to your worry. Don’t do this! Make sure your other cat is allowed out exploring as they normally do, more often than not they will lead you to your other cat who might potentially be trapped or injured. Also if you follow your other cat it will give you an idea where they normally spend their days.
Use smart front door cameras
Front door cameras such as Nest and Ring will often pick up any movement going past their house including animals. Check with your neighbours if anyone has one and ask them to look at motion alerts from the time you last saw your cat.
If you move house
To avoid your cat getting lost when you move house, keep them indoors for at least 3 weeks to avoid them getting disoriented or trying to head back to their previous territory. This time indoors allows them to settle and regard the new house as ‘home’ marking their scent.
You can also rub butter on your cats paws on the first day you arrive, instead of stressing and trying to dart out the door your cat will enjoy sitting down and licking the butter off its paws thereby slowly becoming familiar with their surroundings.
Whilst they’re kept indoors, keep sprinkling some of their used cat litter around the garden so that it warns off other cats and also is a familiar scent for them when you do let them outdoors. Once you do let them out, do it just before a usual mealtime, if they’re hungry they will more likely come back to the sound of dinner rattling in the box or packet.
The need and want to return to their old home can be very strong for a cat, particularly if the house isn’t very far away. Make sure the new owners have your contact details in case your cat returns.
This entry was posted in Cats on November 17th, 2019 by linnearask
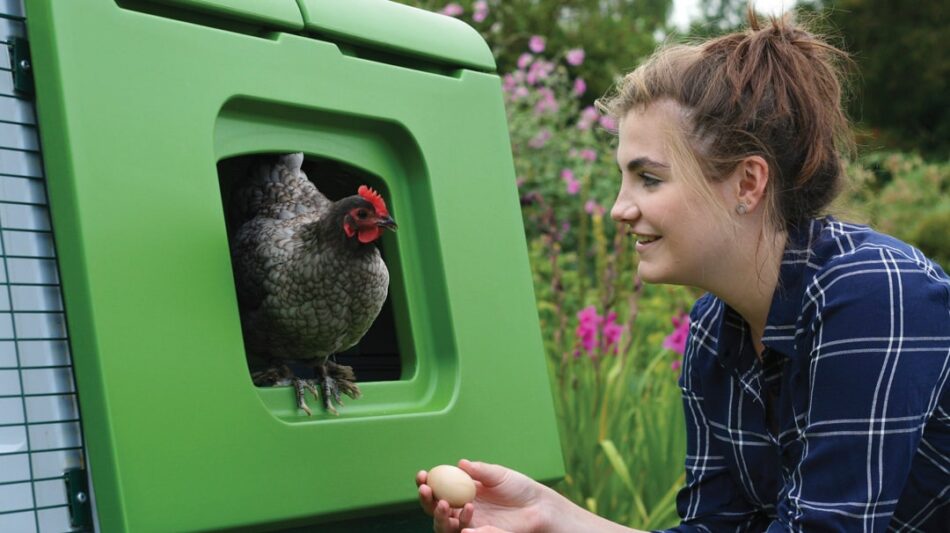
Finding eggs in the nest box is one of the joys of being a chicken keeper!
Most people decide to keep chickens because of the prospect of being supplied with fresh and delicious eggs! So when your hens don’t deliver the goods or stop laying completely, it can be worrying, baffling, and frustrating. There are several reasons to explain this behaviour, and fortunately, in many circumstances, this is no cause for concern. Here are the most common reasons as to why your chickens have stopped laying eggs:
The Age of Your Hens
When raising chickens, you’ll notice that they have a laying cycle, or how their age affects their egg production. Backyard hens typically live to around six to eight years old, but will only lay eggs for a certain number of these.
Many hens will not produce eggs until they are six months old and thereabouts, but the exact timing depends on the breed. Some breeds, such as Australorps, Golden Comets, and Leghorns, begin laying early, in fact as early as between 16 and 18 weeks. Some larger breeds such as Orpingtons, Plymouth Rocks, and Wyandottes, however, could have you waiting up to eight months for their first egg to appear!
Whilst egg production will gradually decrease every year, your hens will eventually stop laying eggs approximately around the six-year mark. Again, this is dependent on the breed and some hens can stop a lot earlier or later than this.
If you’re unsure of how old your chickens are, have a read of our previous blog: How to Tell the Age of a Chicken.
Time of the Year
Another complicating factor as to why your chickens have stopped or are not laying eggs anymore, is the time of year, which is the most common answer to the “why are my hens not laying?” question.
For most breeds, hens tend to stop producing eggs, or drastically reduce their output, in the colder months. This is due to the reduced daylight hours during the winter. When summer ends, there is of course less daylight, which triggers a hormonal response in hens. For egg production, hens typically need between 12-14 hours of daylight each day and 16 for optimum egg laying, which is why they can struggle over winter. Furthermore, hens that reach egg-laying maturity in the autumn or winter may not lay again until spring.
Moulting
Moulting is an annual (or sometimes biannual) occurrence, whereby chickens shed their old feathers and grow new ones. The process usually lasts between 1 and 2 months and whilst it can happen at any time of the year, in the UK, this is usually in late summer or the beginning of autumn.
When chickens moult, most hens will take ‘time off’ from laying eggs with their physical efforts now concentrated on growing new feathers. During this time, you should continue to provide your chickens with a healthy diet, along with adding a bit of extra protein to their diet and ensuring they have plenty of vitamins and minerals. You can also add some apple cider vinegar to their water to help with a healthy, glossy, new plumage.
Poor Nutrition
This underlines another important point – a nutritious diet is vital all year round. Whilst it’s a great idea to help get your chickens some extra nutrients whilst they’re moulting, it’s also important to provide them with what they need to keep healthy and laying eggs whatever time of year it is!
Put simply, if hens are malnourished, egg production will drop, with hens either laying fewer eggs or none at all. Whilst chickens naturally forage for food, to keep producing eggs, hens need a balanced diet of enough protein and carbohydrates. A steady supply of a good quality feed and access to grit will ensure that your chickens get everything they need.
You’ve Got a Broody Hen
Sometimes a chicken will decide to sit tight and wait for her egg to hatch. This is known as a broody hen, and while she’s broody, she’ll stop producing eggs. This is handy if you want to hatch chicks, as the hen will happily sit there for the three weeks it takes to hatch an egg. It’s less handy if you want her to produce more eggs, though!
A hen can either be left for three weeks, after which she will resume normal service. Alternatively, you can gently discourage her, should your hen be nesting in an unsuitable environment (or if you find yourself in dire need of eggs!). Breaking a broody hen can be difficult, but placing a bag of ice cubes or frozen peas underneath her can do the trick. Some chicken keepers also recommend placing the hen in a wire cage or dog crate with food and water for a few days. This can be a little uncomfortable but will usually break the brooding habit.
Chickens need plenty of room to roost in their coop
Sick Chickens Stop Laying Eggs
If your chicken stops laying eggs and you have ruled out that your hen is neither too young nor too old, not moulting, not brooding, and not hunkering down for a cold winter, then the reason for the drop in eggs could be illness. In particular, parasites such as lice, mites, fleas, and internal worms can be causing bodily stress, which has a significant impact on laying. For a bit more information on illness in chickens, check out our pages on chicken health for advice on diagnosing and – where possible – treating problems.
As well as illness being a cause of stress, it can also be brought on by other factors such as bullying, too much handling, injury, noisy children and pets in the garden, or a poor environment. Making sure the hens have a space where they can stay happy and healthy is vital. A setup such as the Eglu chicken coop and run, along with suitable perches, feeders and other essential accessories can help with this.
Something Else to Consider…
It’s also very possible that your hens are in fact laying eggs, but they’re going missing before you even have the chance to collect them! However, rest assured, the mystery behind ‘vanishing eggs’ can usually be explained with two main reasons.
The first of which is that free-ranging chickens often ‘go native’ and begin laying eggs in a spot in the undergrowth, rather than in the coop. You should check under shrubs, in long grass, and any secluded corner of your plot of land. If the AWOL laying has been going on for a long time, there may be a few eggs out there in the wilderness. Check their freshness by placing them in a bowl of water. If the eggs lie on their sides, they are fresh. If they are more upright (between 45 and 90 degrees), but still resting on the bottom of the bowl, they are not fresh, but still usable. Any that float have passed their sell-by date!
Eggs may also disappear if a hen acquires a taste for them. Egg-eating amongst chickens can be a sign of overcrowding or poor diet. Once she has acquired the taste, it can be difficult to stop a hen from eating eggs, and she may need isolating to stop her pecking at her neighbours’ eggs. The isolation may also induce slight stress, just enough to interrupt her own laying, which may, in turn, break the habit.
Normal Egg Service Resumed
Don’t worry – unless a hen is very old or very ill, her egg-laying should soon resume. Owners can aid the process by making sure they’re giving the birds everything they need. The key to a good egg supply is good food, a good space – and patience!

Backyard chickens produce tasty eggs!
This entry was posted in Chickens on November 14th, 2019 by linnearask
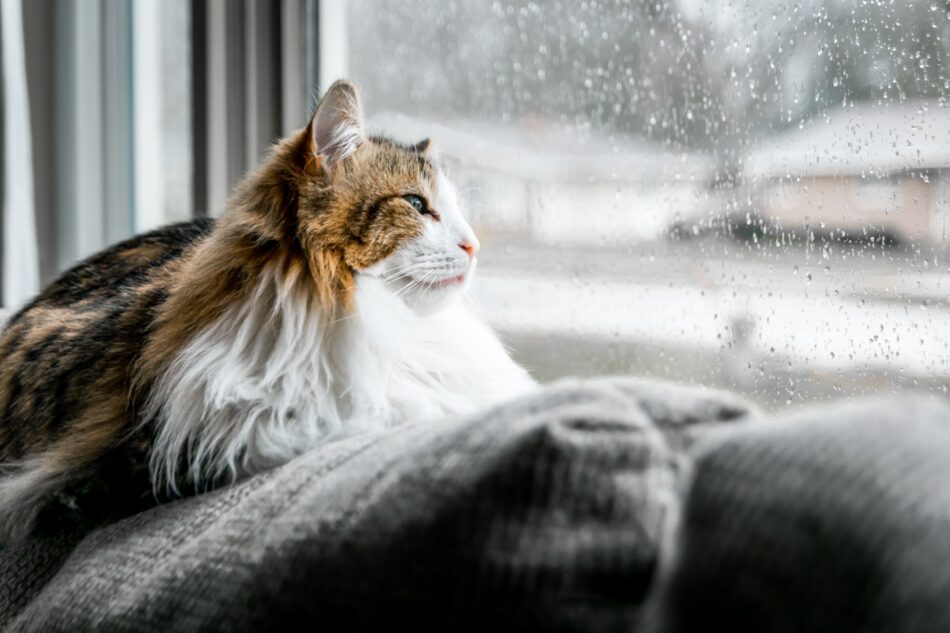
 Some cats would rather have an early night on a warm sofa than a long night out on the tiles. The Persian, the Ragdoll and the Russian Blue, for example, all view the world beyond the window as a hazard rather than something irresistible on the other side of the cat flap.
Breeds such as the hairless Sphynx and the thin-coated Cornish Rex and Devon Rex struggle at both ends of the weather scale, burning in strong sunlight and shivering in the cold.
Other breeds, such as Burmese, Korat and Siamese love being outside and will soon become stressed and destructive if forced to live behind closed doors.
Many others mix and match as the mood takes them. For example, you’ll never see an Abyssinian cat more content than when she’s curled up in a favourite armchair – until you’ve seen her rolling blissfully on the lawn.
But no matter where your feline friend sits on the Coach Potato/Great Outdoors scale, one thing they all love is warmth. For an outdoor cat in the UK this is no problem from – let’s be optimistic – the back end of March to the middle of October. But when the temperature drops and the frosty mornings bite, every cat needs somewhere to warm its paws.
An Indoor Haven
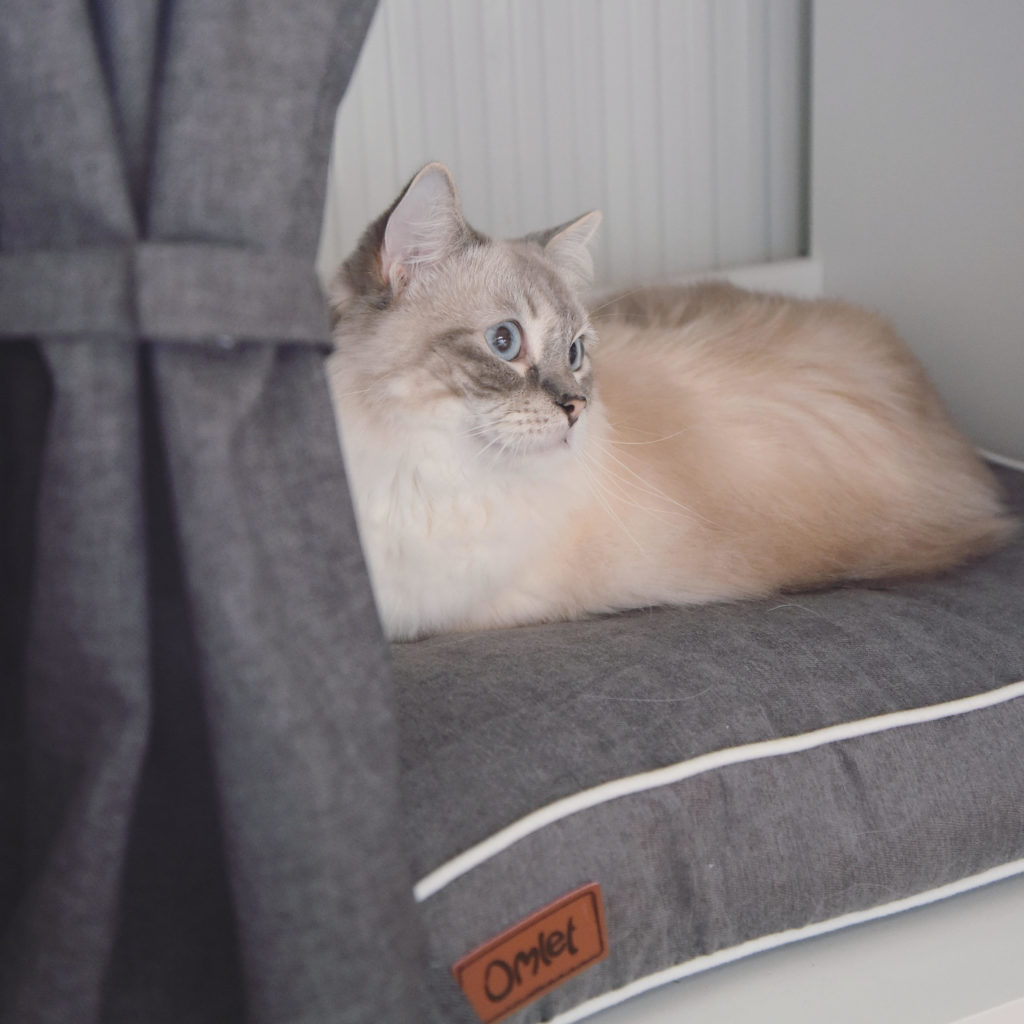
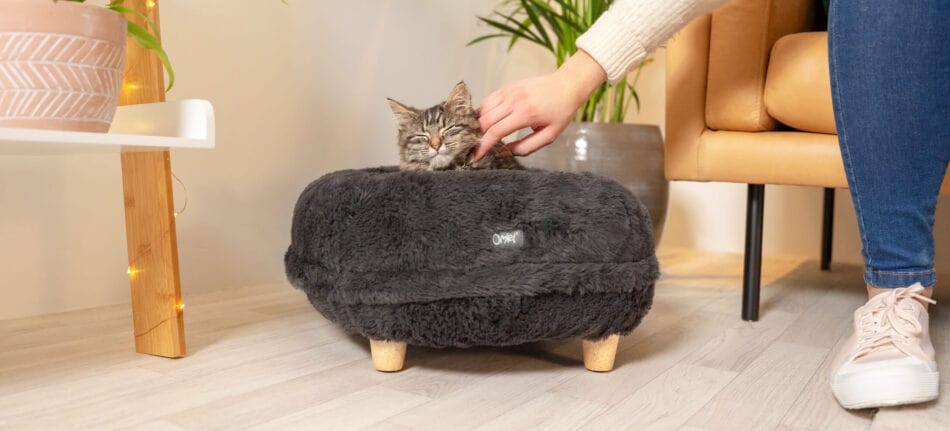
You don’t need to have the central heating blasting out to keep your cat from shivering. A cosy spot to curl up in, away from drafts, hustle and bustle, will do the trick. It could be something as simple as a box with a blanket, or a safe space under the cupboard – or even on top of it. Best of all, a tailor-made cat bed will maximise cosiness and heat retention.
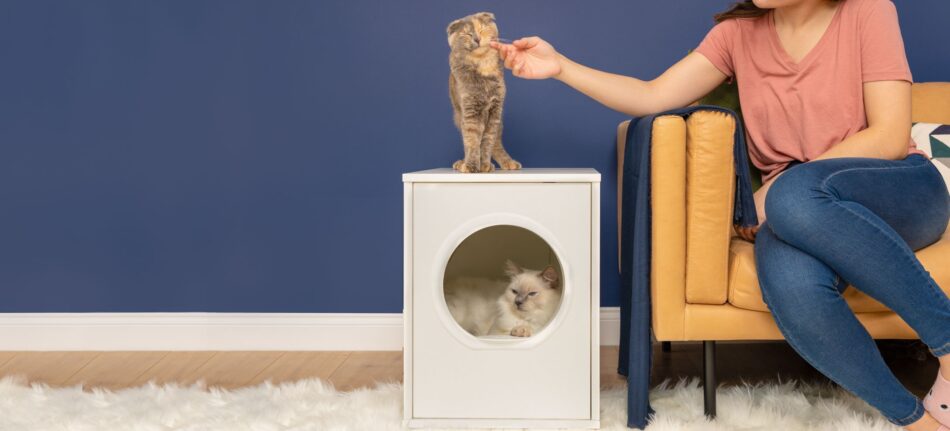
Another custom-made option is the Maya Nook. This transforms your cat’s cosy corner into a piece of attractive furniture, providing snuggling space for your pets, and with curtains that keep it all nice and private. The Maya Nook also has an optional wardrobe attachment, for keeping cat food, toys and other feline bits and pieces tidied away.
Even without the heating cranked up, the enclosed nature of the Maya Nook makes it the perfect hot spot at any time of the year.
An Outdoor Haven
If you have the kind of cat who craves the outdoors no matter what the weather, and who sometimes likes to sleep rough in the garden, there are things you can do to make their life a little comfier.
A box-with-a-blanket in a shed or other outbuilding, or a covered area in a quiet corner, can all give the bare minimum of cosiness that no outdoor cat can resist. Even a little dry area under a trampoline or climbing frame can do the trick.
If you have an Omlet Cat Run, you can put a covered snoozing area in one of the corners. That keeps things snug and safe for a cat who likes being outside, but who has a tendency to disappear or wonder into danger.
If your cat still suffers the shivers in winter, you could buy a cat jacket. These can be particularly useful for hairless breeds such as the Sphynx.
Best of all, though, there is that perennial favourite warm spot that can help a cat through the longest of winters – your lap!
This entry was posted in Cats on November 13th, 2019 by linnearask
 Naming pets can be difficult. Should you go for something highly original, something that describes the pet, or something that reflects your own personality? Should it be ‘safe’, picked from an online list of popular pet names? Or should it say something about the year the pet was born – perhaps a dog called Trump, a cat called Greta, or a budgie called Boris?
If it’s a family pet, parents often take the easy way out and ask the kids to think of names. We fool ourselves that we are being kind, inclusive parents, but in reality we’re just passing the buck!
Safety in numbers
Somehow, if there’s more than one new pet the floodgates of inspiration suddenly open. You can use the same letter – Maxi and Mini, Pixie and Pumpkin, or Arthur and Alfie. Or you can go for famous couples such as Pepper and George, Thor and Loki , Meg and Mog, Lennon and McCartney, Bubble and Squeak.
It becomes harder if there are more than two new animals to be named. A small flock of chickens, for example, may well start out with individual names, but chances are you’ll soon be referring to them simply as “The Chickens”.
The other definition of “safety in numbers” is “names used 1000s of times before”. Cats will always be called Tom, Fido will be used for Dogs, and Polly the parrot will remain iconic. And then there are all those lists of Most popular Pet Names. These change gradually as the years pass, just as popular baby names do.
A survey of 2018 faves, for example, suggests that Bella, Poppy, Lola and Alfie are the commonest dog names in the UK. Cats are mainly called Luna, Bella, Milo and Loki. And if you have a parrot, chances are it’s named Charlie, Kirsty, Ollie, Bernard or Basil.
Small mammals tend to share popular names, and right now the most popular ones are Flopsy, Thumper, Luna, Cookie and Rosie (and Flopsy and Thumper, along with Peter, have been top names for rabbits for 60 years or more).
No Laughing Matter?
If you opt for an amusing name, you need to be confident you won’t regret the decision further down the line. You will find that names such as Brexit, Doggy McDogface and Smelly Cat soon pass their sell-by date.
If you want a pet name that will always raise a smile, without overdoing it, it’s best to choose something not usually used for pets at all. You’ll probably never tire of a cat called Gary, a dog called John and a parrot called Karen. It’s a fine line, though. Quirkier names such as Laptop the cat, Curtains the dog and Bread Roll the parrot may quickly lose their appeal.
 Things To Avoid
If you have a new dog, you should avoid giving it a name that resembles a command word. For example, Sid sounds like ‘Sit’, Levi sounds like ‘Leave it’, Walt sounds like ‘Wait’, Hal sounds like ‘Heel’, and so on. This is less of an issue with other pet species.
Anything rude or controversial is going to cause embarrassment – for you (when you have to use the name in front of the neighbours), and for the poor children forced to address their furry friends as Sexy Paws, Satan, or whatever.
It’s also short-sighted to give pets baby names. Yes, that puppy may well look like Tummykins, and that kitten may respond well to Tiny Fluff, but once they’ve become adults, it will sound a bit silly.
You should also spare a thought for vets and kennels/catteries too. Having a dog called Cholmondeley (pronounced Chumley), a cat that sounds like ‘catkin’ but is spelled Qatqin, or even rogue letters in the name, such as Jaxon, Klyde or Phreddie, can lead to confusion in databases.
Things To Fall Back On When All Else Fails
You could choose a name that describes your pet’s behaviour or appearance. Flash, Dash, Nibbler, Scratchy, Sooty, Rosy, Socks, Spot, Biscuit, Brownie, and so on. There are also the famous names – Bugs, Daffy, Sylvester, Tweetie Pie, Lassie, Laika, Marmalade, Felix, etc.
And then, of course, there’s that classic ‘get out of jail free’ card – the kids. All you have to do is pronounce judgement on whatever names they come up with, saying “try again” if you don’t like it. Once they’ve decided on a Snowy, Scooby, Simba or Marley, you can sit back with the satisfaction of a difficult job well done.
This entry was posted in Pets on November 12th, 2019 by linnearask
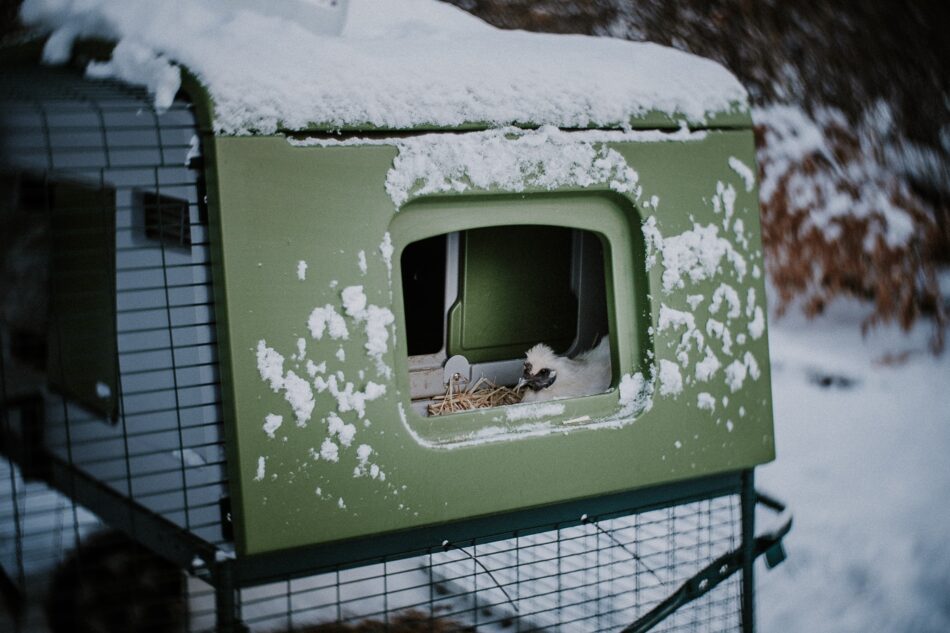
Snowy weather can bring great fun for all the family, but when it comes to our pets we need to take extra care to keep them happy and healthy (even if they love it!) Take a look at our snow safety advice, and make sure you’re prepared for whatever winter may bring…
Dry off damp fur and feathers
Check on your outdoor pets a few times throughout the day during periods of snowy weather and check they haven’t got too wet. Damp fur and feathers will take longer to dry during colder temperatures, making it difficult for them to warm up again. Indoor animals should also be dried off with a towel after being outside or going for a walk.
Clean paws of ice
For dogs and cats in particular, snow can get compacted into their paw pads and turn to painful cubes of ice. Use a towel or drying mitt to dislodge any chunks of snow and dry off their feet. Also take care when walking your dogs in snow, as salt used to grit the roads can be poisonous. Watch that they don’t stop to eat snow at the roadside and clean their legs and paws of any snow or dirt after their walk.
Extra food
Pets of all kinds will use more energy to keep themselves warm in winter, particularly in super cold, snowy spells, so they will benefit from some extra food. Although they will appreciate more treats, don’t be tempted to overfeed on these. Something nutritious will help them the most.
Extra bedding
Outdoor pets will need more dry bedding in their coop or hutch for them to snuggle into and keep warm. However, make sure their home is still well ventilated to keep fresh air moving through and prevent health problems. Read other ways you can get your coop winter-ready. Indoor animals might also appreciate an extra blanket or a cosy den for bedtime.
Potential risks
If you have a cat who still likes to go outdoors whatever the weather, be wary of the potential of antifreeze poisoning. Look out for symptoms such as vomiting, seizures or difficulty breathing and call a vet immediately if you think your cat may be ill. Find out more about anti-freeze poisoning here. An outdoor enclosure could also provide a solution for letting them play outside in safety.
Don’t forget about the wild birds in your garden!
Place a wide bowl or tray of water in your garden with something inside to float around (e.g. rubber duck!) to keep the water moving and prevent freezing. Extra wild bird food will also be appreciated!
This entry was posted in Pets on November 10th, 2019 by chloewelch
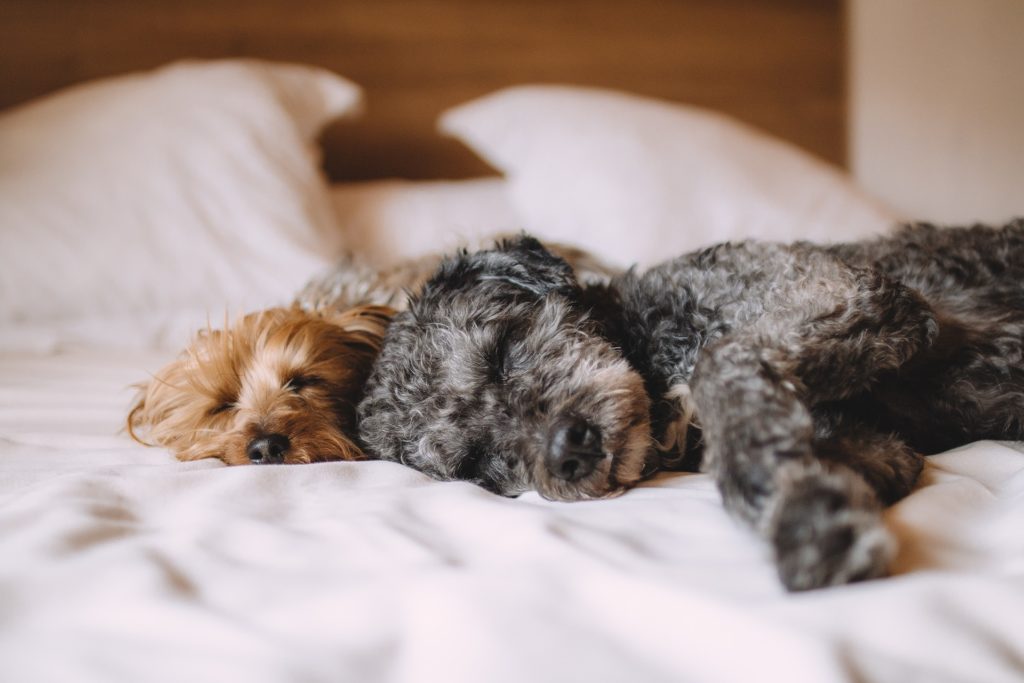
Cats have a reputation for being aloof but in reality, their behavior is often misinterpreted when compared to a dog’s. They might not greet you with a “welcome home” bark or wagging tail but cats actually form very strong bonds with their beloved owners, and the subtlety of their affection is all part of the feline charm. Discover more about what your four-legged friend is trying to communicate with these 15 signs that your cat loves you.
1. Your cat greets you when you open the door
The welcoming meow, the erect tale, the eager trot towards you… if that’s not a happy cat, we don’t know what is! Some cats even acquire an uncanny knack for predicting your arrival, sitting by the door or window and waiting for you before there’s any sight or sound of you in the street. But you’ll need to verify that psychic trick with one of the other humans in the house…
2. Your cat enjoys being stroked
While it’s true that some cats just love being stroked no matter who’s doing the stroking, many don’t like being manhandled at all. If your cat shies away from an over-friendly stranger or discourages them with a claw or two, but lets you stroke them, that’s definitely love.
3. They groom you
You probably groom your cat but have you ever thought about your cat grooming you? Cats can show their love for their owners by giving them their own version of a groom by licking. So, next time you’re being licked by your cat’s sandpaper-like tongue, take this as a sign of affection that means they see you as family.
4. Your cat gazes at you
If your cat looks into your eyes without turning away, they’re completely relaxed in your company. A long, slow blink is a good sign too. A cat will normally interpret staring as a sign of aggression and will look away (or run away) but if they’re relaxed enough to meet your gaze lovingly, take it as a great compliment.
5. They head-butt you
Cats rub against humans and furniture with little discrimination. But, a full-on head-butt rub is a sign of affection, and doesn’t just mean they only want some food!
6. They bring you presents
Okay, this isn’t your cat’s most endearing habit, but the ‘gift’ of rodents – dead, half-dead or very much alive – is a sign that they feel secure and at home, according to some experts. There’s also a school of thought that interprets it as affection – it’s something a mother cat would do for her kittens, teaching them how to handle prey. Curious about what else your cat is bringing home? Take a read of our Cats and wildlife in the garden blog for more.
7. Your cat meows a lot
Cats are thought to have a special ‘meow’ for humans. If your cat mews, gurgles and vocalises a lot in your presence, they’re telling you how much they love you. If your cat has stopped meowing though, it could be a number of factors. Other than being a little stressed out, they could be experiencing allergies, recovering from recent surgery or a temporary loss of voice!
8. Your cat gives you the twitchy tail treatment
When your cat walks up to you, tail erect and twitching, they’re letting you know how pleased they are to see you. Sometimes it’s because they know it’s food time, but it’s also often simple affection.
9. They fall asleep on you
Cats are always wary and need to feel super-secure when choosing somewhere to snooze. If they choose you as their bed, take it as a sign of complete trust and contentment. But, as great as it is to be chosen as your cat’s sleeping spot, they do need an actual cat bed. Omlet’s Maya Donut cat bed is a great choice and with a pillowy-soft feel and designer feet for home hygiene, this luxury cat bed is perfect for felines and humans alike. Pair with a super cosy cat blanket for ultimate comfort that your furry friend won’t be able to resist.
10. Your cat sticks their bottom in your face
Cats have scent glands on their rear ends, a kind of scented ID. If your pet presents you with their behind, it means you’re a friend. Don’t feel you have to reciprocate, though…
11. They show their belly
A cat that rolls on their back and invites you to rub their tummy is very chilled and sees you as a friend and playmate. But that doesn’t mean they won’t use their claws in the belly-rubbing game that follows, so watch out!
12. Purrrrrrrrrs
Cats purr for a number of reasons and whilst this soft rumble doesn’t always mean they’re happy, most of the time it does. Other times you might notice your cat purring if they’re hungry, frightened, or injured.
13. Your cat gently nibbles you
The soft nibble of a friendly cat is very different from an aggressive bite. Some cats use this oral greeting as a means of bonding with their human friends. Some owners, however, discourage it, as even a gentle nibble can be a little uncomfortable if the cat gets over-enthusiastic.
14. They follow at your heels
If it’s not food time, this behaviour is a sign of pure affection and your cat simply wants to be with you. Some cats tag along with their owners outdoors, and many are very happy to follow their best friends to bed. Once you’ve let them adopt this habit, it’s a hard one to break.
15. Your cat kneads you
This behaviour is thought to originate in kittens, pawing their mums to stimulate milk flow. If your cat does it to you, take it as a sign of affection, bonding and trust.
Omlet and your cat’s love
At Omlet, we’re not mistaken that cats definitely love their people – even if they show it a little differently. That’s why we design cat products to support the various personalities cats celebrate their differences. From cosy cat beds, to snuggly cat blankets and sustainable cat scratchers, Omlet has a range of ingenious inventions that your love will love.
This entry was posted in Cats on November 4th, 2019 by linnearask
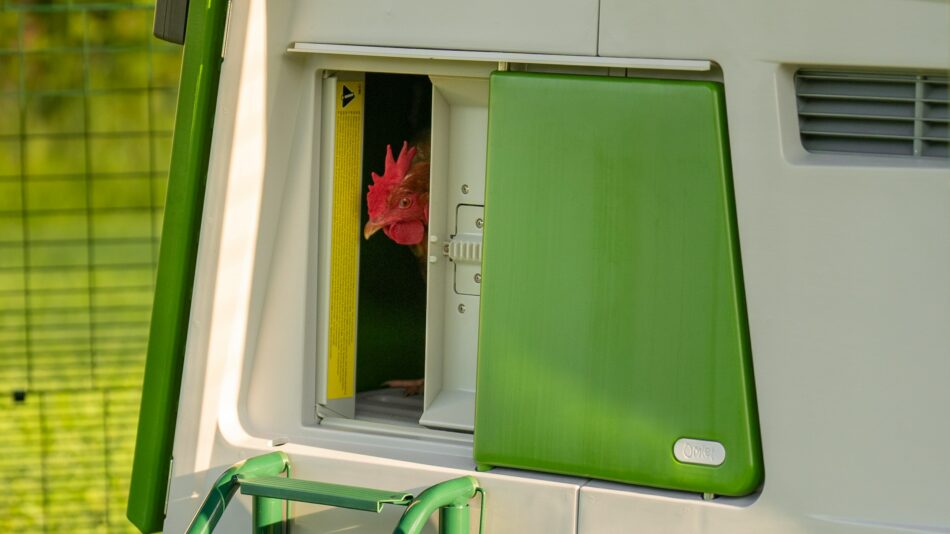
We can learn a lot from chickens — they go to bed early, and know how to snuggle up together to get warm on a cold winter’s night, ready to seize the next day when the sun comes up. But, once we’re down for our long winter’s nap, it’s hard for humans to rise and shine when it means having to trudge out to the coop in the cold. Discover how the Smart Autodoor makes winter easier for you and your chickens when you employ this chicken-life changing piece of technology to be your personal coop concierge.

A Smart Autodoor for any coop
The Smart Autodoor is the perfect solution for all chicken keepers. It attaches to any chicken coop or run, and can be controlled via the control panel or through a mobile app. When connected to WiFi, the Smart Autodoor can be customized, opened, closed, and updated anytime, from anywhere in the world.
Like many ingenious inventions — think wind-up radios, compasses, or steam engines — Omlet’s Smart Autodoor is simple, but effective. This hands-free device has several customizable settings, making it perfect for any schedule, be it human or chicken.
The Smart Autdoor’s open and close schedules can be based on the sun or the clock. The daylight setting adheres to a schedule based on how much daylight is available, keeping your flock in their routine even when the time changes in preparation for winter. If you prefer to have more control over your coop, the time setting can be programmed to open and close the coop door at the times of your choosing. The manual setting enables you to open and close the door at the push of a button on the app or control panel, or by speaking a request to your Alexa or Google Home device.
Attaching the Smart Autodoor
The Smart Autodoor was made to be the perfect companion to our larger chicken coops. If your flock already lives in an Eglu Cube or Eglu Pro, installation is quick and simple. But, fitting the Smart Autodoor to traditional chicken wire, Omlet’s chicken run wire, or wooden chicken coops is also simple thanks to the corresponding attachment kits.
Once installed, the control panel is powered with batteries or through the direct wire connection. The integrated light censors of the control panel are intuitive, ensuring that passing headlights or sudden cloud coverage doesn’t trigger the Smart Autodoor to open or close when using the daylight setting. Positioning your control panel on the side of the coop with a mounting bracket will allow constant access to ambient lighting.
The optional coop light helps your hens head to bed on time. By installing the light around the roosting area of your coop, your flock will have a night light to beckon them to bed. The coop light will come on 5 minutes before the Smart Autodoor closes by default, but this time can be adjusted through the app to accommodate hens that may tend to stay out past their roost-time.
Why is the Smart Autodoor better in the winter?
Aside from the warmer mornings in bed, or sparing yourself a chilly trek to the coop with a few taps on your mobile device, the Smart Autodoor offers practical benefits for your flock in the winter. The seal of the Smart Autodoor further insulates our chicken coops by maintaining a draft-free environment. And, the control panel and Smart Autodoor mechanism has been tested and proven to perform in temperatures below 0 degrees Fahrenheit.
The horizontally-opening mechanism of the Smart Autodoor is strong, designed to reliably perform in all weather conditions and to protect against predators. Instead of a string and pulley system, the components of the Smart Autodoor are nearly impossible for predators to pry open. But even with its strength, our automatic coop door has a delicate door sensor that ensures that no part of a hen is closed in the door. If the sensors detect an obstruction, the door will stop and reverse its path, and will try again after a few minutes.
Between holiday travels and the fluctuating daylight hours, keeping your flock safe and on schedule has never been easier. Like a true coop concierge, the Smart Autodoor eliminates the need for you to brave the cold outside of your cozy bed to let your flock out of their coop, or venture out in the freezing temperatures to close your hens in their house for the night.
Omlet and your flock
We’re here to make winter a more enjoyable experience for you and your flock. From our Smart Autodoor to our insulated chicken coops and chicken coop and run weather protection, we have everything you need to keep your chickens safe, warm, and covered throughout the entire season. Enjoy the warmer hours of the day with your flock, while our ingenious products take care of them during the cold. So snuggle up with your loved ones this winter, knowing Omlet is helping your flock do the same in their setup.

This entry was posted in Chickens on November 2nd, 2019 by chloewelch
What do you need from a bird cage?
The main thing is to give your budgies and finches a space in which they can happily do what a bird has to do – eat, sleep, fly, perch, and chill out.
So, your check list might read something like this:
- Full flying access to the entire cage
- Fantastic feeding station
- Lots of perches and usable ‘corners’ for taking time out
- Easy access to and from the cage
- Fantastic design that makes it a standout feature in the room.
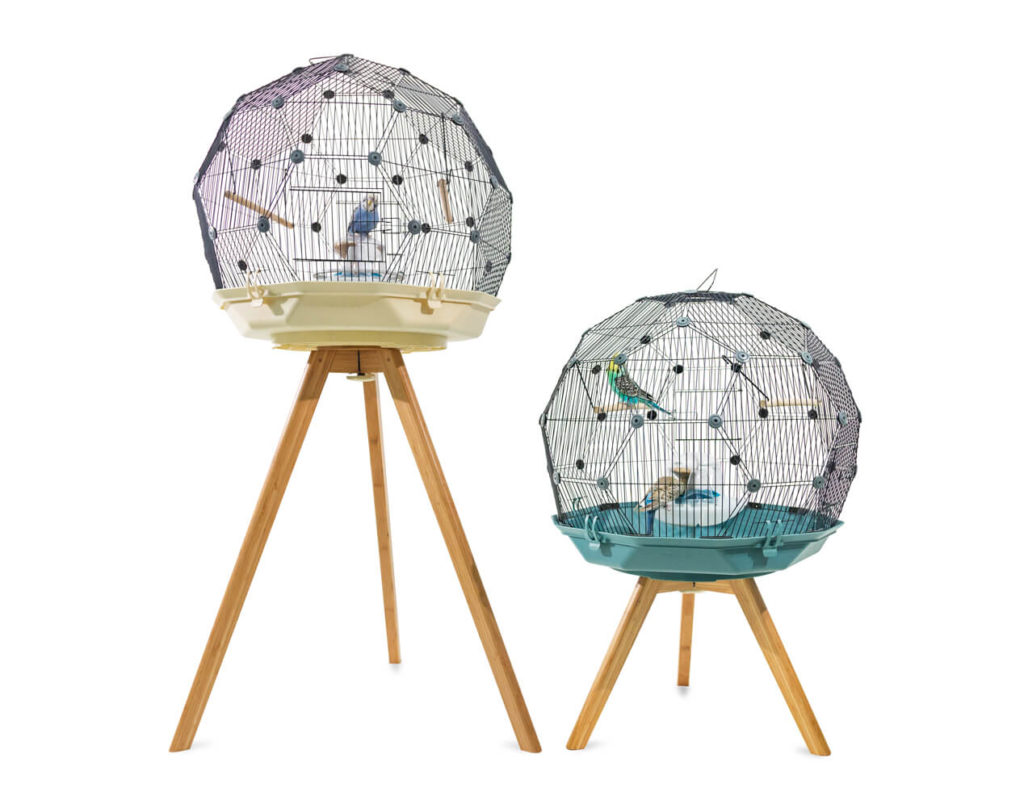
And that pretty much summarises the new Geo – the first great leap forward in cage design for 100 years.
The Geo Bird Cage for Budgies, Finches and Canaries
Until the arrival of the Geo, bird cages hadn’t changed much since the early 20th century.
But why did we need another innovation in cage design, you may ask? For the simple reason that when keeping a pet, its welfare and happiness are the top priorities.
So, with this in mind, could the old, rectangular-type standard bird cage be improved upon?
The answer is yes – and then some!
The unique geodesic-dome shape of the Geo, and its central feeding station, are the stand-out features. To explain how we got there, let’s take a brief sprint through previous approaches to cage design.
Bird Cages – from Small Cells to Big Sales
Bird cages have a long history, and their basic shape and function has evolved over the years.

In the beginning a cage was simply a cell in which the feathered inmate – usually a finch, bunting or starling – was expected to sing its little heart out. These small cages were made from wicker or other light, pliable wood. By the 1830s cages were being made from metal and wire. The basic design remained bell-shaped (the kind of thing seen in Tweety Pie cartoons).
This design lingered into the later 19th century when keeping birds as pets underwent a huge surge in popularity, with budgies becoming the pet bird of choice for many. The cages were often ornate, but the emphasis was on decoration, rather than keeping the birds happy. These cages were all height and no width, usually.
By the early 20th century, rectangular, wider bird cages were mass produced – the kinds of things still sold as the standard finch or budgie cage in most pet shops. Design was, at last, part of the overall concept – seed trays that slot into the cage sides, water bottles that attach via clips, better, wider doors, removable bases for easy cleaning.
With a wide range of cage sizes, it meant you could ensure that the dimensions were right for the number of birds you owned. So what was left improve – why do we need the Geo?
Why the Geo Cage is Better for Pet Birds
The geodesic dome shape of the Geo cage provides the ideal dimensions for birds to move around in. When flapping and flying in a rectangular cage, birds don’t have much front-to-back space – the flying area is limited to the length of the cage. Also, birds cannot negotiate 90 degree corners: these are dead space when it comes to flying.
So, if you were to map the total usable flying area, you might be surprised to find that in a standard rectangular cage of 90x60x40cm (220,000 cubic centimetres) a budgie or finch can only make use of one tenth of the area for flying.
In contrast, the Geo’s 62x60x60cm (223,200 cubic centimetres) is nearly ALL flying space. There are no front-to-back limited space issues, and no right-angled corners to prevent a bird stretching its wings.
Birds are happier if they can fly outside the cage
In any indoor cage, a bird is only able to fly in a limited space. Ideally, all pet birds should be allowed to free-fly in the room – and we have advice on making this a safe and happy pastime in our Omlet Budgie Guide.
The Geo makes free-flying a breeze – it has two wide doors allowing your birds easy access to and from the cage.
Cutting Corners
Do birds need corners to hide in if they’re startled or afraid of something?
Yes and no. It’s more about the position of the cage. If the birds are in the middle of a room completely surrounded by activity they will have nowhere to hide if they’re feeling nervous. That’s why a cage – including the Geo – should be close to a wall or a corner of the room if possible.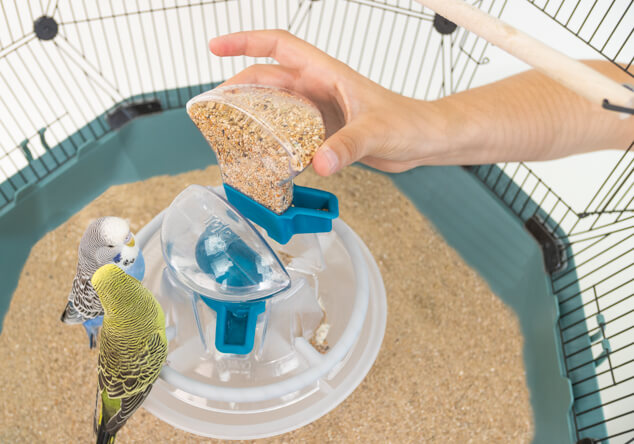
Also, the Geo does have corners – lots and lots of them, just not the right-angled corners of a standard cage. You’ll still find your birds using these multiple corners to rest and take stock.
Looking good, feeling good
The Geo’s marriage of great looks and ultimate bird-friendly design set it apart from anything else available.
One of the most eye-catching features is its central feeding station. It’s a joy to watch birds gather together and feed, and the Geo has an extra bonus in that most of the discarded husks and dropped seeds fall into the feeding station’s hopper for easy cleaning.
The rounded shape of the Geo – not circular, but a collection of many flat sides – makes it a striking feature in the room. But, most importantly, it’s a striking feature that doubles as the perfect environment for your pet budgies and inches.
This entry was posted in Budgies on November 1st, 2019 by linnearask