Izy Hossack is a London based chef and baker, food stylist and food photographer, as well as author of the books Top with Cinnamon and The Savvy Cook. Izy has created two deliciously festive recipes for the Omlet Advent Calendar, you can find her Chocolate Gingerbread Bundt Cake here.
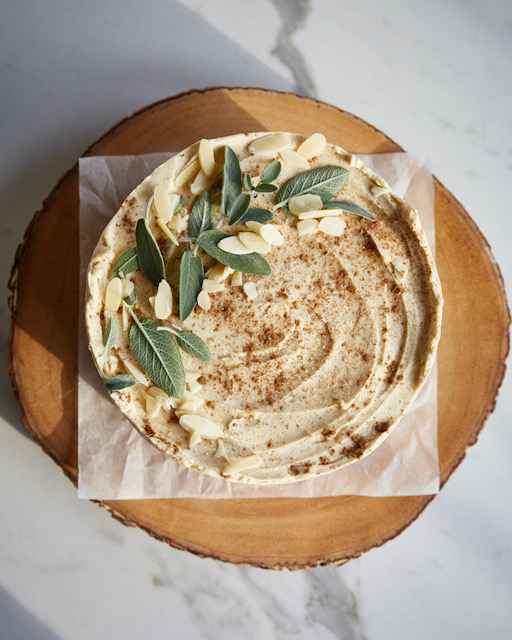
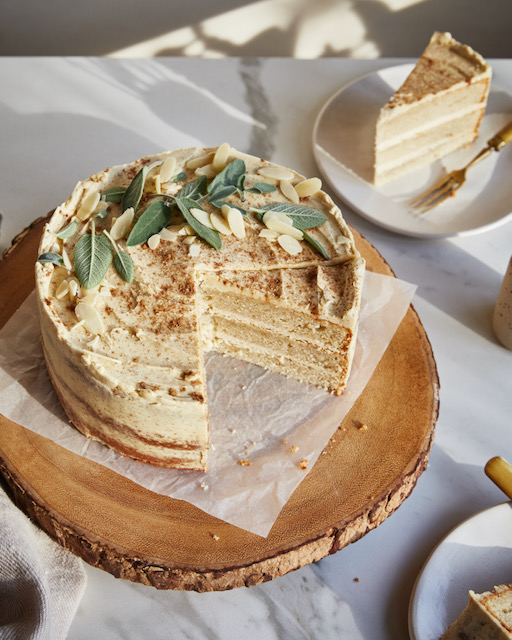
This layer cake is the perfect Christmassy bake to impress. Inspired by the flavours of eggnog, the cake and frosting are flavoured with vanilla, nutmeg, cinnamon and rum for a slightly boozy, warmly spiced dessert.
The frosting is an interesting one to try – if you usually find standard buttercream too sweet, you’ll love this version (and it doesn’t require icing sugar!). The base is a cooked custard, thickened with cornflour and egg until very viscous. This is then whisked into softened butter until fluffy and creamy. It can seem a bit dense if the butter or custard are too cold so you may need to add a splash of boiling water to help it fluff up properly. It’s definitely worth the extra effort over a standard buttercream as the texture is so smooth and light with the perfect level of sweetness.
For decoration, I like to keep the frosting simple with a thin layer around the outside and a slightly swoopy texture on top. For the toppings, I look for edible bits to give the cake a festive look; Woody herbs like rosemary, thyme or sage (as I’ve used here) are lovely as are chopped/flaked nuts. A sprinkle of cinnamon and nutmeg are a finishing touch and boost that eggnog flavour.
Ingredients:
Cake:
300g granulated sugar
140g unsalted butter, softened
60ml vegetable oil
4 medium eggs
150ml natural yoghurt
150ml milk
1 tsp vanilla paste or extract
330g self-raising flour
1 tsp ground cinnamon
¼ tsp freshly grated nutmeg
¼ tsp fine table salt
¼ tsp bicarbonate of soda
Frosting:
150ml milk
1 tsp vanilla paste or extract
80g granulated sugar
20g cornflour
1 egg
½ tsp ground cinnamon
¼ tsp freshly grated nutmeg
Pinch salt
200g unsalted butter, softened
2 tbsp dark rum
For the cake:
Preheat the oven to 180C fan. Grease, line and flour three 18-cm cake tins.
In a large bowl, cream the sugar and butter until pale and fluffy. Beat in the oil then eggs, one at a time.
In a jug, combine the yoghurt, milk and vanilla.
In a separate bowl, place the flour, cinnamon, nutmeg, salt and bicarbonate of soda and stir to combine.
Add 1/3 of the yoghurt mixture to the butter mixture and stir to combine. Add 1/3 of the flour mixture to the butter mixture and stir to combine. Repeat in this alternating fashion until you’ve mixed in all of the yoghurt and flour mixtures and have a smooth cake batter.
Divide the batter evenly between the cake tins and bake for 25-30 minutes, until a skewer inserted into the centre of the cakes comes out clean.
Run a butter knife around the inside edges of the cake tins and then leave them to cool for 10 minutes before turning out onto a wire rack to cool completely.
For the frosting:
Combine the milk and vanilla in a small pot and place over a medium-low heat on the stove until gently steaming.
In a medium bowl, mix the sugar, cornflour, egg, cinnamon, nutmeg and salt until smooth.
Pour a little of the hot milk into the egg mixture and quickly stir with a whisk until smooth. Stream in the remaining hot milk whilst stirring to combine. Pour the contents of the bowl back into the pot and return to the heat.
Cook over a medium-low heat, stirring with a whisk, until the mixture becomes lumpy and thick. Keep stirring until it looks smooth and glossy, about 1 minute, then remove from the heat.
Spread the mixture out in a shallow bowl and pop into the freezer for 5-10 minutes until cooled. Alternatively, chill the mixture in the fridge for around 1 hour.
Beat the softened butter in a large bowl with an electric whisk (or in a stand mixer) until smooth then gradually add the cooled egg mixture, stopping to scrape down the sides and bottom of the bowl occasionally.
Add the rum and keep whisking until the frosting looks aerated and light. If it seems too dense still, add 1-2 tbsp of boiling water to help soften the butter which should help the frosting to achieve the correct texture.
To assemble:
Cut off any domed tops from the cooled cake layers using a serrated knife and peel away the baking paper from the bottoms.
Place one cake layer onto a serving plate and spread a few heaped tablespoons of frosting over the top of the cake. Top with a second cake layer and repeat.
When you’ve placed on the final cake layer, place ½ of the remaining frosting onto the cake and spread it thinly over the top and sides of the cake. Using a warm palette knife can be useful here (warm it up by placing into a jug of boiling water and wipe clean as needed).
Place the cake into the fridge for 10 minutes to harden this initial layer of frosting.
Remove the cake from the fridge and add the remaining frosting to the cake, using it to decoratively frost the top and sides as you like.
Decorate the cake with any toppings you want – I’ve used grated nutmeg, ground cinnamon, sage leaves and flaked almonds here for a festive feel.
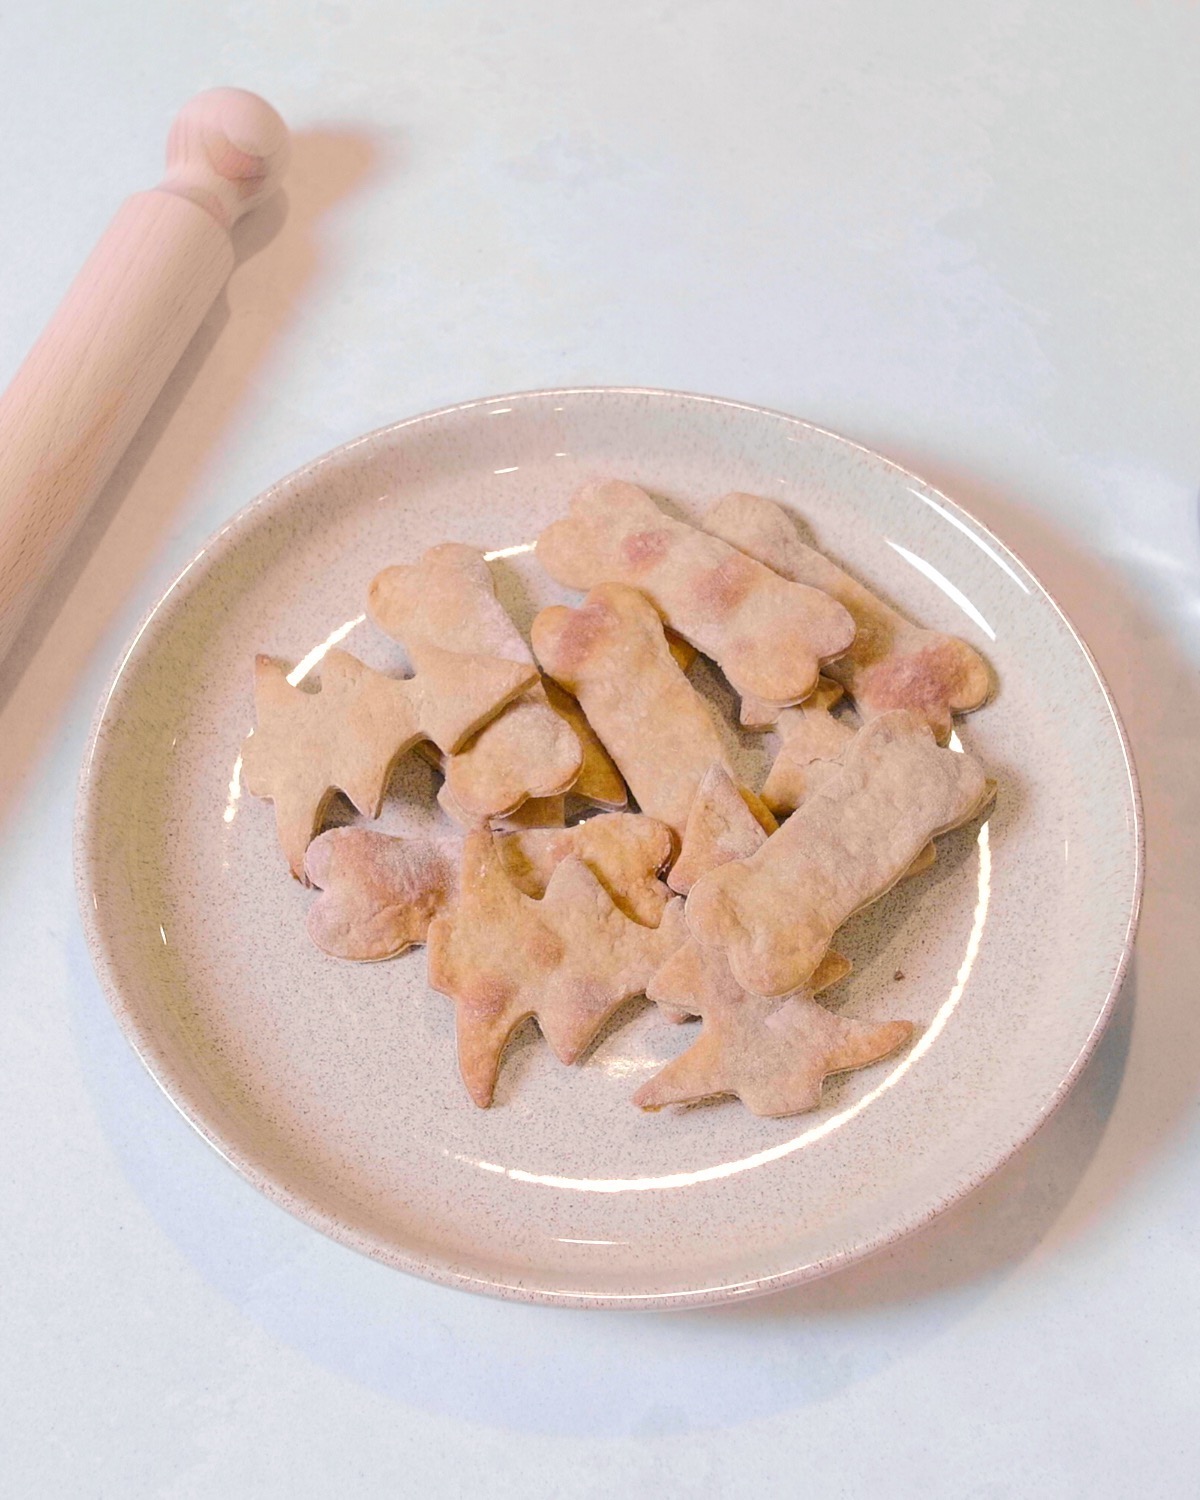
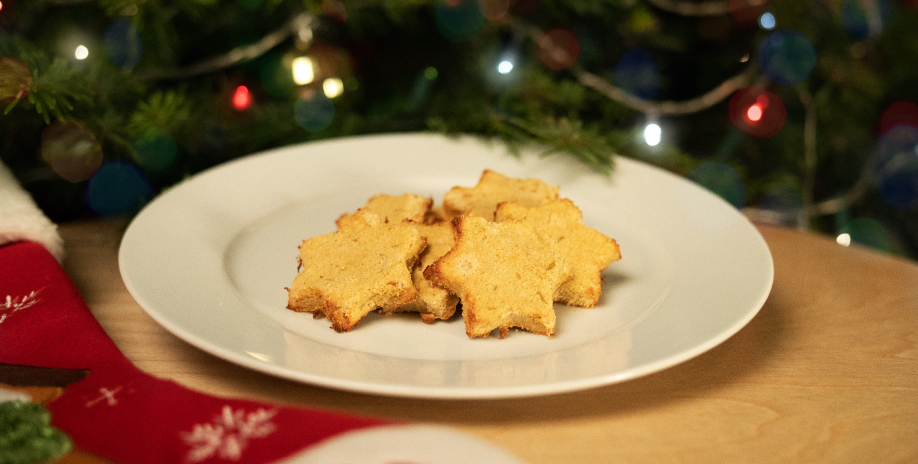
Everyone deserves a treat from Santa Paws this festive season, including our four legged friends! This super simple recipe makes around 15 dog biscuits (using a 10cm cookie cutter), and are the perfect Christmas treat for your dog!
Ingredients
150g plain or wholemeal flour
80g xylitol-free peanut butter*
1 banana
4 tablespoons hot water
½ teaspoon cinnamon
*Check the ingredients of your peanut butter – xylitol is toxic to dogs.
Method
Prep time: 10 minutes Cook Time: 15 minutes
Preheat your oven to 170°C. Mix together the xylitol-free peanut butter and hot water in a bowl.
Add the banana to the bowl and mash with a fork until most lumps have gone.
Add the flour and cinnamon to the bowl and use your hands to form a dough. The texture should be quite firm and sticky.
Lightly flour your work surface and roll out the dough to about 1cm thick.
Cut out into your favourite Christmassy shapes and place on a lined baking tray.
Bake at 170°C for around 15 minutes or until golden brown. Once cooked, leave to cool completely before your dog does the taste test!
Your homemade Christmas dog treats can be stored in an airtight container for up to 10 days. A friendly reminder that this recipe is intended as occasional treats for your dog, and should be fed in small amounts alongside a well-balanced diet. These treats are not suitable for dogs with nut allergies or other special dietary requirements.
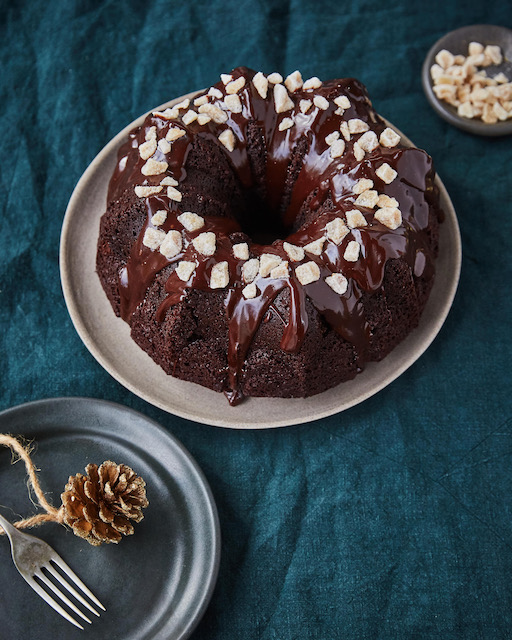
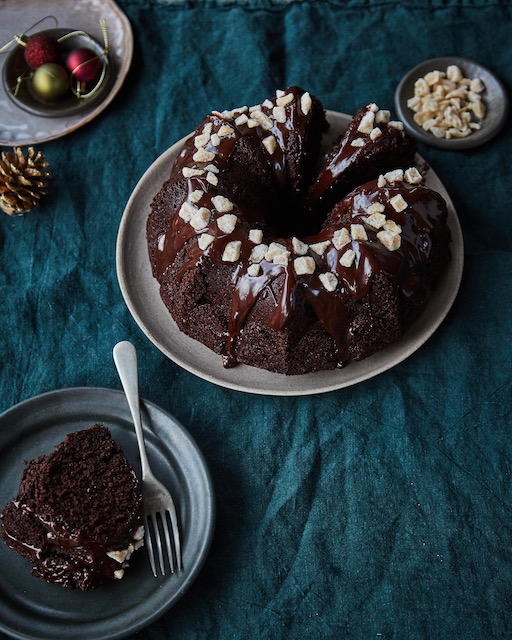
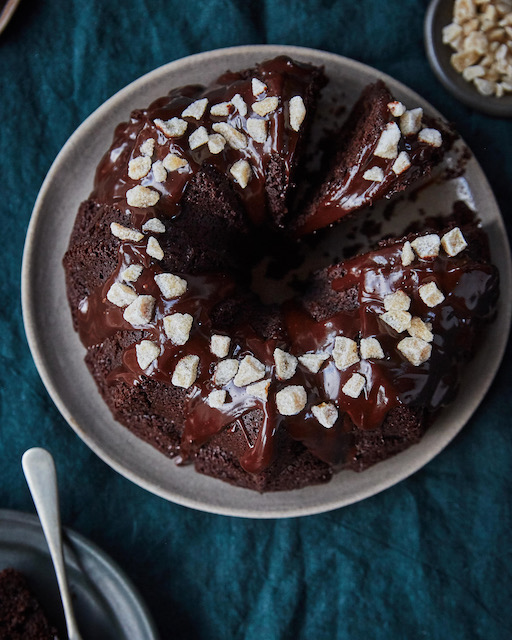
Izy Hossack is a London based chef and baker, food stylist and food photographer, as well as author of the books Top with Cinnamon and The Savvy Cook. Izy has created two deliciously festive recipes for the Omlet Advent Calendar, starting with this Chocolate Gingerbread Bundt Cake, perfect for the Christmas party!
Ginger and chocolate make the perfect combination in this festive bundt cake. The batter is very easy to make as it’s a melt-and-mix situation so no electric mixer is required! The golden syrup and treacle bring a soft, squidgy texture and boost the warming flavours of the spices. The ganache is best made with a bitter chocolate as this helps to tame the sweetness of the cake. For a pretty (and delicious) decoration, a simple sprinkle of crystallised ginger chunks are the perfect touch – you can find them in the baking aisle of most large supermarkets.
Ingredients:
175g unsalted butter, plus a couple of tablespoons for the tin
150g golden syrup
120g treacle
120g light brown sugar
3 medium eggs
200g natural yoghurt
250g plain white flour
60g cocoa powder, plus more for the tin
1 ½ tsp bicarbonate of soda
1 ½ tsp ground ginger
1 tsp ground cinnamon
¼ tsp fine table salt
Place a standard bundt tin into the freezer for 5-10 minutes. Melt a couple of tablespoons of butter in a medium pot (we’ll use this pot later for the batter too) over a low heat.
Generously brush the inside of the bundt tin with the melted butter, making sure you get into all of the crevices.
Dust the tin with cocoa powder, tapping it around the tin to coat all over then tip out any excess (if you collect it on a plate, you can use the excess cocoa powder in the cake batter).
For the cake:
Preheat the oven to 180C fan.
Take the same pot you were using earlier and add the 175g of butter, the golden syrup, treacle and light brown sugar. Place over a low heat on the stove and cook, stirring often, until the butter has fully melted. Remove from the heat and allow to cool for a few minutes.
To the cooled butter mixture, stir in the eggs one at a time, then stir in the yoghurt.
In a large bowl, mix the flour, cocoa powder, bicarbonate of soda, ginger, cinnamon and salt.
Pour the wet mixture into the dry mixture and stir with a whisk until smooth.
Pour the batter into the prepared tin and bake for 40-50 minutes, until a toothpick inserted into the centre of the cake comes out clean.
Allow the cake to cool for 10 minutes in the tin before tipping out onto a cooling rack.
For the ganache:
Place the chocolate into a small, heatproof bowl. Pour cream into a small pot and place over a medium-low heat. Once the cream is gently steaming, remove from the heat and pour over the chocolate in the bowl.
Allow to sit for 10 minutes then stir to get a smooth ganache.
Drizzle the ganache over the cake (which can still be warm when you do this) allowing it to drip down the sides. Decorate with crystallised ginger while the ganache is still warm.
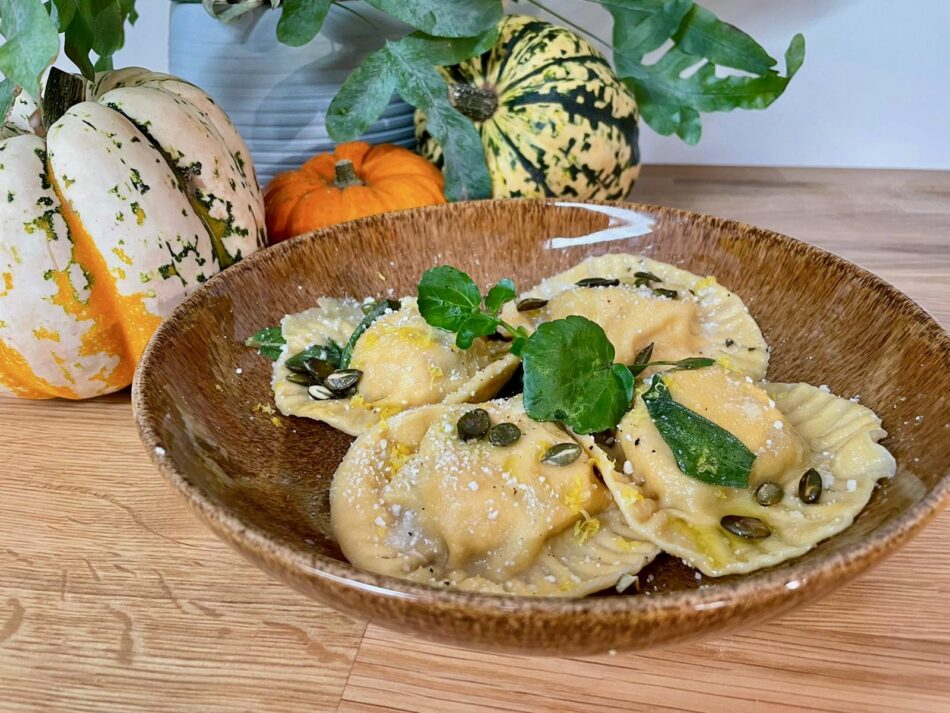
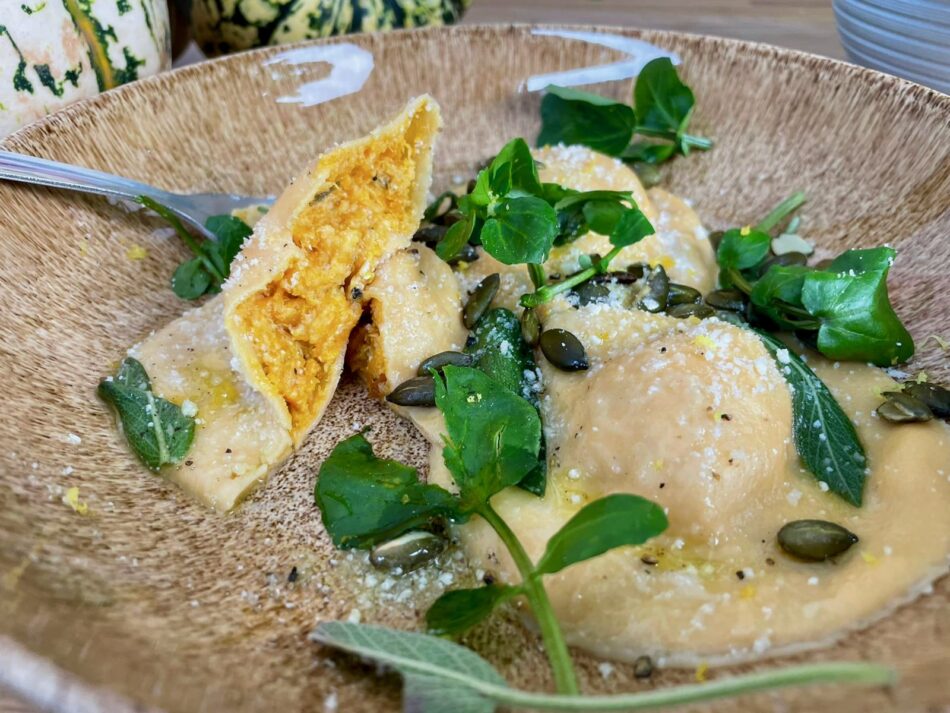
This warming, autumn inspired pasta recipe is perfect for when you want to curl up on the sofa with a big bowl, your favourite Netflix show on the telly and the fire crackling in the background. Contrary to popular belief, pumpkins aren’t just for carving! The sweet squash makes the perfect ravioli filling for a cold autumnal dinner.
For the pasta:
200g 00 Pasta/Tipo Flour 2 Eggs Salt
For the filling:
Half a pumpkin or squash or your choice Ricotta Fresh Sage Grana Padano or Parmesan Salt Pepper
Extra toppings
Pumpkin seeds Butter Olive Oil Watercress or other salad
Instructions
– For the filling, cut your pumpkin in half and scoop out all of the stringy flesh and seeds. You then need to chop the pumpkin up into equal sized pieces, slicing off the skin as you go. Spread the pumpkin chunks out on a baking tray and drizzle with olive oil, some salt and pepper and roughly 6 sage leaves. Give it a good mix around. Pop this in the oven on 200 degrees until the pumpkin is crispy and golden on the edges. It should be soft enough to mash, roughly 30mins in the oven, but keep an eye on it.
– Take it out of the oven and allow to cool for a little while. Remove any of the sage leaves you can see, then place in a large mixing bowl with a couple of big dollops of ricotta cheese and some grated Italian hard cheese. Mash them all together. Season to taste. Cover and place in the fridge until cooled. Now move onto the pasta part of the recipe.
– For the pasta please follow our previous pasta recipe up until the point where you’ve made a long lasagne style sheet (we’re not making linguine this time).
– Lay your 2 long pasta sheets out and add spoonfuls of the cooled mixture onto one sheet, spacing them out by about 5-10cm.
– Then brush or dab water on the pasta sheet around the pumpkin mixture so that it’s ready to stick together with the top pasta sheet. You’ll then need to carefully place the other pasta sheet on top and press down around the edges where you have wet the base sheet. Try to avoid getting any air bubbles in the ravioli.
– For this next part you can either use a ravioli cutter or the top of a small wine glass to cut around the ravioli. Dust each one with some flour and place on a plate ready to boil.
– Boil the ravioli in batches of 3-5, for roughly 3mins. In the meantime you can start melting some butter in a frying pan with some sage leaves to make a lovely sage butter. Add a drizzle of olive oil to stop the butter from burning then transfer your ravioli with a slotted spoon into the frying pan.
– If you want to be really fancy, we recommend toasting some pumpkin seeds and scattering them on top of your ravioli with some more grated grana padano and a drizzle of olive oil. Serve with a salad of your choice, enjoy!
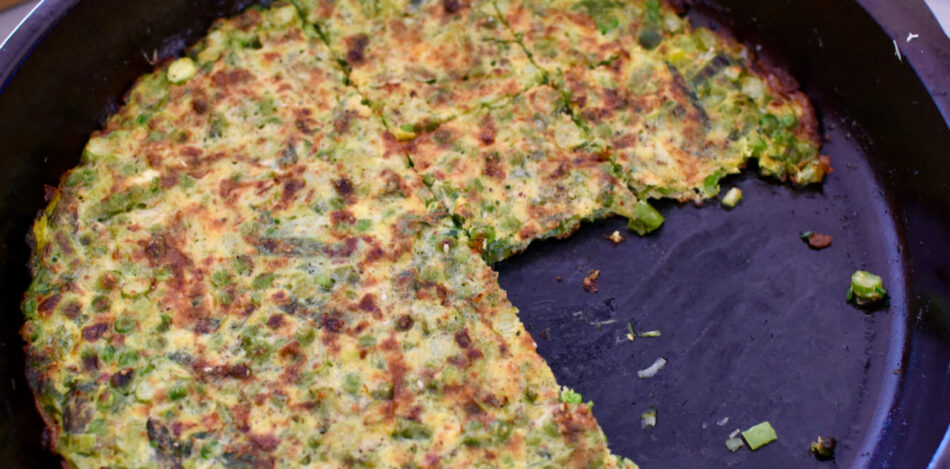
Elise Pulbrook is an Australian chef, baker, Australian Masterchef 2021 semi finalist and, as of recently, – chicken keeper! She’s sharing one of her favourite ways of using those lovely fresh eggs on the Omlet blog, a scrumptious asparagus, leek and pea frittata!
My favourite egg recipe of all time is my Zia Maria’s asparagus frittata. I’ve changed her recipe slightly, adding leek and peas. Sometimes Zia Maria adds chopped boiled potato. At the start of Spring, there has never been a shortage of asparagus in my family. Koo Wee Rup is Victoria’s asparagus country and my large Italian family has roots there. Zio Frank would bring at least one large polystyrene box of asparagus down to Melbourne every year for his sisters to divide amongst themselves.
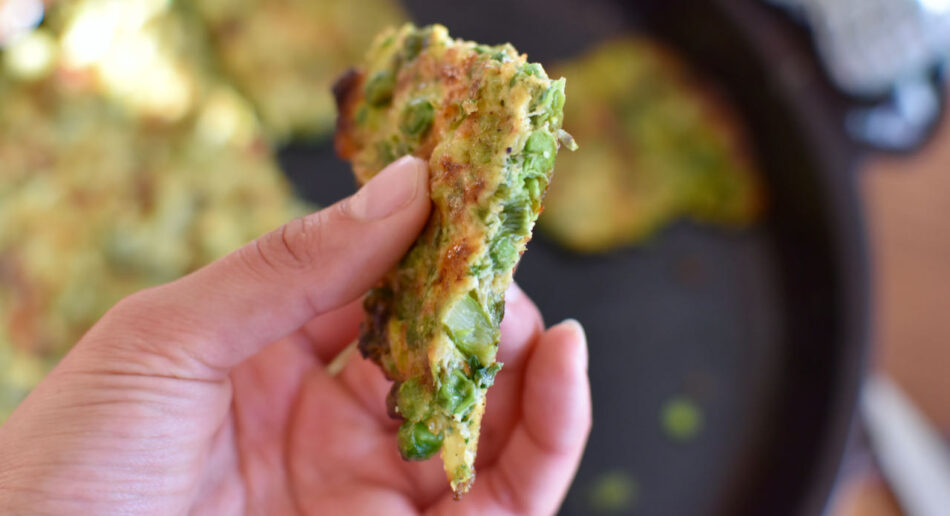
This is a recipe I make as soon as sweet stems of asparagus come into season. To make this with my own chicken’s eggs is deeply satisfying! This is a thin frittata that is flourless and it is often referred to as an omelet within my family.
Ingredients:
200g chopped leek
200g chopped asparagus, woody ends removed
200g baby peas
10g chopped garlic, approximately 2 cloves
230g whisked egg, approximately 4 large eggs
30g fresh chopped parsley
2 -3 pinches of salt, or to taste (every salt is slightly different in its saltiness, know your salt!)
1 tsp chilli flakes, or to taste (some chilli flakes are hotter than others!)
1-2 pinches dried oregano or zaatar
40g grated pecorino cheese, or enough to cover the surface of your omelet
Light olive oil for frying (at least 100ml, remember to be generous with your olive oil and cook like an Italian!)
Method:
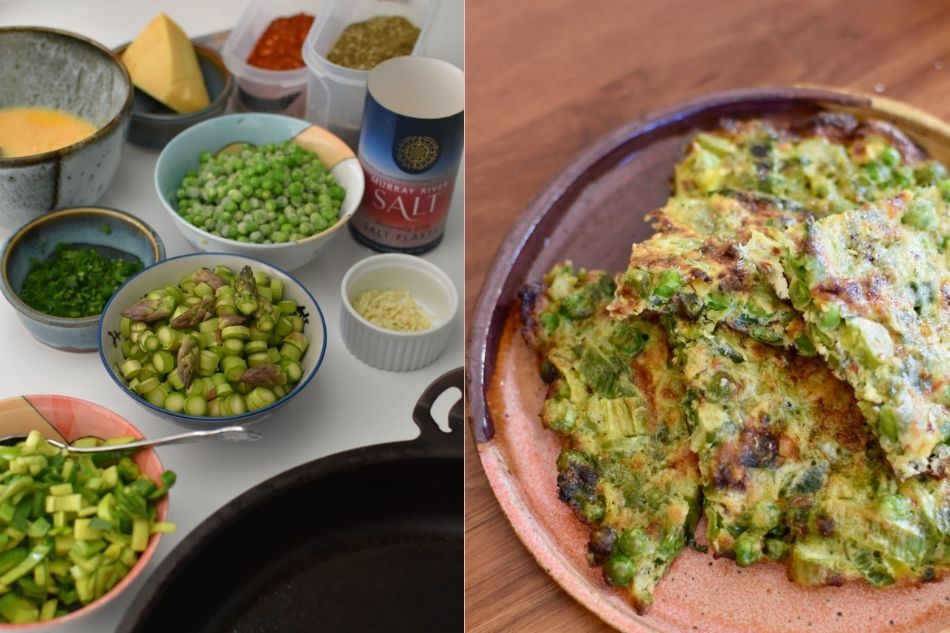
1 – Heat a large well-seasoned cast iron pan or non stick fry pan. If using a 30cm fry pan, the quantities in the ingredient list will allow you to make two omelets. I have used a 35cm cast iron skillet for the frittata pictured. A rule of thumb for the success of many recipes is to choose the appropriate pan for the task at hand.
2 – Add 2-3 tablespoons of olive oil to your pan and begin to sweat your leek over a medium heat. Add two pinches of salt to help extract moisture from your leek and accelerate its cooking time. When your leek has softened and tastes sweet, add your garlic. Allow the garlic to soften and perfume the oil. Next, add your asparagus. Allow the asparagus to fry by slightly increasing the heat of your pan and allowing it to sizzle. Stir occasionally, avoiding any browning. We are aiming for a tender ‘just cooked’ asparagus with a slight crunch and bright sweetness. Add the peas and allow them to blister into radiant green jewels. The peas will only need a moment or two. If using frozen peas, you’re essentially just defrosting them in the pan. Taste the vegetables and, if they are all beautifully tender, remove them from the heat and into a large bowl.
3 – Mix the vegetables with the whisked egg, parsley, chilli flakes, a pinch of oregano and a pinch of salt.
4 – Wipe out your pan, bring to a medium-high heat and then add a generous 5mm layer of olive oil. Don’t allow your oil to smoke but do allow it to be hot enough for your frittata to sizzle once poured into the pan. Once you do pour your frittata mixture into the pan, flatten it out quickly using a spatula, pushing the mixture completely and evenly cover the surface area of your pan. Sprinkle over the grated cheese and the remainder of your oregano.
5 – Turn on the grill function of your oven to preheat while you are waiting for the edges of your frittata to start to brown. Check the bottom of your frittata by using a spatula to peek underneath. Once it has begun to brown, transfer the pan to the oven and leave to grill until the cheese on top has melted and begun to brown. Remove from the grill.
6 – Serve cut into squares as part of an antipasti selection or wedged between buttered sliced bread for lunch. Enjoy!
They might be small, but the humble egg is a nutritional powerhouse. Plus, their versatility means they can be used to make thousands of delicious recipes we all know and love. But do you know fact from fiction when it comes to the amazing health benefits of eggs?
Busting the biggest myths
You’re probably not unfamiliar with hearing that eating eggs can cause high cholesterol and can lead to cardiovascular problems. But, the reality of this is actually very different.
While the yolk of a medium egg contains a high level of approximately 186mg cholesterol, the majority of cholesterol is made by the liver as opposed to through diet. Approximately 25% of the cholesterol in the food we eat is absorbed by the intestine and 75% of the cholesterol in the blood is produced by the liver.*
Rather, high cholesterol can be caused by genetics and lifestyle choices like smoking and lack of exercise. This isn’t to say diet is not a contributing factor towards high cholesterol, though. Rather, a diet high in saturated fats such as fried foods, processed meat, and full-fat dairy products should be more of a cause for concern.
Eggs are also not responsible for clogged arteries or cardiovascular problems. It’s actually how you cook your eggs, or what you eat with them that could play more of a role in heart health. Frequently frying your eggs in lashings of butter or serving them alongside fried bacon every morning is more the problem. But, as with anything, moderation is key and you should always consult your doctor for tailored medical advice.
Why eggs are so great
A great source of micro and macronutrients
Whether it’s the yolk or the white, eggs are full of nutrients and vitamins that are useful for your body to function properly. Eggs contain carotenoids, antioxidants that help to fight against age-related diseases, especially eyesight.
Plus, eggs are rich in protein (2 eggs are equivalent to 100g of meat), vitamins A, D, E, K, B2 and N12, as well as phosphorus, magnesium, potassium and minerals, all of which keep your body in perfect working order.
The vitamin B present in eggs helps your brain to function properly, i.e. memory and concentration. Eggs can be consumed during pregnancy, as the nutrients present in eggs, including vitamin B9, help the growth and proper development of the fetus.
Eggs also contain Zinc for hormone regulation and with the proteins and vitamins they provide, eggs are a real ally for your hair. There are many recipes on the internet for caring for your hair with eggs but our favourite is using one egg, a few drops of sweet almond oil (no more than 4) and a spoonful of honey – your hair will thank you! Leave on for 10 minutes and rinse thoroughly.
Low calorie
Did you know that an egg contains only 90 calories? Two eggs at 90 calories each and you can make a low-calorie but very tasty omelet. The appetite-suppressant effect of eggs also makes it a food to include in your meals if you want to feel fuller for longer.
Sweet treat or protein-packed lunch?
Aside from the various health benefits, eggs can be used in many different ways, allowing us to vary our meals. Whether you like eggs fried, boiled, scrambled, in quiche, in cake or in pancakes, there’s something for everyone.
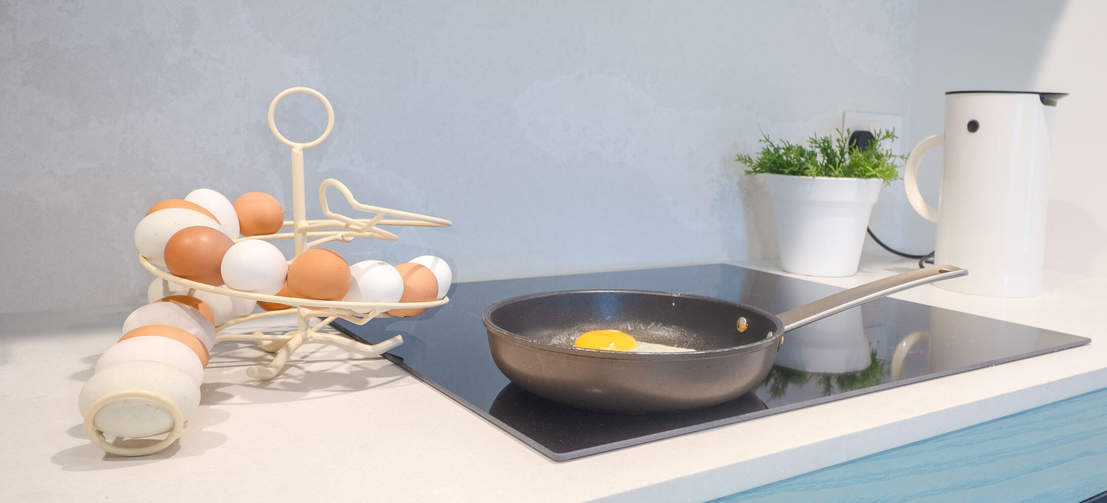
Nothing beats the taste of freshly laid eggs from your hens. Plus, when your girls are as happy as can be in an Eglu Cube Chicken Coop, they taste even better! The love you put in towards caring for your flock really is returned with their labours of love in the form of tasty eggs. Having them on hand, without worrying about going shopping, is a real pleasure too.
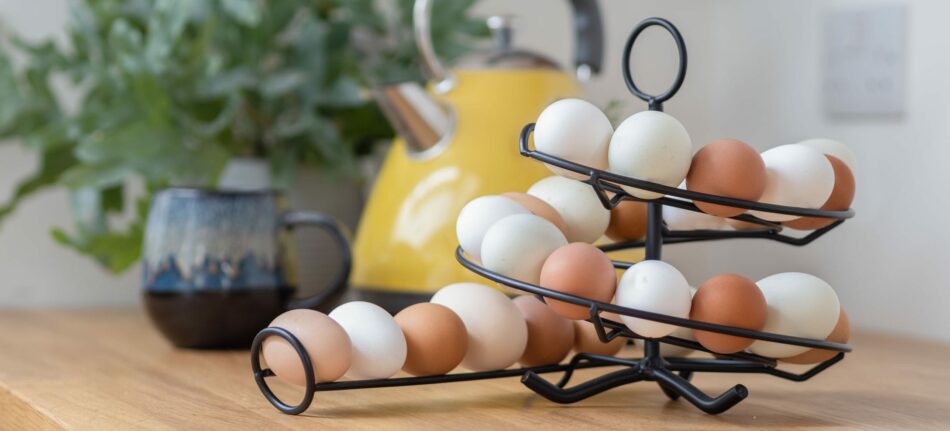
You can even show off your hens’ hard work in the Omlet Egg Skelter. Not only will the beautiful design stand out in your kitchen, but it keeps your eggs neatly arranged in order of laying to ensure that you always use the oldest eggs first, meaning no waste.
But, if you’re yet to experience the joys of chicken-keeping and are purchasing your eggs from the supermarket, here’s what to look out for. Please note that the nutrient content may vary slightly depending on the origin of the eggs you consume. The omega 3 content may be lower if you buy your eggs from a cage farm instead of organic.
A grade eggs – Highest grade of eggs. Intact shells and are internally perfect. Eggs must be graded A for retail and catering.
B grade eggs – Unbroken shell, abnormal shape and staining.
Omlet and your eggs
Eggs have an array of benefits, and when chicken keeping is made so easy with Omlet, why miss out on the delight of having them fresh from your garden? From our Eglu Cube Chicken Coop for super speedy cleaning, Autodoor to put your flock to bed and the Walk In Chicken Run to give your chooks space to roam, shop Omlet’s remarkable range of chicken products, designed in-house by expert chicken keeping, animal loving engineers.
Ingredients for the cake batter (for a Ø25 cm cake tin):
900 ml milk*
250 g sugar
250 g butter/margarine
4 tbsp lemon juice
5 eggs*
250 g flour
1 packet baking powder
a pinch of salt
1 package of clear cake glaze*
1 can apricots halves (850 g drained net weight)
1 can apricots halves (425 g drained net weight)
Ingredients for pudding cream:
100 ml milk*
2 packets vanilla pudding powder
80 g sugar
1 packet vanilla sugar
2 cups sour cream*
*For a plant-based or vegan option:
As a milk substitute you can use any non-dairy milk (e.g. almond or oat milk). As 1 egg substitute use ½ mashed banana (5 eggs = 2 ⅕ bananas) or 70 g apple puree (5 eggs = 350 g). You can buy vegan sour cream or soy yogurt. Instead of the clear cake glaze you can use agar-agar powder.
Instructions
Grease a cake tin (Ø25 cm). Preheat oven to 170°C/338°F (convection oven).
Boil 900 ml milk in a saucepan. Mix in a bowl the remaining milk, 80 g sugar and vanilla pudding powder until smooth, stir into the boiling milk and cook well for 1 minute while stirring. Pour into a bowl and let cool, stirring several times.
Mix butter/margarine, 200 g sugar, 1 pinch of salt with the mixer until you reach a creamy texture. Mix in eggs one at a time. Mix flour and baking powder and stir in 2 tsp of lemon juice. Put the batter in a greased cake tin and bake on the middle shelf for 20 minutes.
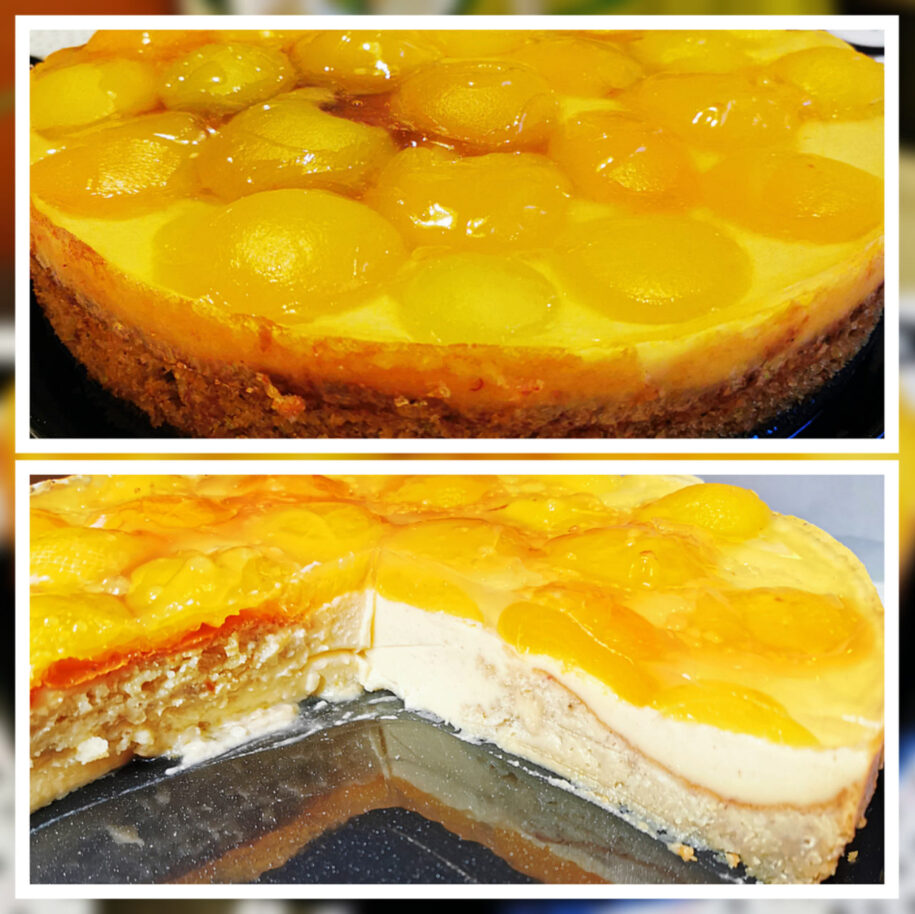
In the meantime, drain the apricots well and collect the juice. Stir the pudding again, and now stir in the sour cream with a whisk. After the 20 minutes baking time, spread the pudding cream evenly on the batter. Cover the cake with apricots and bake for another 20-30 minutes. Let cool down.
Mix the clear cake glaze, remaining sugar, ¼ liter of apricot juice and remaining 2 tsp of lemon juice in a saucepan and bring to the boil while stirring. Now spread the glaze with a tablespoon over the apricot halves so that it looks like egg white. Allow to become firm.
? You can use peaches instead of apricots as well.
? If you want to bake the ultimate “Omlet”-cake with a Ø12 cm cake tin, use ⅓ of the ingredients and only one apricot halve on top of it.
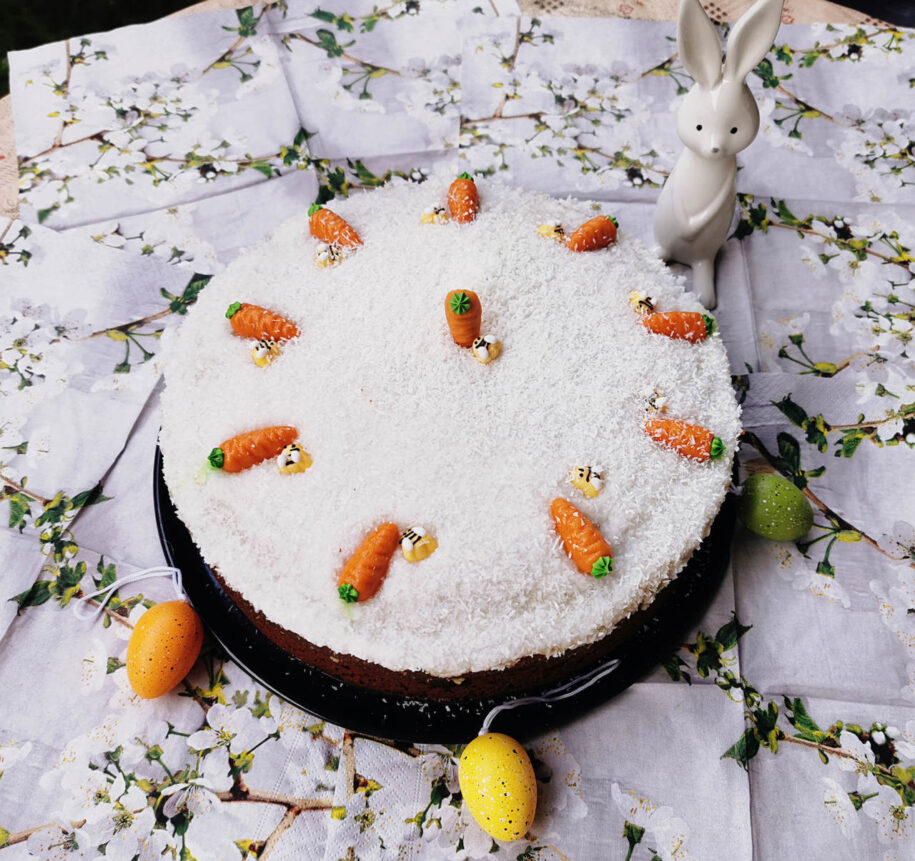
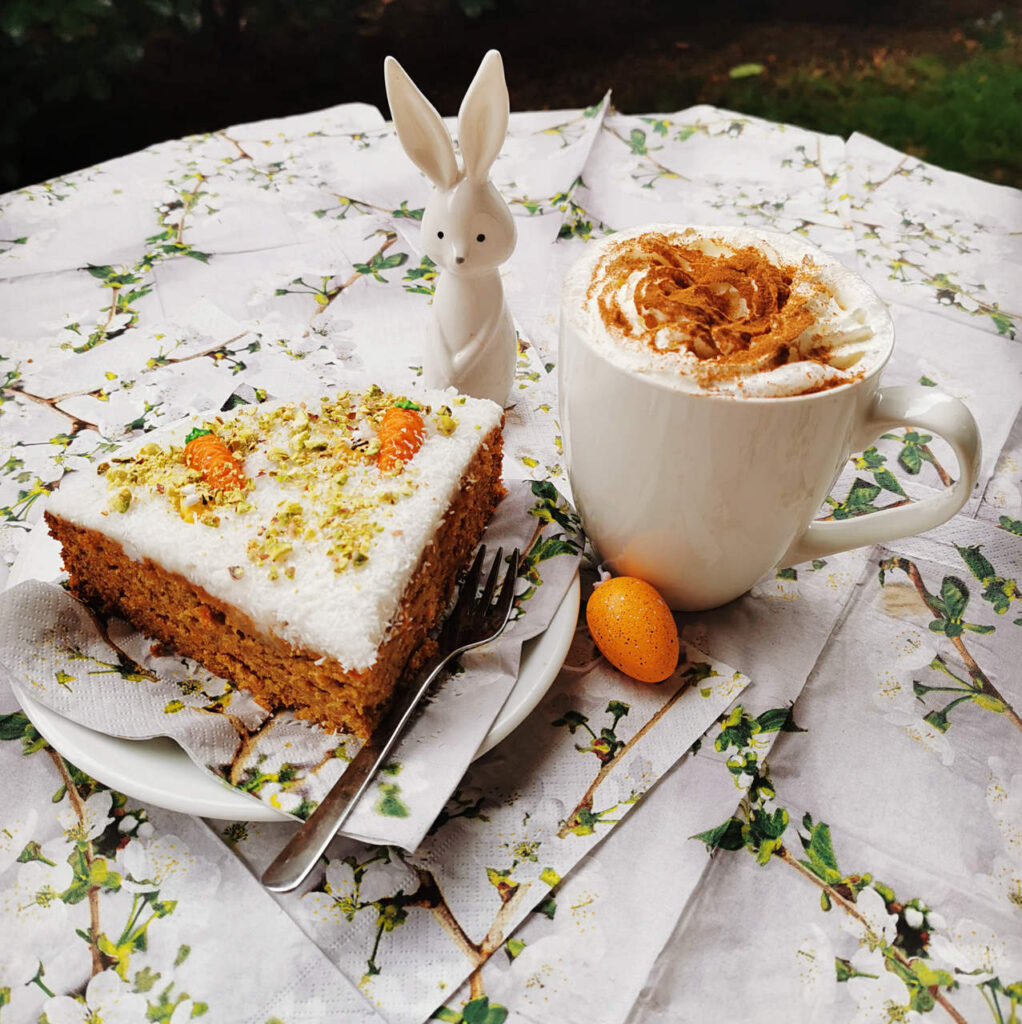
If you prefer a more traditional Easter cake, here is a super delicious yet easy recipe:
Carrot-Marzipan-Cake
Ingredients for the cake batter:
350 g wheat or spelt flour
4 eggs*
400 g carrots
100 g ground hazelnuts
100 g ground almonds
200 g sugar
1 packet vanilla sugar
¼ tsp vanilla extract
1 vanilla pod
1 tsp cinnamon
1 packet baking powder
1 tsp baking soda
200g marzipan
200 ml rapeseed or sunflower oil
200 ml milk*
juice of 1/2 lemon
extra portion love
Optional adult version: 150 ml advocaat
Frosting:
70 g icing sugar
200 g coconut yogurt
30 g coconut paste
shot of lemon juice
optional: food colouring, e.g. green colour
Decoration: e.g. Marzipan carrots, chopped pistachios, dried flower
*For a plant-based or vegan option:
Use 2 tsp baking soda and 2 tsp cider vinegar or alternatively banana/apple puree as egg substitute (½ mashed banana per egg; 70 g apple puree per egg).
As a milk substitute you can use e.g. almond milk or oat milk, or any other non-dairy milk you prefer.
Instructions
1. Grease a cake tin (about Ø25 cm) or use baking paper. Preheat oven to 175°C/347°F (convection oven).
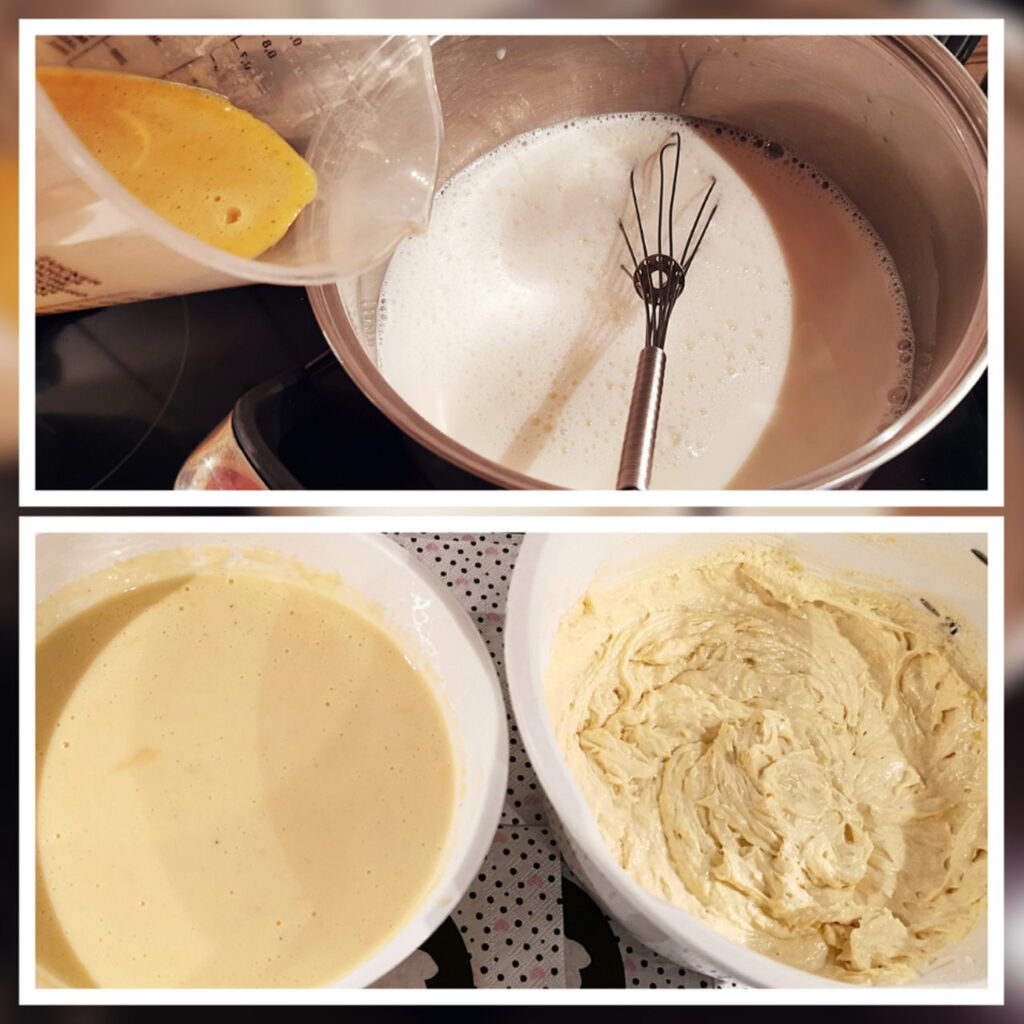
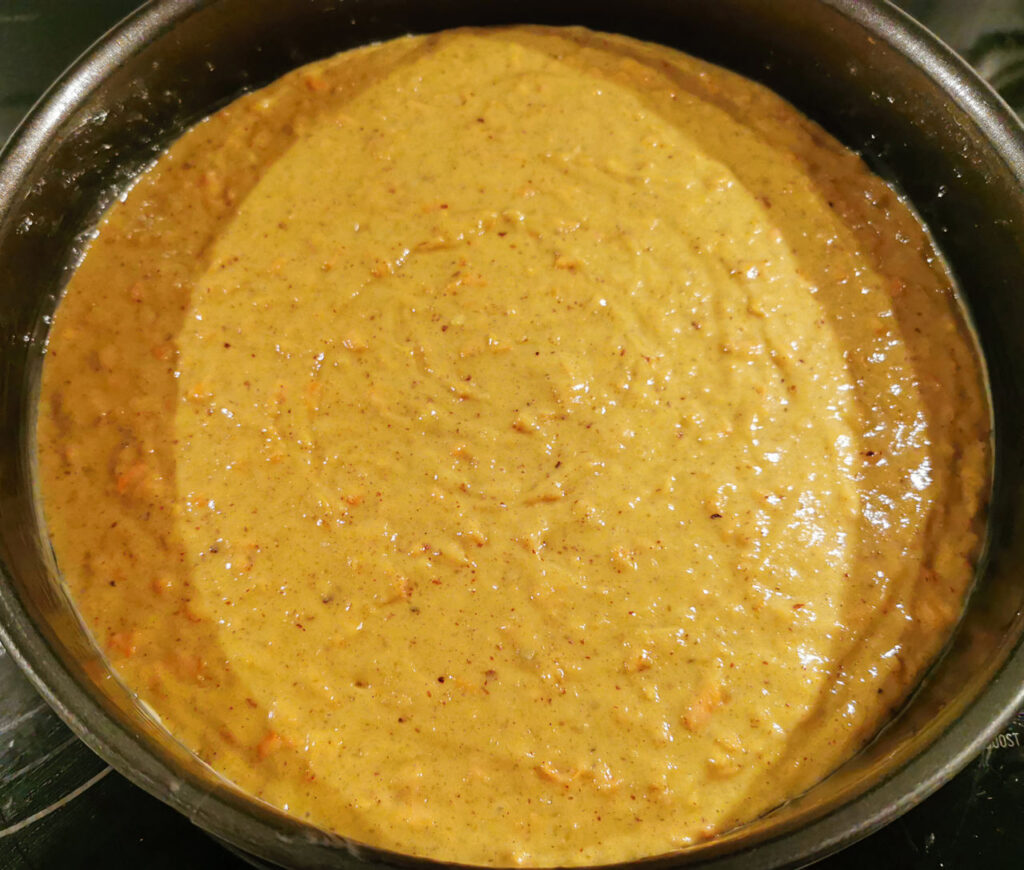
2. Mix dry ingredients (flour, hazelnuts/almonds, sugar, baking powder, baking soda, cinnamon) and the eggs in a bowl with a mixer. In a separate bowl, peel and grate carrots and mix them with the wet ingredients (vanilla extract, oil, milk, lemon juice).
3. Now slowly heat the marzipan in a saucepan, stirring repeatedly until it becomes a liquid mass. Mix the dry and wet ingredients together and gradually add the marzipan (and optional advocaat) to the batter, mix well.
4. Pour the batter into the cake tin, smoothen it and bake it for about 50 minutes (skewer test).
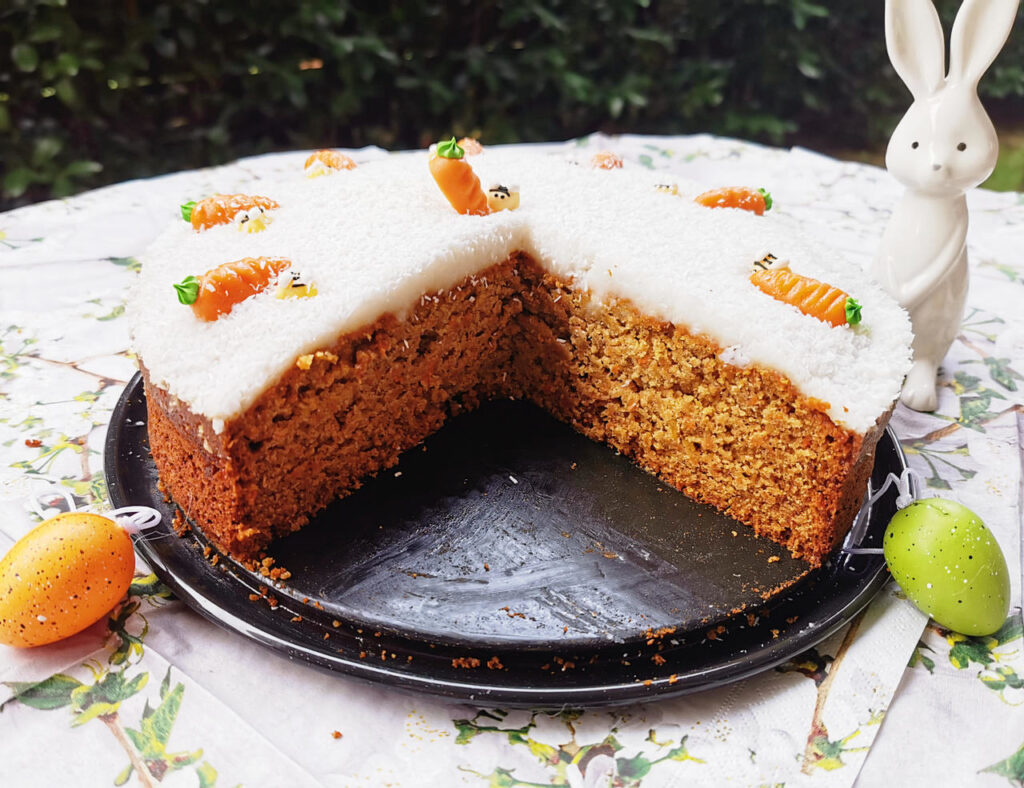
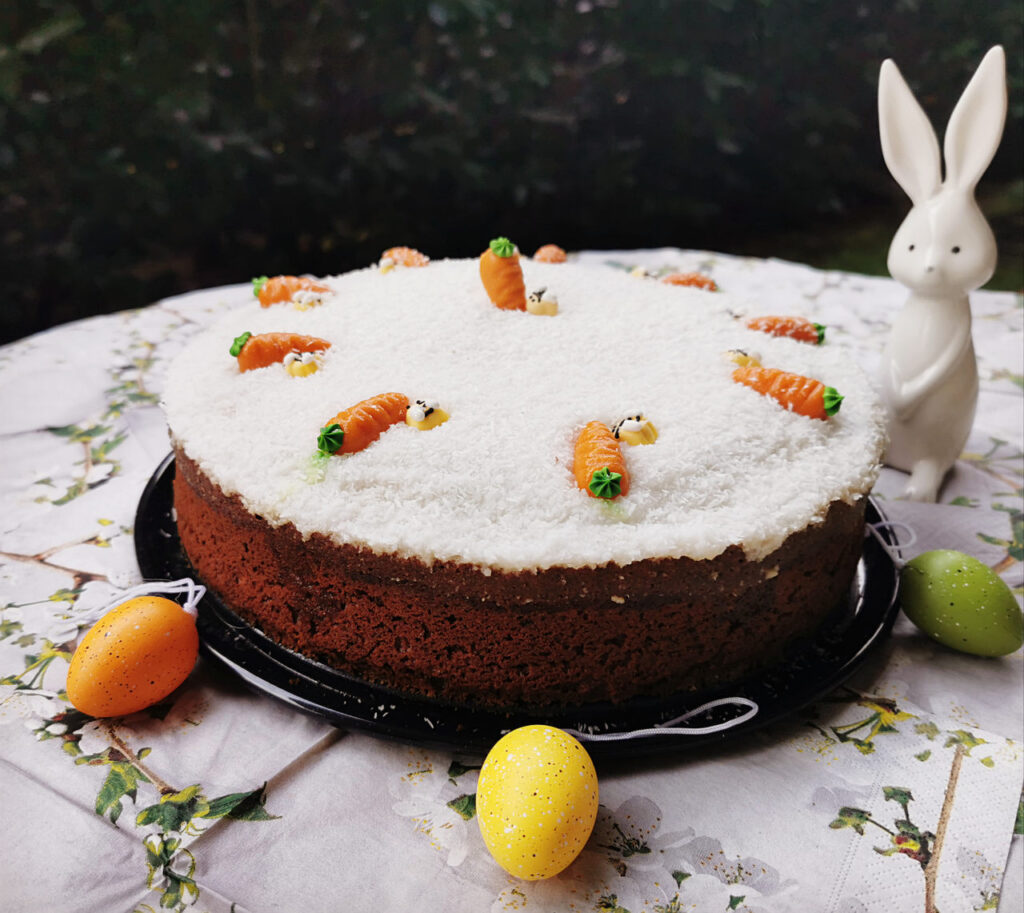
5. Let the cake cool down and prepare the frosting in the meantime. Mix the sifted icing sugar with yoghurt and coconut puree and season with more icing sugar and a shot of lemon juice. You can add food colouring to the frosting if you wish. Now spread the frosting on the cooled cake and decorate as desired, e.g. with marzipan carrots, chopped pistachios or dried flowers.
Enjoy!
Bon appétit
&
Happy Easter from the Omlet Team!
Tag us on social media (Instagram: omlet_uk) with an image of your cake!
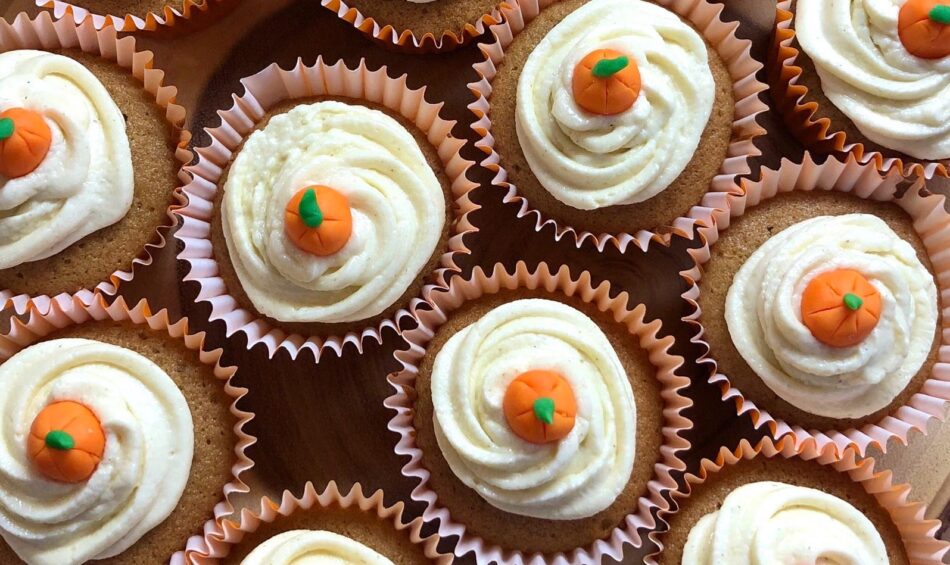
Not a fan of Pumpkin Spice? Fancy trying something simple, yet seasonal you can make with your girls’ eggs? Try out these delicious ginger cupcakes, with a nod to autumn on top!
To make 12 delicious ginger cupcakes, you will need…
12 cupcake cases (we’ve gone for orange to stay on theme!)
150g margarine or unsalted butter (softened)
150g light muscovado sugar
150g self raising flour
1 – 2 tsp ground ginger (to suit your taste)
2 large eggs
1 tbsp golden syrup
For the buttercream, you will need…
250g margarine of unsalted butter (softened)
500g icing sugar
½ – 1 tsp ground ginger (to your taste)
For the pumpkin decoration, you will need…
Ready to roll fondant icing sugarpaste – orange
Ready to roll fondant icing sugarpaste – green
Preheat the oven to gas mark 4 (fan 160), and line a muffin tin with 12 cupcake cases.
To make your ginger cake mix, start by creaming together the butter and sugar in a mixing bowl. Sieve the self raising flour into the mixture with the ginger. We used 2 tsp of ground ginger but you can use less if you prefer a more subtle taste.
Lightly whisk the eggs in a bowl and add them to the mixture. Mix everything together carefully.
Once mixed add the golden syrup and give a final stir.
Fill the 12 cupcake cases with the ginger cake mixture as evenly as possible.
Place in the oven for 15 – 20 minutes.
Leave to cool on a cooling rack before making the buttercream icing.
For the buttercream icing, add a small amount of icing sugar to the butter at a time and cream together. Once smooth, add up to a tsp of ground ginger to the icing.
Put the icing in a piping bag. We used a large, star shape nozzle for the piping. Start in the middle and circle round leaving some space at the edge of the cake. Then spiral up on top and pull away to leave a peak.
Once you have iced all 12 cupcakes, you can decorate however you wish! We decided to make little pumpkins out of ready to roll icing. Simply roll the orange icing into small balls, no more than a cm in diameter. Then use a sharp knife to carefully draw lines down the pumpkin.
Roll a small amount of green icing a long strip then cut into tiny pieces to create the stalks. Press the stalk down lightly onto the pumpkin, and place on top of your cakes.
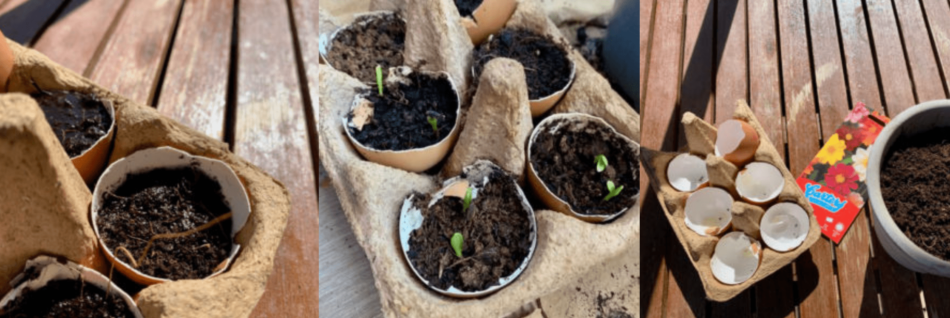
Next time you’re about to throw away your empty egg shells, spare the food waste bin and keep hold of them. Many people use crushed up egg shells in gardening to add calcium to the soil, however we have another great way you can use egg shells to add to your garden. Many propagators or seed starter tubs are made out of plastic, which isn’t great for the environment. Why not use your empty egg shells to start your next batch of seeds?! It’s so quick and easy to do!
1. Firstly rinse out the shells, and then let them dry.
2. Once dry, fill the egg shells halfway with compost and sit them in the egg carton.
3. Sprinkle a little water on the compost and then add your chosen seeds to the compost.
4. Spread a thin layer of compost on top and drizzle a little bit more water.
5. Then place in a sunny spot indoors – a window ledge is a great place to start seeds.
6. Keep watering your eggshell seeds each night, and after a few days you should start to see them sprout!
Once they’re too big for the shell then transfer to a bigger spot to continue growing indoors or outdoors depending on the chosen seeds (see packet for details).
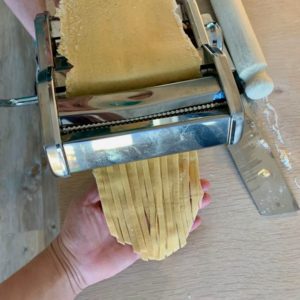
Homemade pasta is one of the easiest recipes to remember as it’s a 1:100 ratio. For every person you’re cooking for you’ll need 1 egg and 100g of pasta flour per serving, plus just a little bit of salt for seasoning – simple! This is how we at Omlet make it:
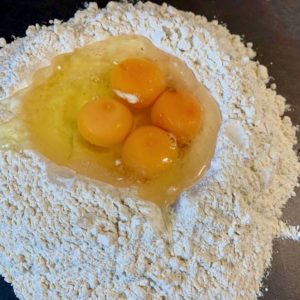
? Start by weighing out your flour and then tip it onto a clean surface so it forms a mound, sprinkle with a bit of salt, then make a large well in the middle of the mound and crack your eggs into it.
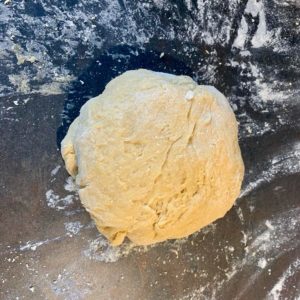
? With a fork start lightly whisking the eggs in the middle, slowly bringing the flour at the edges into the mix, keep going until you’ve got the majority of the flour mixed in. You may need to use your hands to work it in towards the end. Once the mixture is all together in a ball, start kneading the dough. It will feel quite rough and grainy to start with but as you work the dough more it should start to smooth out.
? Knead until the dough is elastic and stretchy. Be careful not to over knead it as your pasta will become tough and chewy. Once you’re done kneading, cover or wrap your dough in a bowl or a beeswax wrap and then place in the fridge for half an hour.
? Once chilled, bring your dough out. Depending on how much you’ve made you may need to split it into more manageable chunks.
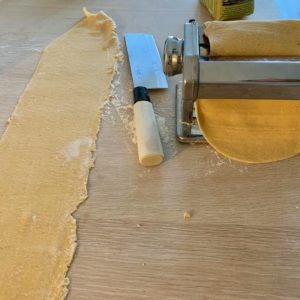
? Start rolling out a ball of your dough with a rolling pin and then with your pasta maker. Roll the dough through the machine on the widest setting, once through fold the dough in half and repeat. Then feed the dough through on a medium thickness and fold in half and feed it through again. Then move onto the thinnest setting and feed your dough through this setting twice, no need to fold it over this time. Your dough should be in a long lasagne style sheet, and thin enough that you can almost see your hand through it.
? Then turn your attention to the linguine and tagliatelle accessory on the pasta machine. You can use either of these for this type of pasta, it will just depend what sauce you’re making and your personal preference. We used the tagliatelle cutter for this batch and it came out great!
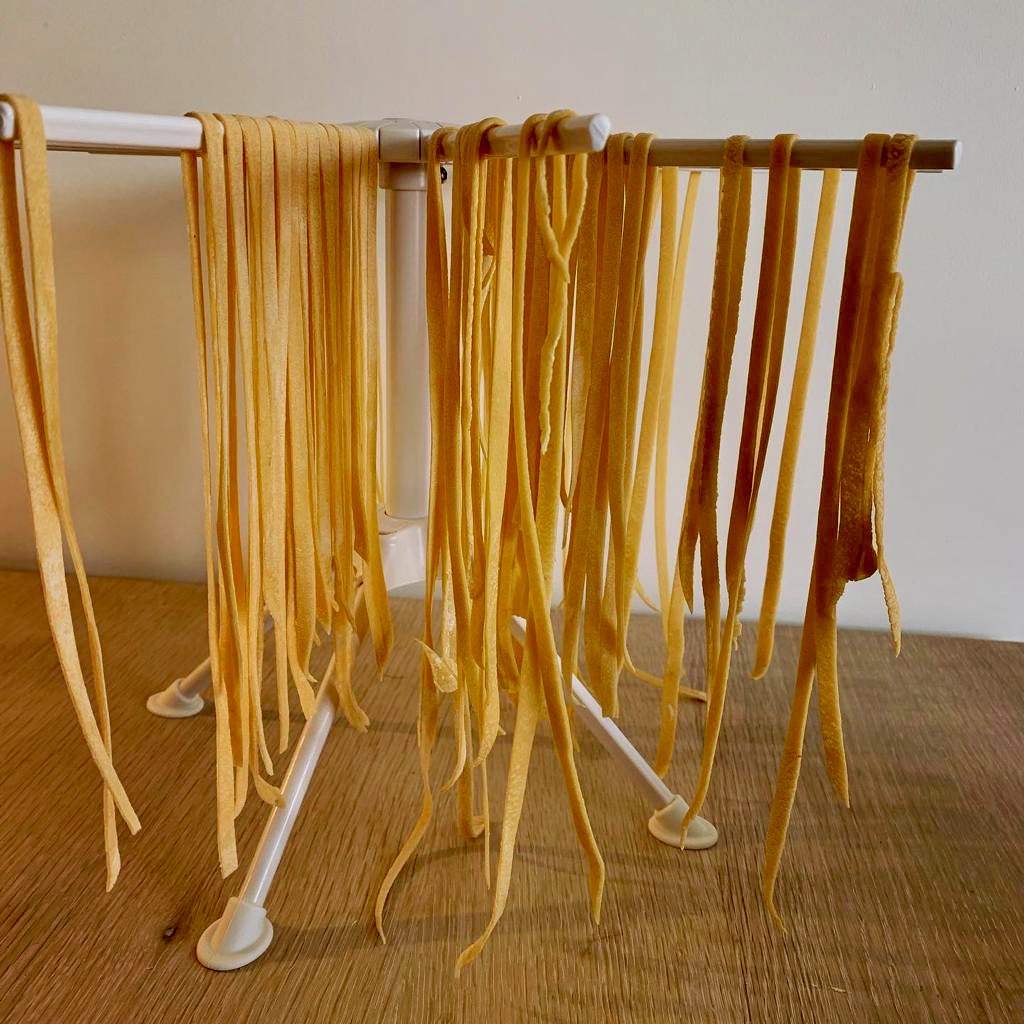
? Once you have fed your pasta through the chosen cutter, then hang it on a drying rack, or you could use a clothes airer for about half an hour. You don’t want the pasta to dry out too much. When it’s ready either boil it in salted water for about 3 mins if you’re ready to eat, or place in a Tupperware in the fridge or freezer ready for when you want to use it.
Mash 3 of the bananas and set to one side ready to fold into your mixture later.
Sieve the flour and baking powder into a large mixing bowl.
In a separate bowl, cream your softened butter with the sugar and then add the eggs 1 by 1 to the mixture.
Once all of the wet ingredients are combined and smooth, slowly fold in the flour mixture – try not to over mix it.
Take your mashed banana and carefully blend this into the large mixing bowl along with your vanilla extract.
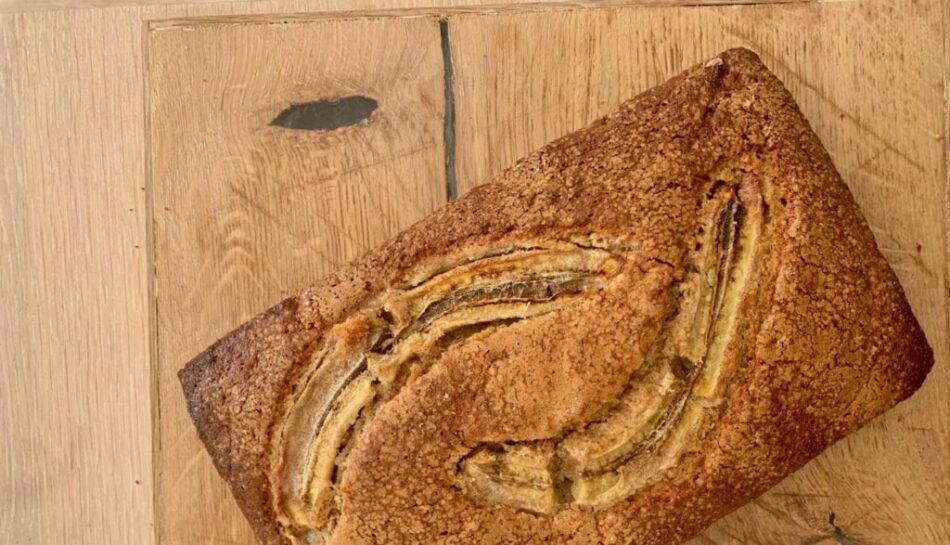
Tip the mix into a lined loaf tin or ovenproof dish of your choice and decorate with the remaining banana peeled and sliced lengthways, sink into the mix.
Bake at 165 degrees c for approximately 1hr.
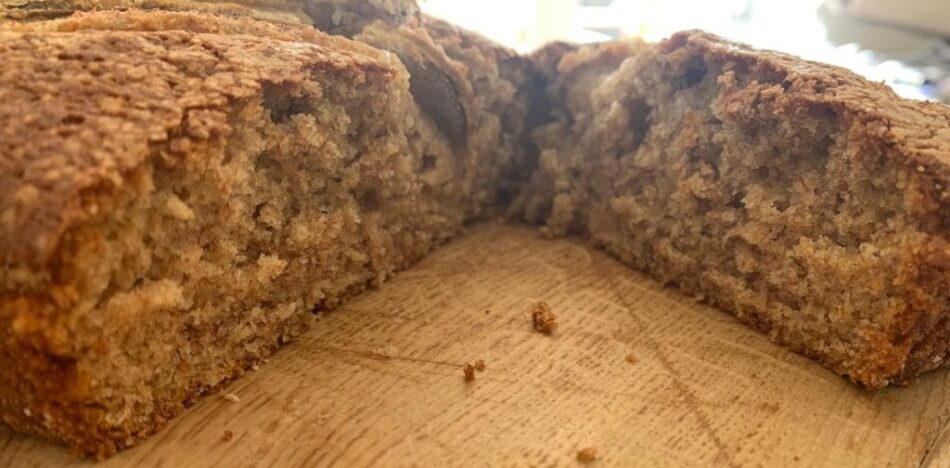
Take out of the oven once golden and cooked through, allow to cool and then enjoy with a cup of tea in front of your favourite boxset.
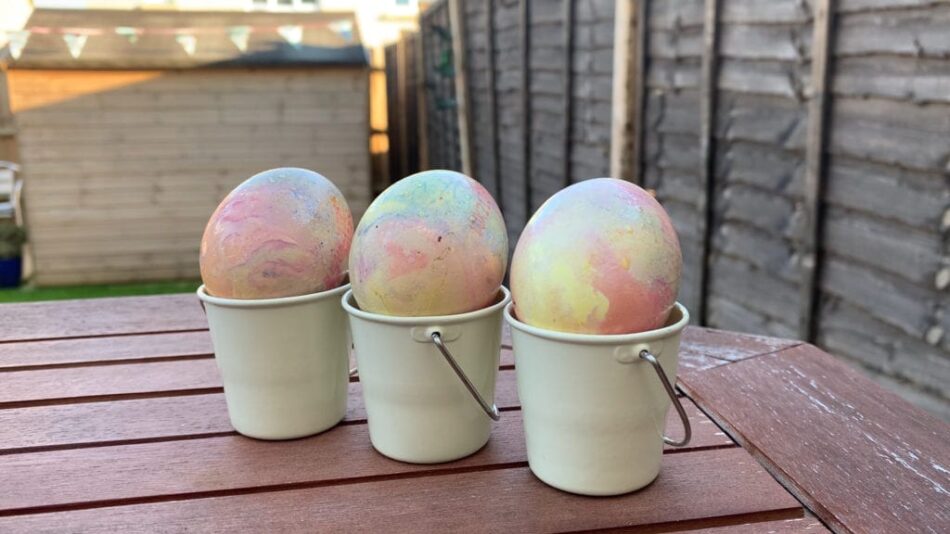
Make Easter more colourful with this super fun craft for the whole family – marbled eggs! Watch the video or follow the instructions below.
You will need:
Eggs
Food Colouring
Vinegar
Vegetable Oil
Instructions:
Take an egg and gently poke a hole at one end. Poke a hole at the other end of the egg which is slightly larger than the first.
Empty the egg by carefully blowing through the smaller of the holes, pushing the inside of the egg out into a bowl.
Set aside the egg mixture.
Add a tablespoon of food colouring to a bowl and mix with a splash of hot water and a tablespoon of vinegar.
Put the empty eggs in the bowls and let them sit there for a while, regularly turning them to get an even coating.
When the eggs has got some colour to them, drain and put on the side to dry.
Add a few drops of a different food colouring to a plate and mix with some water and a drop of vegetable oil. Roll the eggs on the plate to cover them in the second colour. They don’t need to be fully covered.
Repeat with a few different colours, adding more layers.
Let the eggs dry on a piece of kitchen roll.
You will now have some beautiful and truly unique marbled Easter eggs! Wash your hands thoroughly and scramble the eggs you put aside earlier for a delicious lunch!
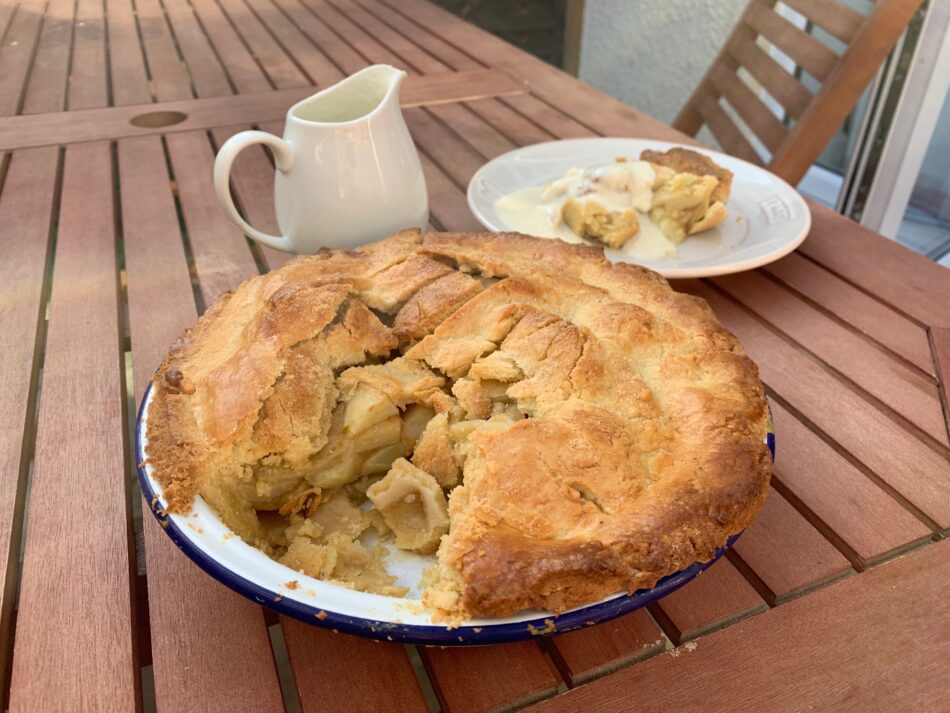
As the leaves begin to fall and the evenings get shorter we all start to crave comfort food. What’s more comforting and warming than hot apple pie with homemade custard?! Apples are in abundance this time of year so grab some cooking apples and cosy up with a bowlful of this homemade yumminess.
Ingredients:
Filling
4 Cooking Apples
150g Golden Caster Sugar
Pinch of Cinnamon
3 tbsp Plain Flour
Pastry
250g Unsalted Butter
50g Golden Caster Sugar
2 Eggs
350g Plain Flour
Custard
2 tsps Vanilla Bean Paste
1 pint Whole Milk
4 large Egg Yolks
2 tbsp Caster Sugar
1 tbsp Cornflour
Method:
The filling- Peel, core, quarter and slice 4 cooking apples. Lay them out on paper towels to get as much liquid out of them as possible. Leave until you need them later.
Mix the sugar and flour for the filling with cinnamon and place in a bowl big enough for the apples and set aside.
For the pastry- beat the butter and sugar together then whisk in 1 whole egg and 1 egg yolk (save the white for glazing pastry later.)
Now fold in the flour slowly until it starts to form a ball, collect the remainder of the pastry together with your hands and form a solid ball. Wrap and place in the fridge to cool for 1 hour.
Whilst the pastry is cooling, make a start on your custard.
The custard- Heat the whole milk and vanilla bean paste to boiling then take it off the heat. Whilst that cools slightly, in a large bowl whisk 4 egg yolks, sugar and cornflour then slowly start to add the milk mixture in ladle by ladle whilst continually whisking.
When all the milk is added to the mixture, pour it back into the saucepan and place on a low heat for roughly 20 mins, continuously stirring, take off heat when the custard becomes thick.
Take pastry out of the fridge and set aside a third of the pastry for pie top. Roll the majority of the pastry out to fit your pastry dish, make sure there is a bit of overhang.
Put the apples into the bowl with the sugar and flour and coat the apples using your hands. Now pile the apples into the pastry tin, then roll out the remaining ball of pastry.
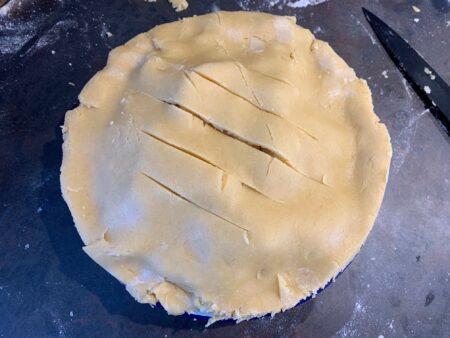
Brush some water around the edges of the pastry in the tin and then lay the other round of pastry on top and join them.
Trim the left over hanging pastry off of the tin and make 5 slits in the top of the pastry to let the steam out.
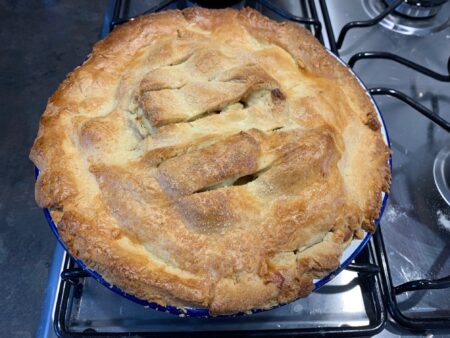
Preheat oven to 190 degrees c and place the pie in for 40mins until golden brown.
Allow to cool for 5 mins then serve with hot or cold custard.
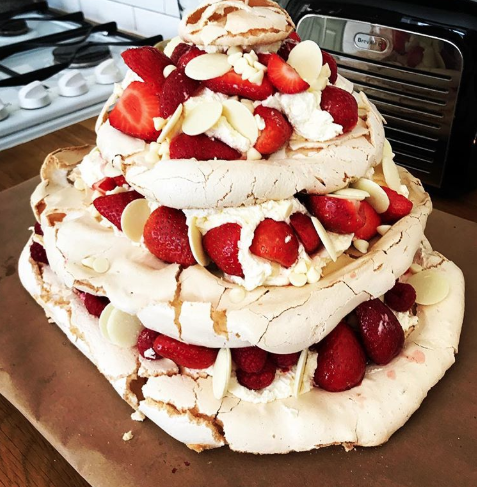
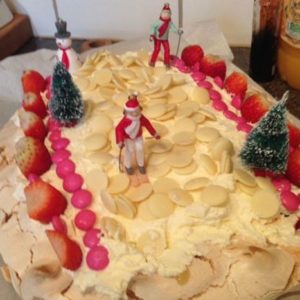
There’s much debate surrounding the origin of the Pavlova, however from our research the majority of articles believe the dessert began its journey in New Zealand. Nicknamed after the Russian ballerina Anna Pavlova, the people of NZ welcomed her with her very own dessert in the 1920s, although Australia still claim they invented this sweet treat. Whoever invented it, we’re just grateful somebody did! Check out our favourite pav recipe below.
Ingredients
MERINGUE
6 large free-range egg whites
300g caster sugar
Pinch of sea salt
PAVLOVA
450 g fresh strawberries and raspberries
250 ml double cream
150 ml natural yoghurt
2 tablespoons caster sugar
1 vanilla pod or 1tsp of vanilla bean paste
a few sprigs of fresh mint
a handful of white chocolate buttons
Method
Preheat the oven to 150°C/300°F/gas 2. Put your egg whites into a mixing bowl and whisk them at a medium speed until they start to form nice firm peaks.
With your mixer still running, gradually add the sugar and a pinch of sea salt. Turn the mixer up to the highest setting and whisk for 7 to 8 minutes more until the meringue is white, glossy and smooth. If it feels grainy, whisk for a little bit longer, being careful not to let the meringue collapse.You should be able to tip the bowl upside down without the meringue mix falling out.
Line two baking trays with baking paper. Separate the meringue mixture evenly between them and shape each mixture into a circle about 20cm in diameter.
Put both trays into the oven and bake for 1 hour until the meringues look slightly golden and are fluffy in the middle.
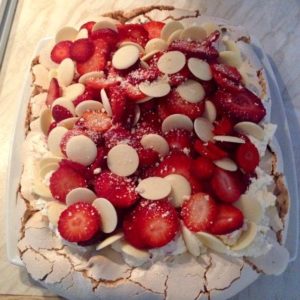
Cut the large strawberries and leave the smaller ones whole. Mix them with the raspberries. Or alternatively you could top your pavlova with other fruit, such as passion fruit and pineapple, for a tropical twist. We also like adding white chocolate buttons for even more of a treat.
Whip the cream with the sugar until it forms soft peaks, then stir in the yoghurt. Halve the vanilla pod length ways, scrape out the seeds and fold them into the mixture.
Spoon half the cream mixture on top of one of the meringue halves and smooth it out. Sprinkle half of your berries evenly around the cream mixture. Layer the other meringue on top and press down gently to stick them together.
Spread the remaining cream mixture over the top layer and sprinkle the remaining berries on top. Pick a few small mint leaves, scatter over and now it’s ready to serve to your guests or cover and refrigerate ready to serve later.
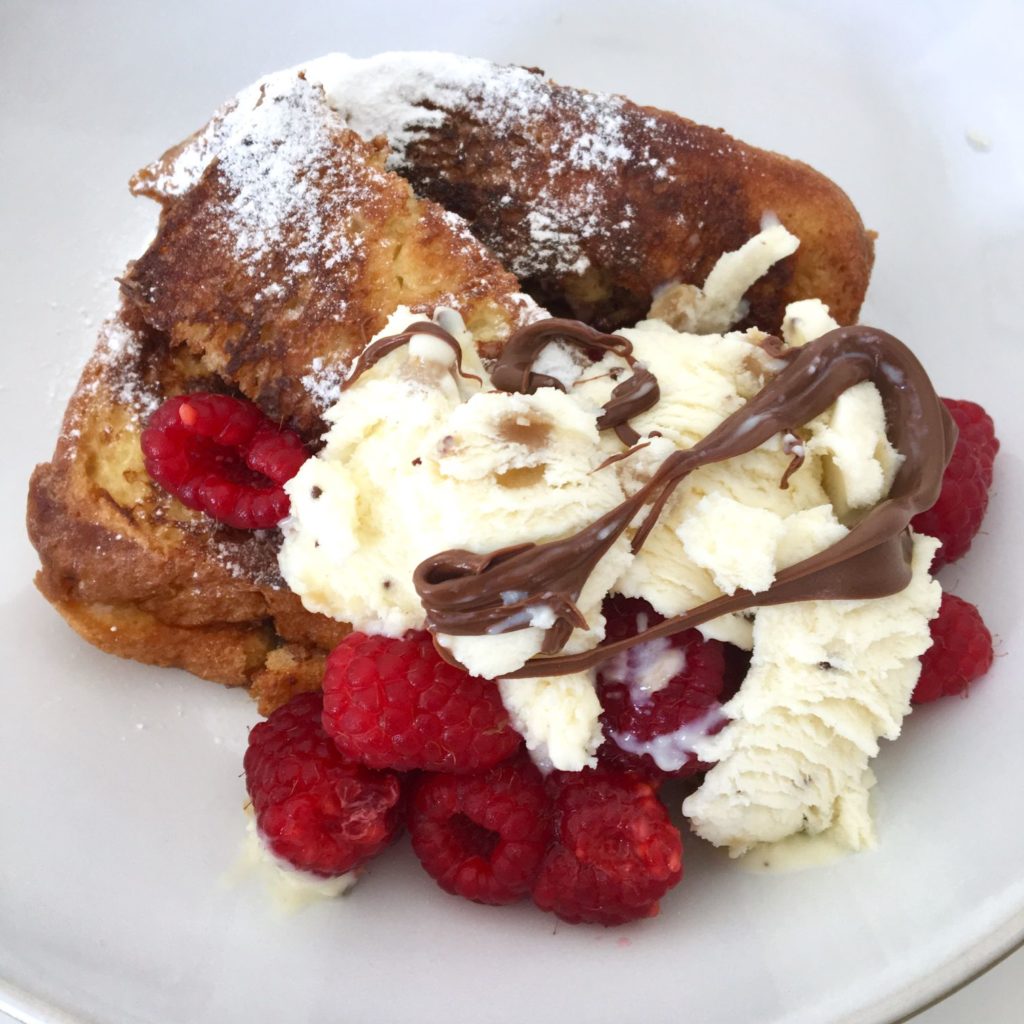
Looking for a breakfast treat that will impress guests, but doesn’t take all morning? Put your girls’ eggs to delicious use with this gooey Nutella French Toast and a selection of toppings, perfect for a tasty brunch to be enjoyed with family and friends this summer.
Ingredients – serves 4
Sliced Brioche Loaf (8 slices serves 4)
Lots of Nutella!
2 eggs
2 tbsp milk
½ teaspoon vanilla extract
Butter for frying
Toppings of your choice. We recommend a dusting of icing sugar, fresh summer berries, vanilla ice cream, and more Nutella!
Method
In a bowl, beat together the eggs, milk and vanilla extract. Pour into a shallow dish, such as a pasta bowl.
Spread Nutella (as much as you would like!) on one side of 2 slices of the brioche loaf and put together to create a sandwich.
Pop roughly a teaspoon of butter in a frying pan on a medium heat.
Soak each side of the Nutella brioche sandwich in the egg mixture for a couple of seconds, and then place in the frying pan when the butter is melted and hot.
Allow the brioche to fry for 1-2 minutes on each side until golden brown.
We cut these into thirds and served with a selection of toppings for guests to choose from.
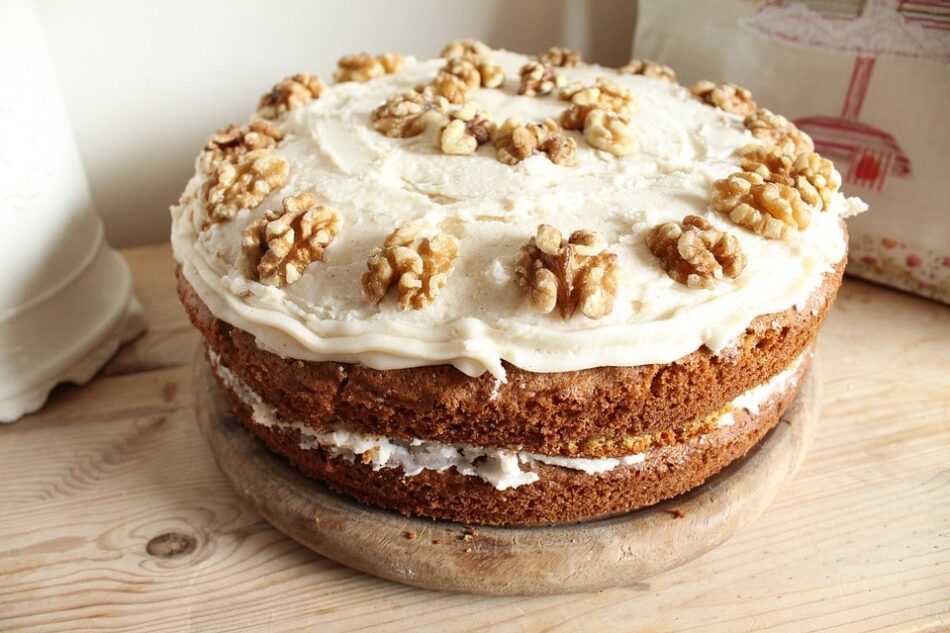
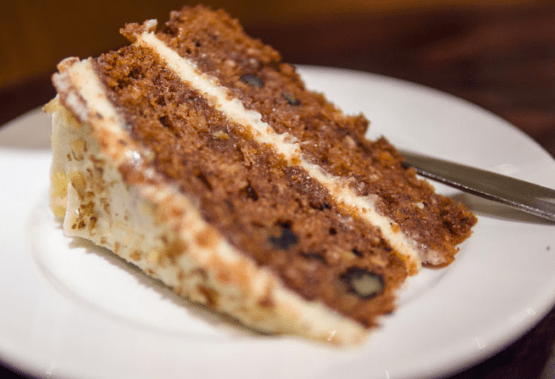
1) Heat oven to 170 degrees. Line bottom and sides of two 20 cm round springform pans with parchment paper, then lightly spray pan with cooking spray. Whisk butter (room temperature), yoghurt, caster and dark brown sugar, vanilla, cinnamon, mixed spice and salt. Add the eggs one at a time. Stir in the grated carrots and ginger. Use a spatula to fold in the sifted flour and baking soda.
2) Pour the mixture into the springform pans and bake for 55 minutes or until a skewer inserted into the centre comes out clean. If any wet mixture clings to the skewer, return to the oven for 5 mins and check again. Leave to cool in the tins for two hours.
3) To make the icing, beat the cream cheese, icing sugar and lime juice and zest together. Remove the cakes from the tins and sandwich together with half the icing. Top with the remaining icing and walnuts.
Freshly baked carrot cake will keep well for about 1 week in the fridge when properly stored.
Pancake Day is coming up on the 5th of March, and while you might be thinking about what fancy pancake toppings you are going to try this year, we are thinking about what our dogs will want. Priorities.
Don’t leave out your furry friend this Shrove Tuesday, treat them to this dog-friendly pancake recipe with all the trimmings. This is also a delicious, healthy option for humans, too!
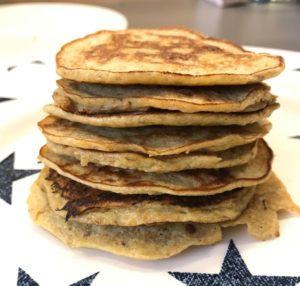
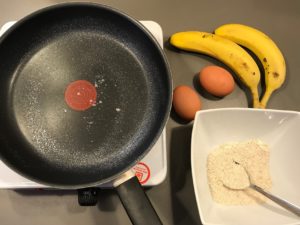
All you need for the pancakes are –
2 eggs
2 ripe bananas
1 tablespoon of flour
Coconut oil spray for frying pan
Eggs are a great source of protein for dogs, and are full of vitamins which can benefit their diet. Bananas are also rich in vitamins and minerals, and they also help boost your dog’s immune system and skin health.
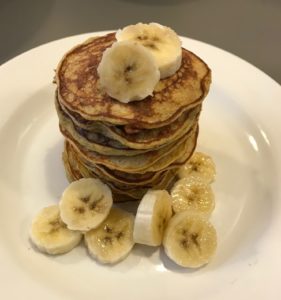
Mash up the bananas in a bowl or food processor. Add the eggs and mix. Thicken with flour until the mixture forms a batter-like texture. Spray the frying pan with Coconut Oil Spray on a medium temperature. Add a tablespoon of the mix into the frying pan and cook for 2-3 minutes. Flip and cook the other side. Allow the pancakes to cool before giving to your dog.
Suggested toppings for your dog’s pancakes –
More bananas!
Greek yoghurt
Peanut butter (check there is no xylitol in ingredients)
Blueberries
Strawberries
Apple
Cottage cheese
Small cubes of cheddar cheese
Their own treats!
Flipping fantastic! Join the fun on Instagram and tag us in videos of your dog attempting to catch their pancake using the hashtag #FlippingFido.
Remember dogs should only have treats in moderation so consider the portion which is appropriate for the size of your dog to avoid overfeeding.
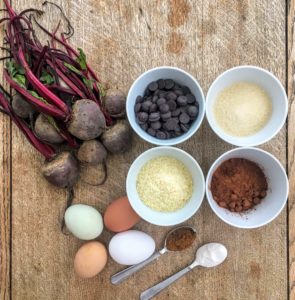
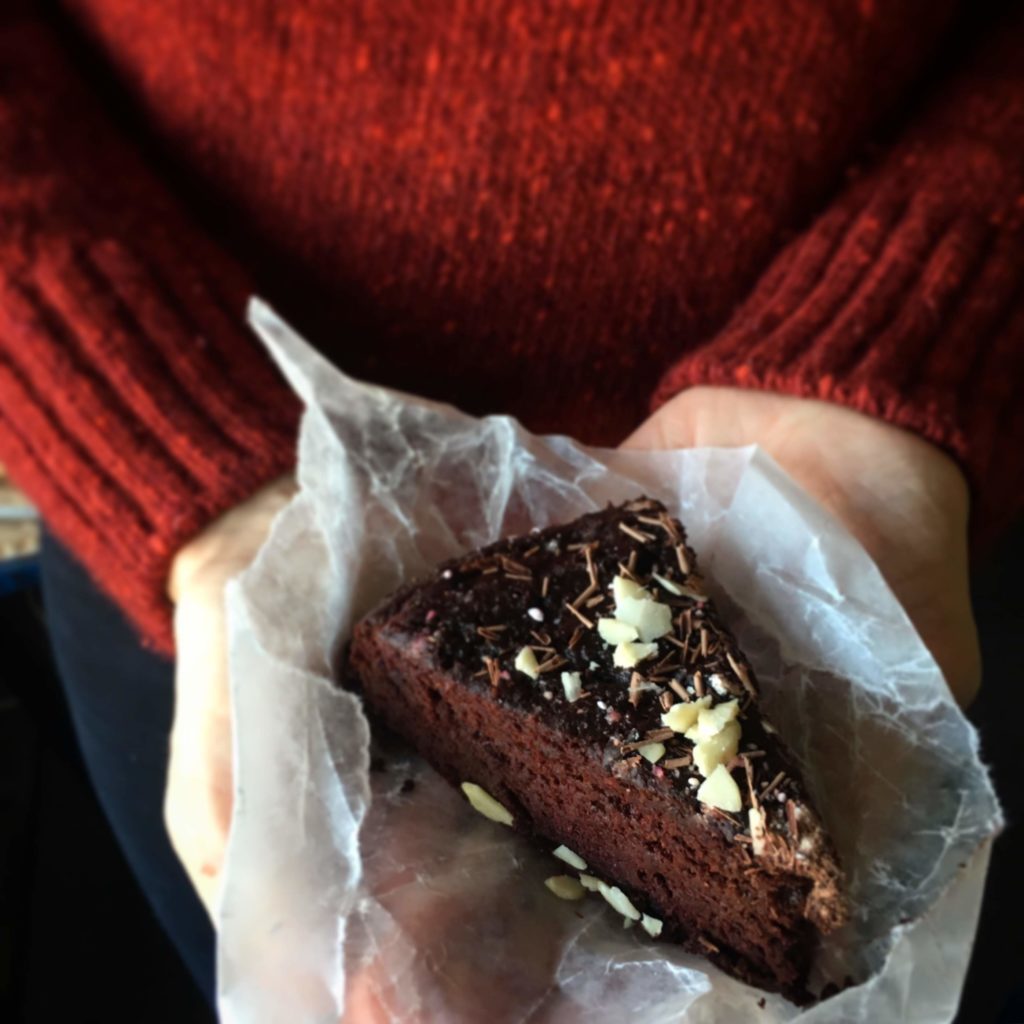
What’s on your Christmas list when it comes to cake? Easy, healthy, indulgent, gluten free, no added fat? Using eggs and veg from the garden, this recipe ticks every box…
Ingredients:
100 g good-quality dark chocolate
250 g grated raw beetroot
4 large free-range eggs
100 g ground almonds
150 g golden caster sugar
2 tablespoon good-quality cocoa powder
2 tsp mixed spice
1 teaspoon baking powder (gluten free if required)
Decorations of your choice: icing sugar, chocolate shavings, almond slivers, etc.
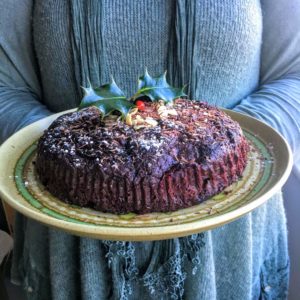
Method:
1) Preheat the oven to 180c and line a 20cm round cake tin with baking parchment.
2) Melt the chocolate in bowl over hot water.
2) In a large bowl, mix together the eggs, almond, sugar, cocoa powder, mixed spice and baking powder.
3) Fold in the melted chocolate, followed by the grated beetroot.
4) Pour mixture into the prepared tin and bake for 40 minutes, it’s cooked throughout when a clean metal skewer inserted into the middle of the cake comes out clean.
These delicious Apple and Cinnamon Dog Cookies are a great Christmas treat for your pooch this festive season, and they’re healthy!
Ingredients Makes 10 cookies
70g coconut flour 1 egg 3 teaspoons of coconut oil Pinch of cinnamon 1 apple (grated) And a cookie cutter
180 C for 15 minutes (160 C fan assisted or gas mark 4)
Preheat the oven to 160c and prepare a baking tray with baking paper.
Heat 3 teaspoons of coconut oil in a bowl in the microwave for 1 minute, or until soft.
Mix together the egg, coconut oil in a bowl.
Grate 1 apple into the bowl and mix.
Add a pinch of cinnamon to the mix.
Weigh out 70g of coconut flour into a separate bowl, and start to add a bit of flour at a time to the wet mixture, stirring as you go.
Continue adding coconut flour and mixing until you get a dough like consistency. You may not need to use all the flour to achieve this. The texture will be sticky and slightly crumbly.
Dust some coconut flour onto a clean surface and place the dough on top.
Flatten the dough with a rolling pin or your hands until it is approximately 1 cm thick
Use a small cookie cutter (approx 5cm diameter) to press out shapes in the dough and place them onto the baking tray. Handle these carefully as the dough can be fragile due to the lack of fat in the recipe (too much fat is unhealthy for dogs!)
Once all the dough has been used and the cookies are all placed on the baking tray, place them in the oven for approximately 15 minutes, keeping an eye that they do not burn.
Take them out the oven and leave to cool, at this point they will firm up a bit more, so handle carefully.
Once cool, store in a cool dry place, and treat your dog to a delicious cookie!
Health Benefits
Coconut flour is gluten free, perfect for dogs who suffer an intolerance of wheat. It’s also low in sugar and high in protein, fibre, and healthy fats.
In small quantities, coconut oil can promote a healthy coat, improve digestion and assist the immune system.
Eggs are also great for extra protein in your dog’s diet
Did you know, cinnamon can be incredibly helpful for senior dogs who are suffering with arthritis? Adding a small amount to your dog’s diet can be incredibly beneficial.
Apples are a source of Vitamin A and C so make a great, healthy treat for your dog, but don’t feed them the core when you have finished grating the apple, as the seeds are harmful.
As always, treats should be given to dogs alongside a healthy balanced diet, and do not feed them too many at a time.
We’d love to see your photos of this cookie recipe, tag us on Instagram using #OmletPets.
The cold, frosty temperatures of winter are in full swing, and while you are enjoying a warm cup of tea in the warmth of your kitchen, you might be looking out on your girls wondering how they feel about the colder weather.
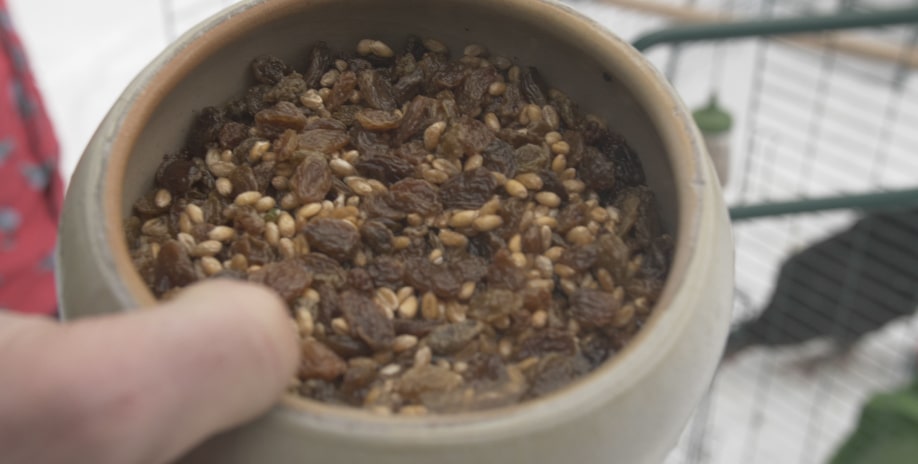
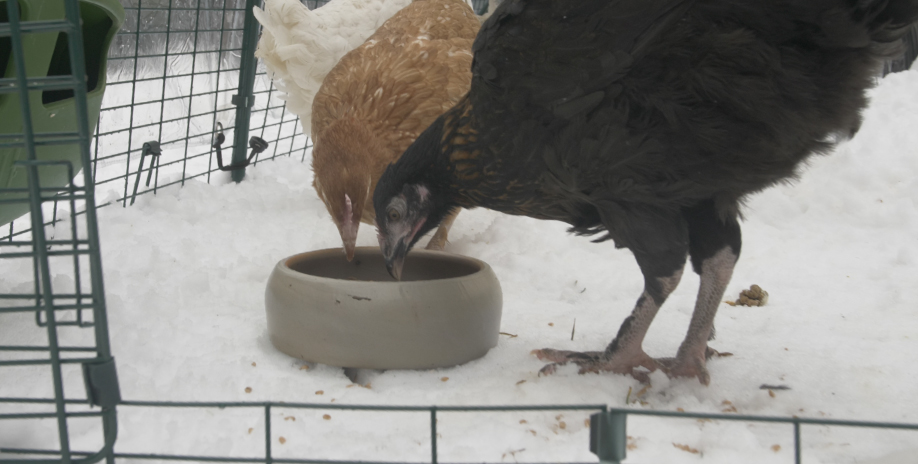
If you’re looking for a new way to keep them warm first thing in the morning, or late afternoon just before they go to roost, consider making this yummy, warm corn recipe, specially for your hens, with a festive flavour which will provide extra nutrients to keep up their health this winter. It’s super simple and quick to make.
Ingredients – for 2-3 chickens
40g corn
20g oats
20g raisins
100ml hot water
Pinch of ginger, cinnamon
Method
Soak the corn, oats and raisins in hot water for 10 minutes, stirring occasionally. Mix in a pinch of Ginger and Cinnamon for added nutrients for your chickens. Leave to cool slightly before feeding to chickens.
Benefits of Ginger and Cinnamon For Chickens
Ginger supports the immune system and provides anti-inflammatory benefits which can be particularly beneficial for a poorly hen. Cinnamon has antibacterial and antioxidant benefits, and can reduce inflammation, these are extremely good for chickens as they are likely to experience respiratory problems.
Only feed your chicken’s porridge as an occasional treat. Make this recipe outside of your kitchen to avoid cross contamination of food.

 Ingredients for the cake batter (for a Ø25 cm cake tin):
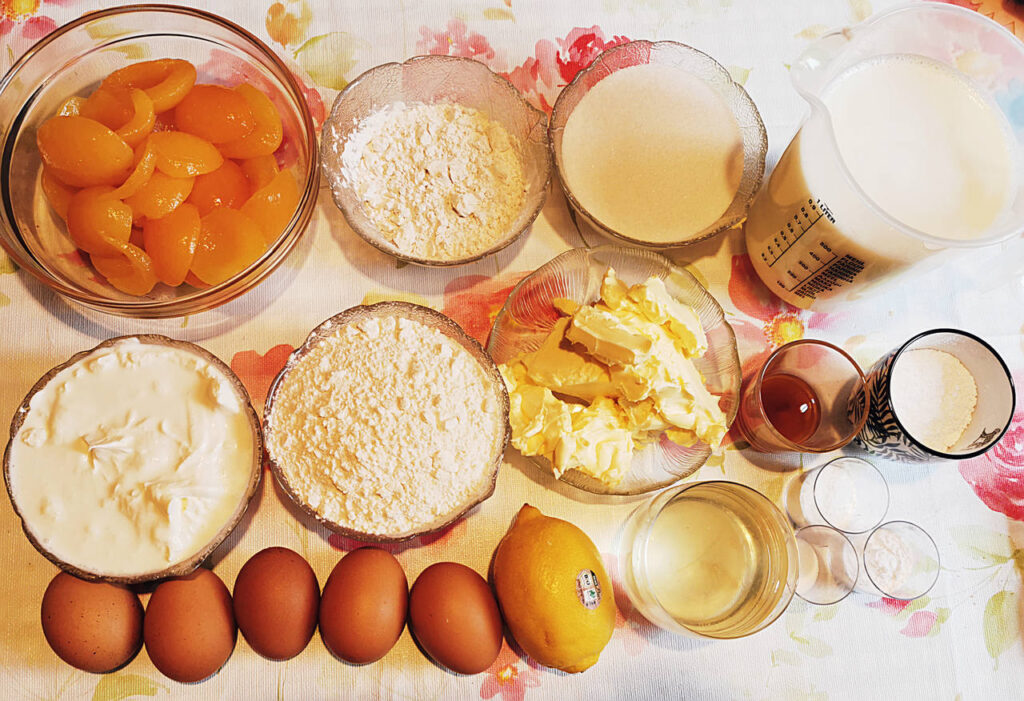


 The cold, frosty temperatures of winter are in full swing, and while you are enjoying a warm cup of tea in the warmth of your kitchen, you might be looking out on your girls wondering how they feel about the colder weather.